I tried to use organic shampoo, it didn’t work. So then I broke down and used the ultra toxic shampoo, then the electric Combs and toxic furniture sprays. You name it – I was still finding lice on my child’s head after a few days.
I began researching and to my horror found lice have adapted and are no longer affected by even toxic shampoos. They are referred to as Super Lice and nothing kills them.
Nothing in a bottle any way. Not willing to simply live with lice, this is what I finally did to kick these creepy parasites to the curb.
Out of desperation I discovered this amazing meathod. 100% organic, kills Super Lice and you’re done in a day. I sincerely hope this article saves you time and head lice trauma.
First How to organically Rid Your Living Area of Lice
• Wash everything you can in hot water. Sheets, clothes toys.
• Put all other exposed items in garbage bags and store away from people for two weeks. Pillows, toys that don’t wash well etc.
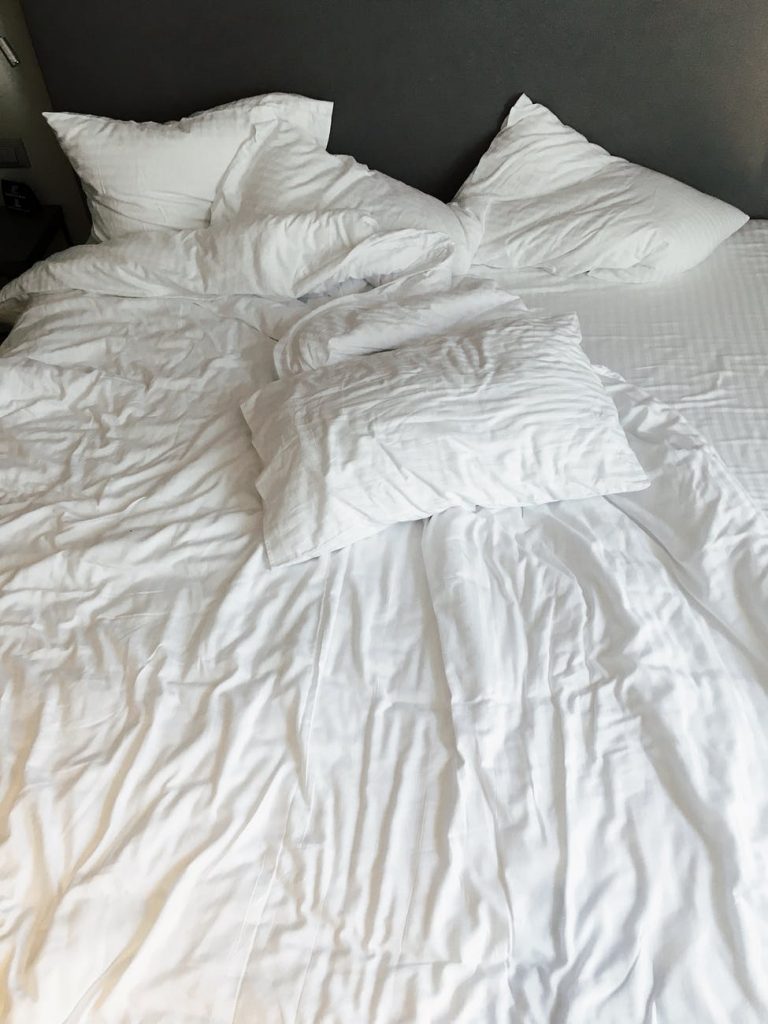
• Change sheets and pillow cases daily, wash dirty sheets in hot water.
• Vacuum carpets, couches, mattresses in sleeping and living areas.
• Boil, or throw away all items used on hair: combs, brushes etc. Or place them in a garbage bag for two weeks.
For even more bedding tips and tricks to rid your place of lice, checkout Lovetoknow.com
How to Organically, Rid You/Your Child’s Head of Lice
It used to be you could simply buy a toxic – yet effective lice shampoo and be done with lice. This is not only unhealthy it also is no longer an option. Lice have survived and created “super lice,” lice that can’t be killed with shampoos.
Also the toxic shampoos, really are toxic. Coming with warnings to, “leave in your hair for 10 minutes, but no longer,” all the while burning your lungs. They don’t work! And leave you feeling like this… Big time creepy, crawly, nearing-break-down, ick!
How I Finally Rid My Home of Head Lice
The to-do list above, is essential for getting rid of lice where you sleep and play. Now how to get rid of the lice in your hair – the safe and organic way.
Ok, this is the nitty gritty reasons why we all hate head lice. I’m just going to say it how it is so you can be lice free sooner.
Lice live off our blood, that’s why we itch, they’re parasites. They then lay eggs (or nits) and attach them to our hair close to the scalp. For a more lice behavior and helpful info, checkout Goodhousekeeping.com
Many people say nits are found at the nap of your neck or behind your ears. That wasn’t my experience. I found adult lice, like the one below, at the nap of the neck, nothing behind the ears and nits on the side of the head about 2 inches down from the middle of the scalp.
Adult lice are not blue however, they are more of a dark brown and clear color, kind of like a fly, but much smaller. Juvenile lice are white and black. They also jump to get away. Nits are white, they at first look like a large piece of dandruff, but unlike dandruff which blows away with a tossel of the hair, nits have to be carefully pulled from the hair with a nit comb or using your finger nail firmly pressed against your thumb to pull each one out.
Step 1: Use Coconut Oil in Place of toxic lice Shampoo
Coconut oil will work in the same way as organic shampoo. It’s oily texture traps the lice so they can’t jump away. You then comb them out with the lice comb and wipe oil and lice on a tissue. I then bagged it up and threw it in the garbage can outsude.
The coconut oil meathod with a few others can be found at this link. I of course really like my full meathod because it worked, but you may be interested in seeing the variety of options at lethow.com
Be very thorough and remove all eggs and lice you can see. This will speed the process. Coconut oil is also great for the skin and scalp, as opposed to the toxic shampoo that makes your skin die and flake.
You will want to use regular shampoo to rinse out the coconut oil once you are done combing through.
Step 2: Blow Hair Dry
Using a hair dryer, blow the hair completely dry. One of the steps for ridding you’re living area of lice is to put it in a hot clothes dryer- this works. Even super lice can’t live through the heat. You of course don’t want to burn your head or your child’s head so be aware of the temperature on their skin.
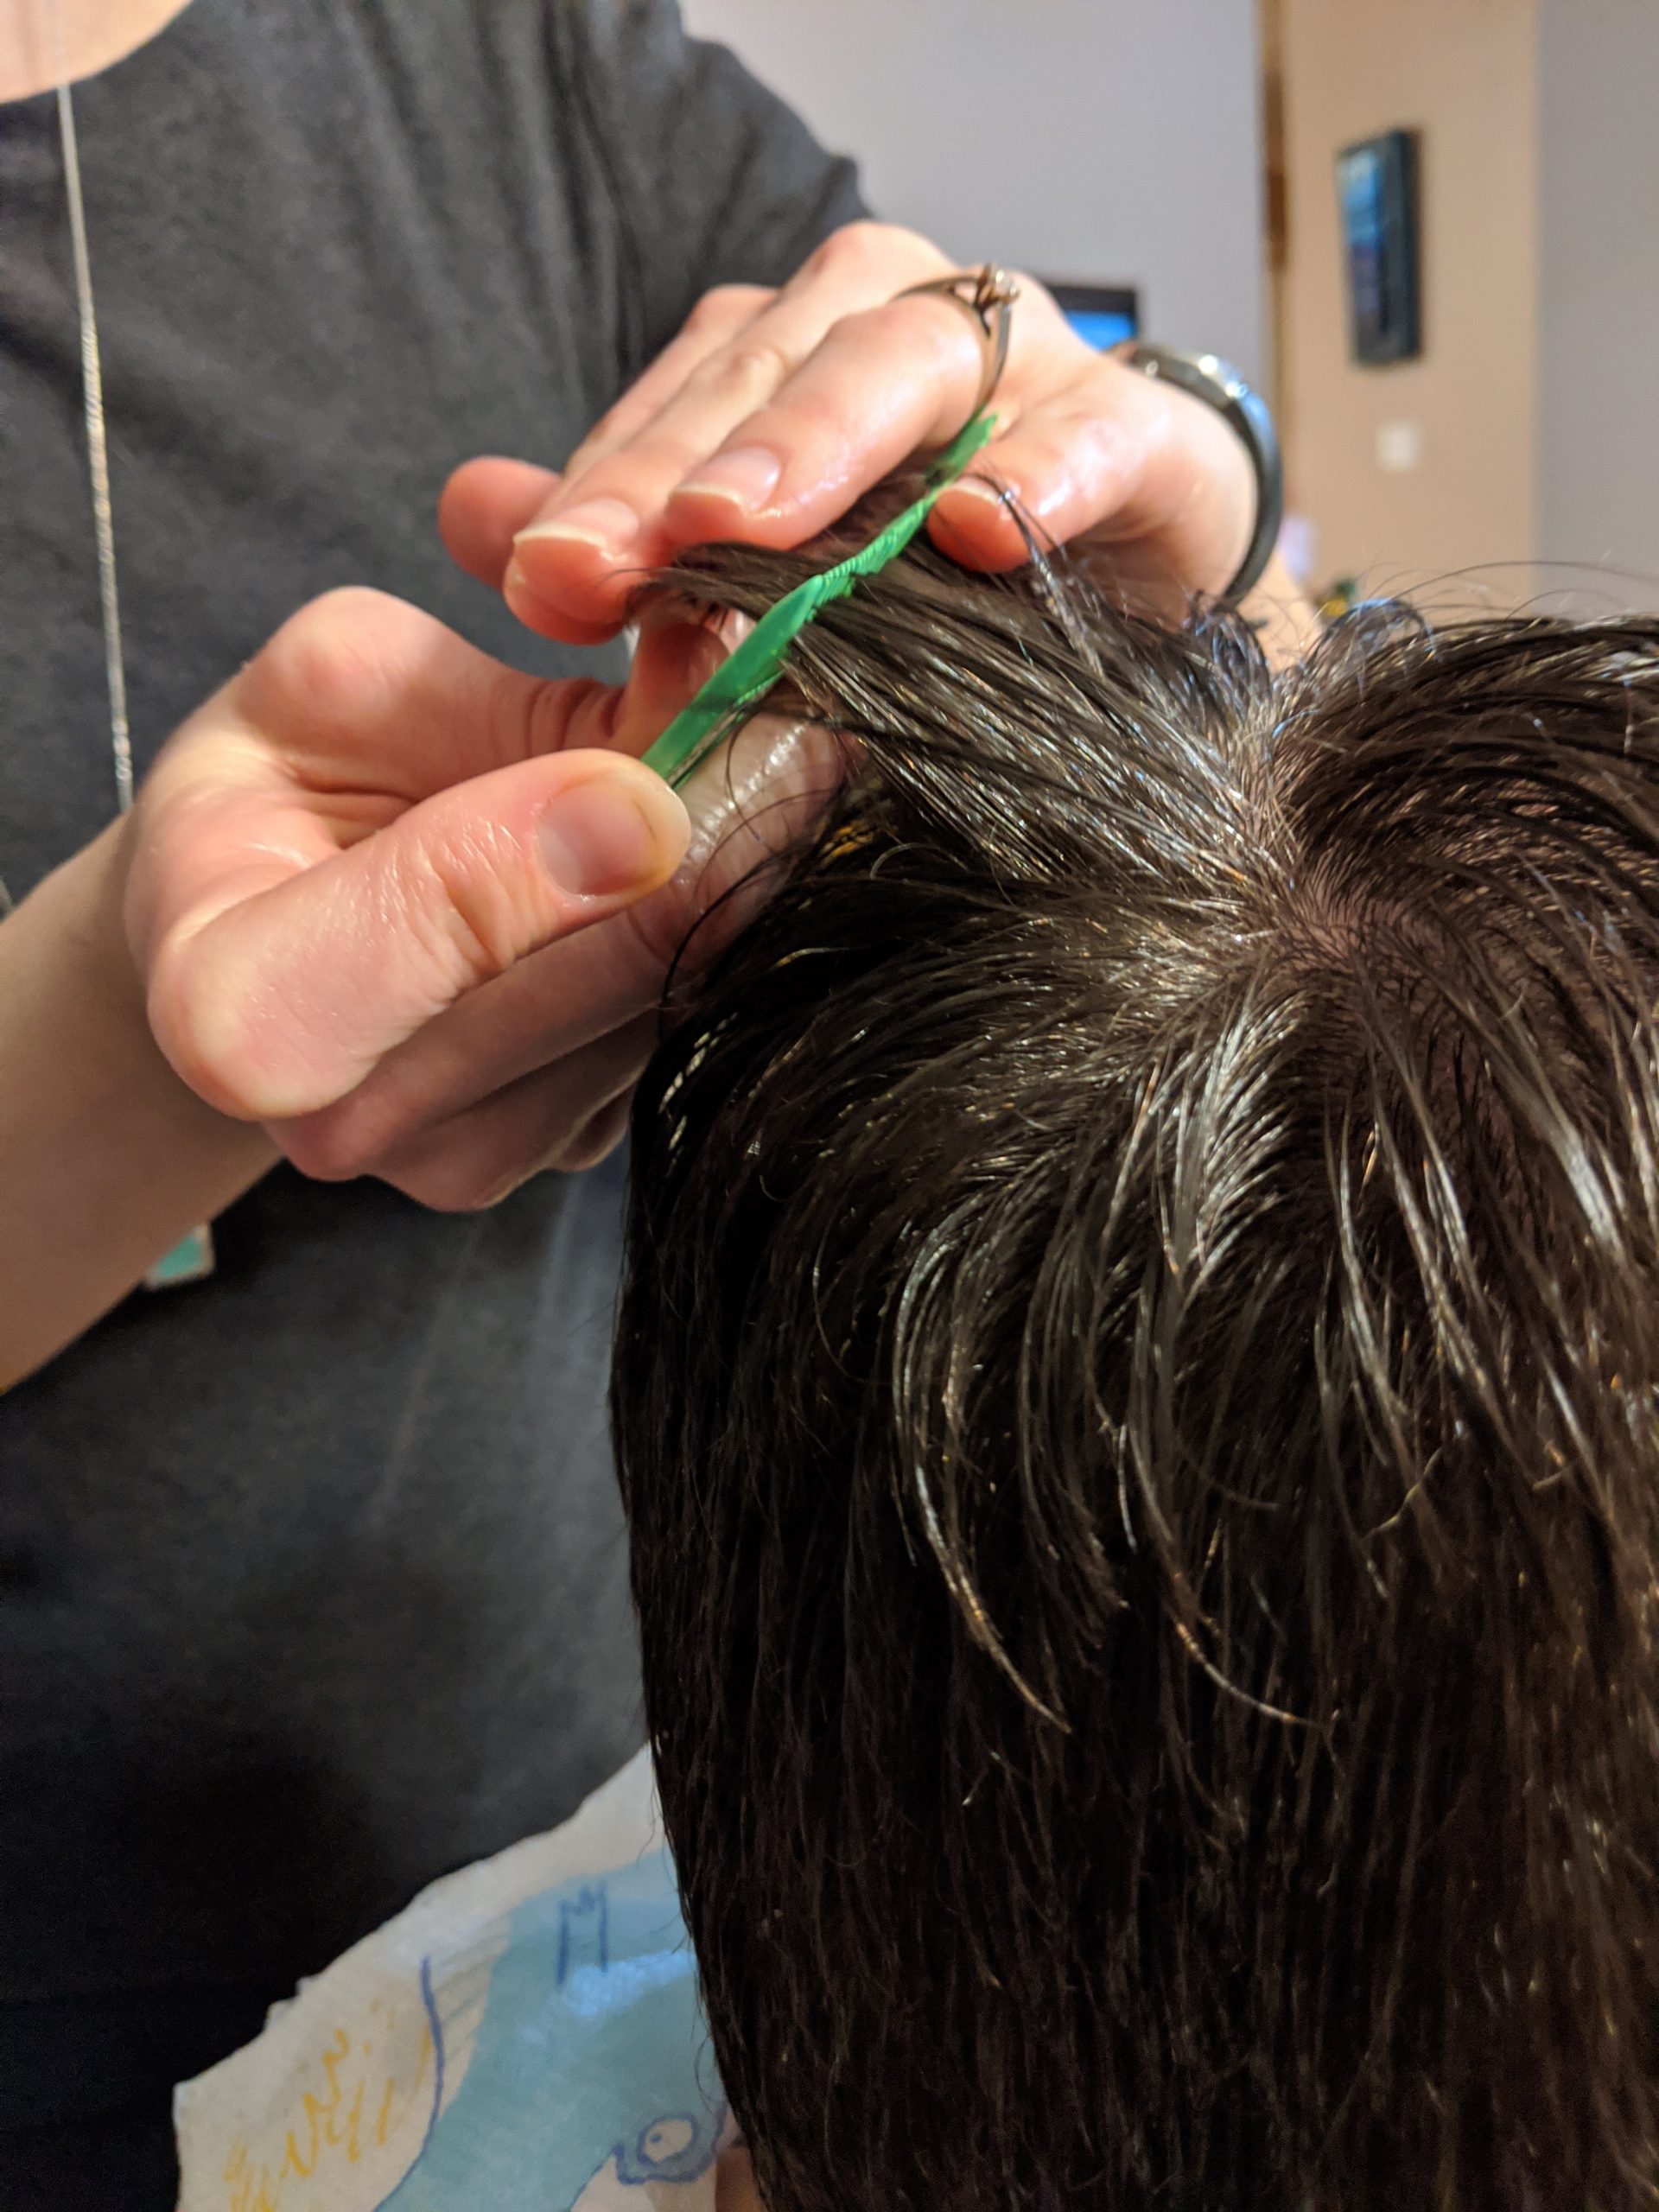
Step 3: The Final Lice Free Step, Use A Flat Iron
This my friends is what finally did it. I kept finding lice after a few days or even weeks. I honestly thought I would lose my mind. I began wishing I could just put my child’s head in the dryer and that’s when I came up with this meathod – I never saw lice again.
After you have completed the living area clean sweep. AND after you have combed through their hair to remove the nits and lice. Start the final step with dry hair.
Pull all the hair on top of their head except for the bottom 1-2 inches. Then with a heated flat iron, iron out hair a few inches at a time. Try to get as close to the scalp as possible without burning the head. Sweep this hair to the side let down another 2 inches and continue the steps until all hair had been done.
Repeat every morning until you feel sure all lice are gone. Also continue to change pillow cases for the infected individual until you feel sure head to lice are gone.
And that’s it!
Ok, I know… you may be thinking, “That’s it!?!” Yes, this is a lot of work I wish I could say, “just use a hot iron” – but the truth is you need to activity rid your area of lice as well, to truly be lice free.
Stay away from all the toxic chemicals and shampoos – they don’t work and they’re horrible for your health.
If you want to keep reading, 😄 I’ve shared some tips about the right lice comb to get ect. Best wishes, may lice never hit your home, but if they do may you find this article.
The Best Lice Comb to Use
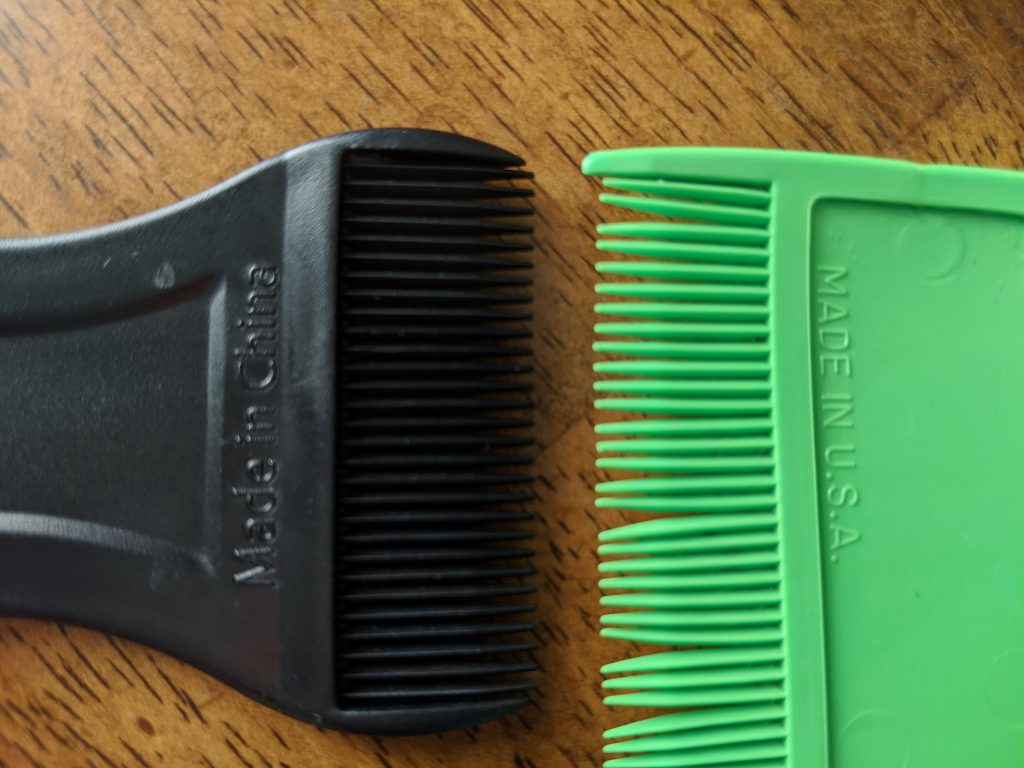
The best comb I used came in my organic shampoo set. It was a medium green color which actually made it easier to see the lice. Lice eggs are white, but newly hatched lice have a bit of black in them and they jump around.
Another lice comb I had was black. I think the idea was to more easily see the lice eggs, but it didn’t work. You can see lice eggs with the naked eye, but it’s hard to see the newly hatched darker lice. A light colored lice comb works best. You then wipe them off the comb onto a tissue and throw away (out of your house).
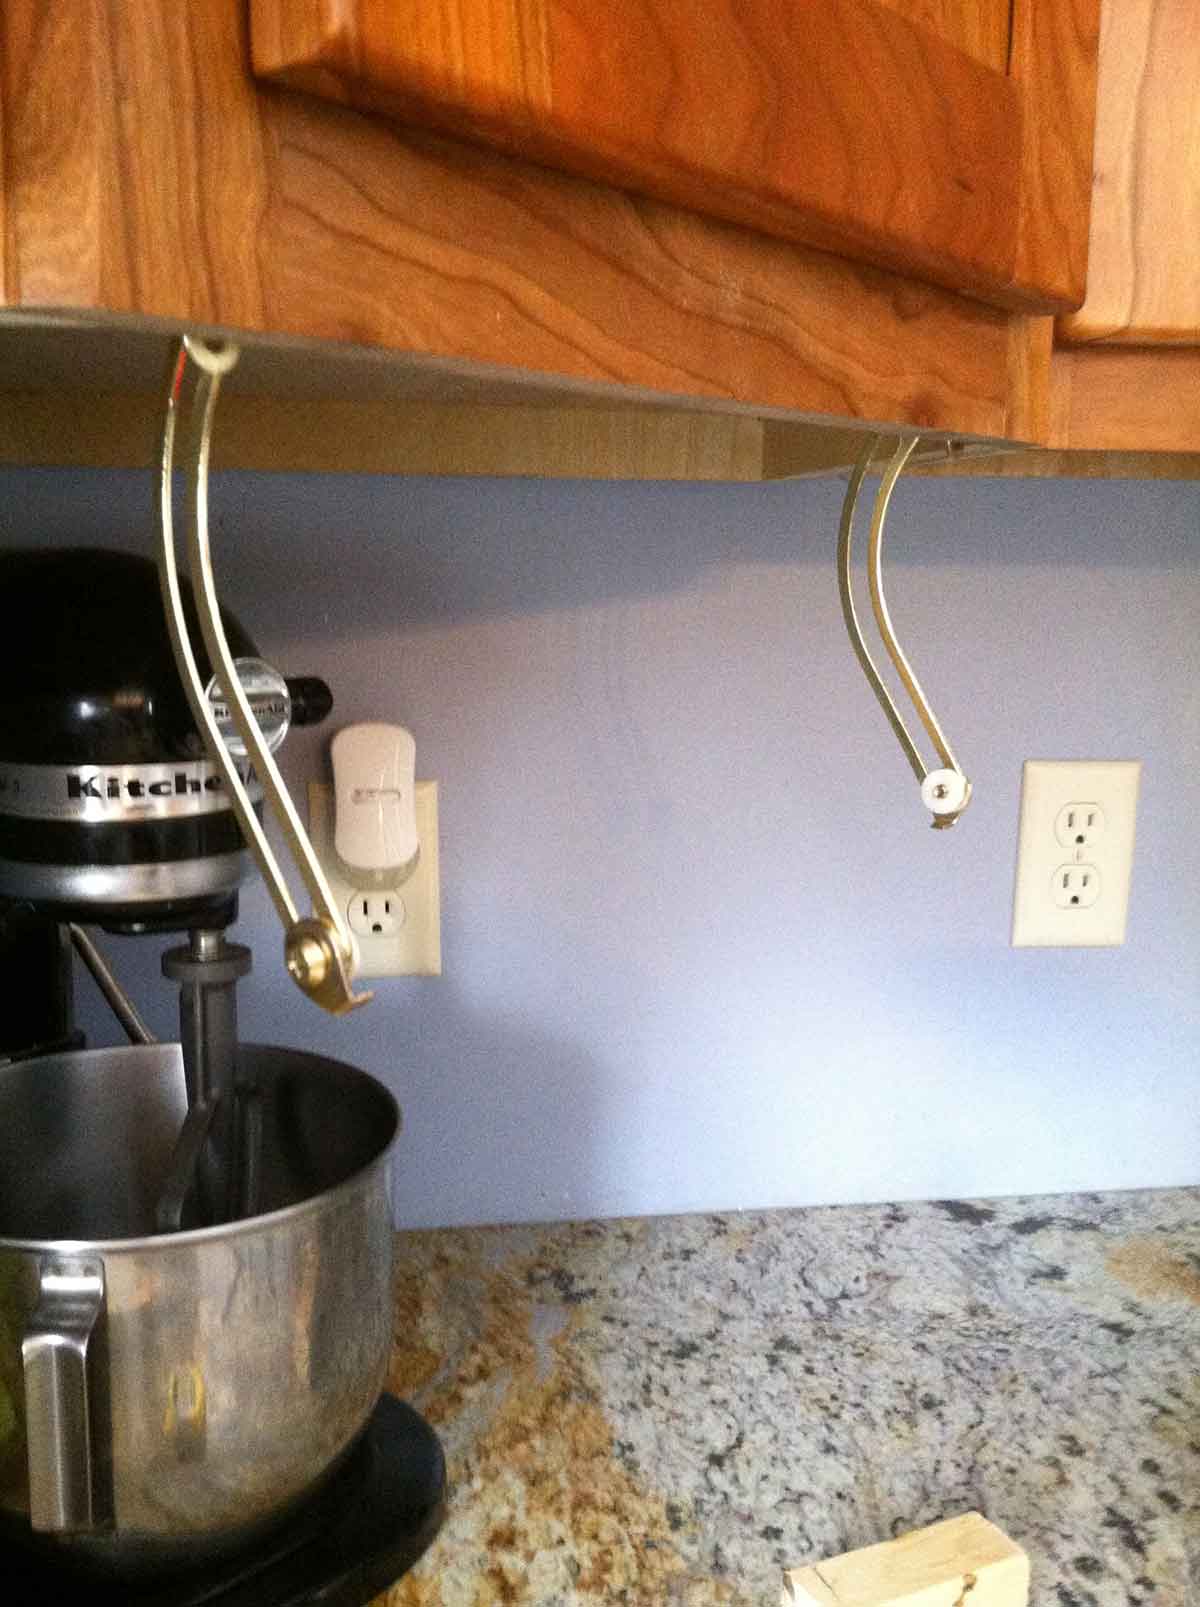
Somethings in life just make sense, like being able to see the recipe on your tablet or smart phone while your hands are sticky. I didn’t realize I wanted a recipe card/ tablet holder, until I saw the idea from RealityDaydream.com, I began to see the advantages and had the perfect corner cabinet to attach it to. I also had a small shelf I wasn’t using from my newly installed cabinets and thought I would try it out. All you need are the friction lid hinges one for the left and the right, a square piece of wood the size you want for your device or magazine, and a magnet. The magnet is used to hold up the back of the board when you fold it in for storage, otherwise it hangs down. RealityDaydream acknowledged this was a problem and invited others to send their solutions. This was mine and I’ll show you how to install it below.
I attached the hinges to the bottom of my cabinet, right along that 2 inch ledge cabinet builders leave. Once folded into place, you could see the hinge a little bit, but not enough to notice unless you were looking.
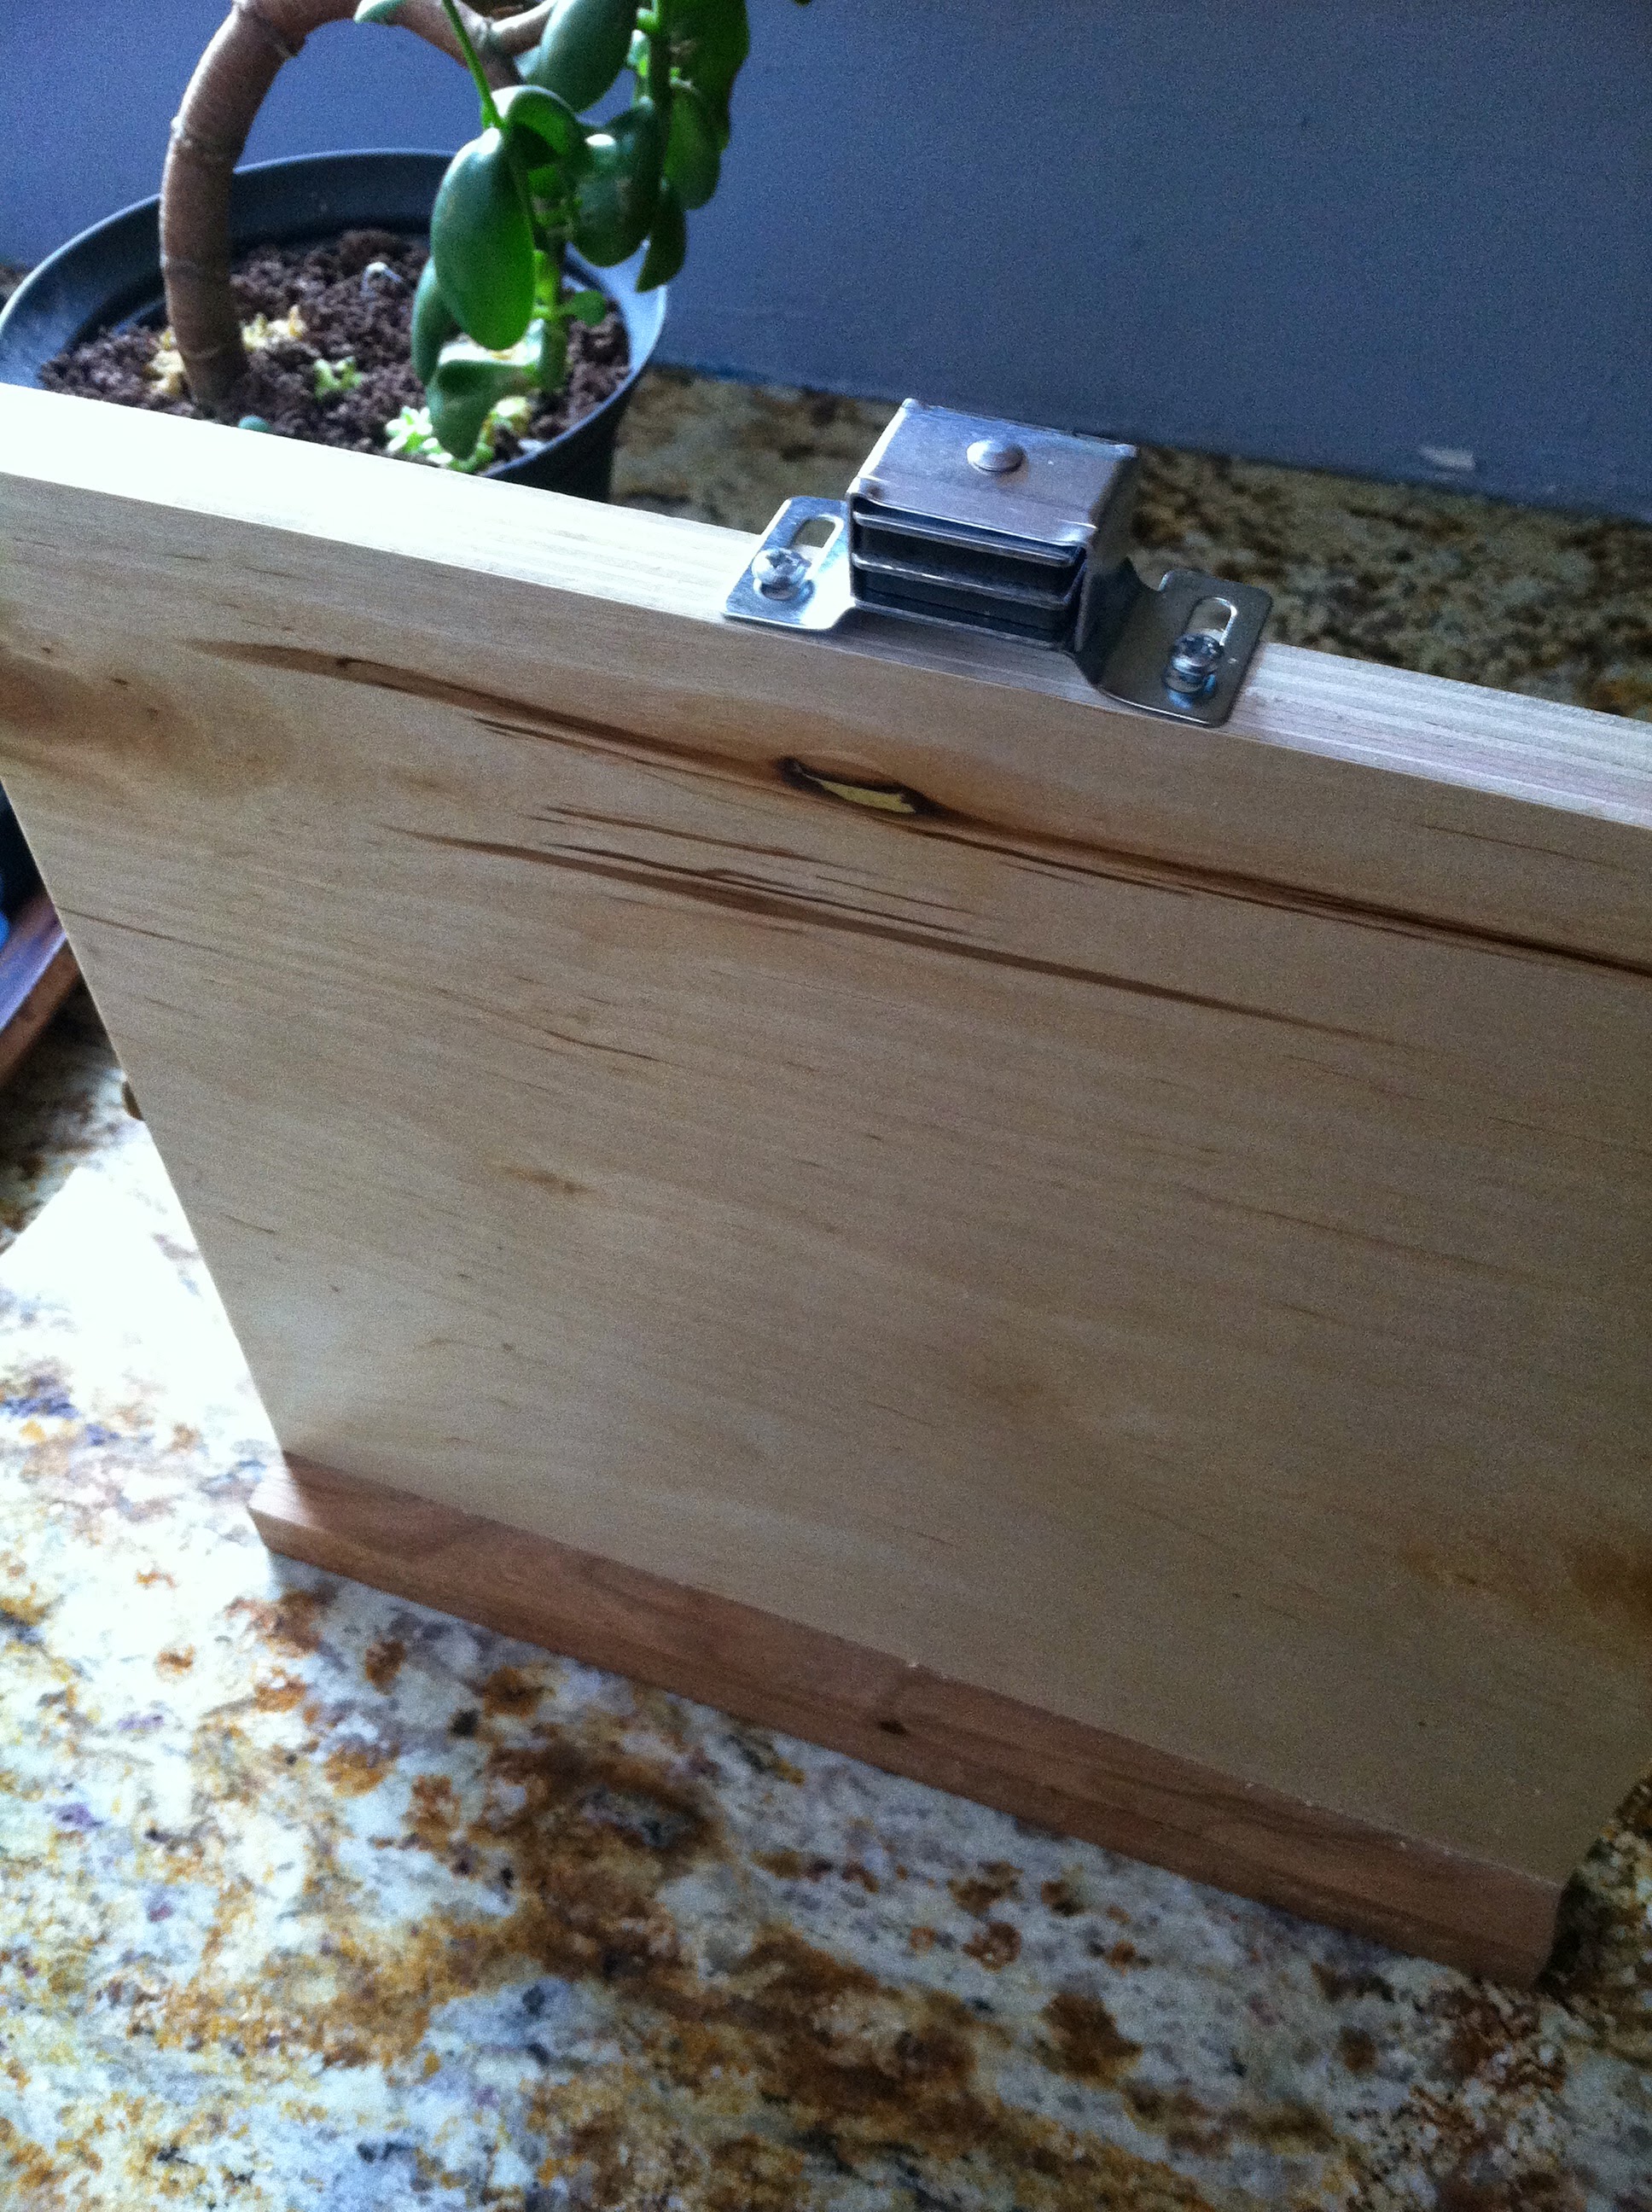
I also attached my magnet to the top of the wood slab. The metal plate for the magnet was attached onto a 1″ block of wood which was placed about in the middle of the cabinet. Notice I also placed the magnet flush with my board face, this was so the magnet would hold the wood slab close to the underside of the cabinet. The ridge at the bottom of the wood slab was here because it is the underside of a narrow shelf. I lucked out in having a nice piece already in place. If you are creating a wood surface from scratch you will need to attach a piece of wood at the bottom to hold your wood slab.
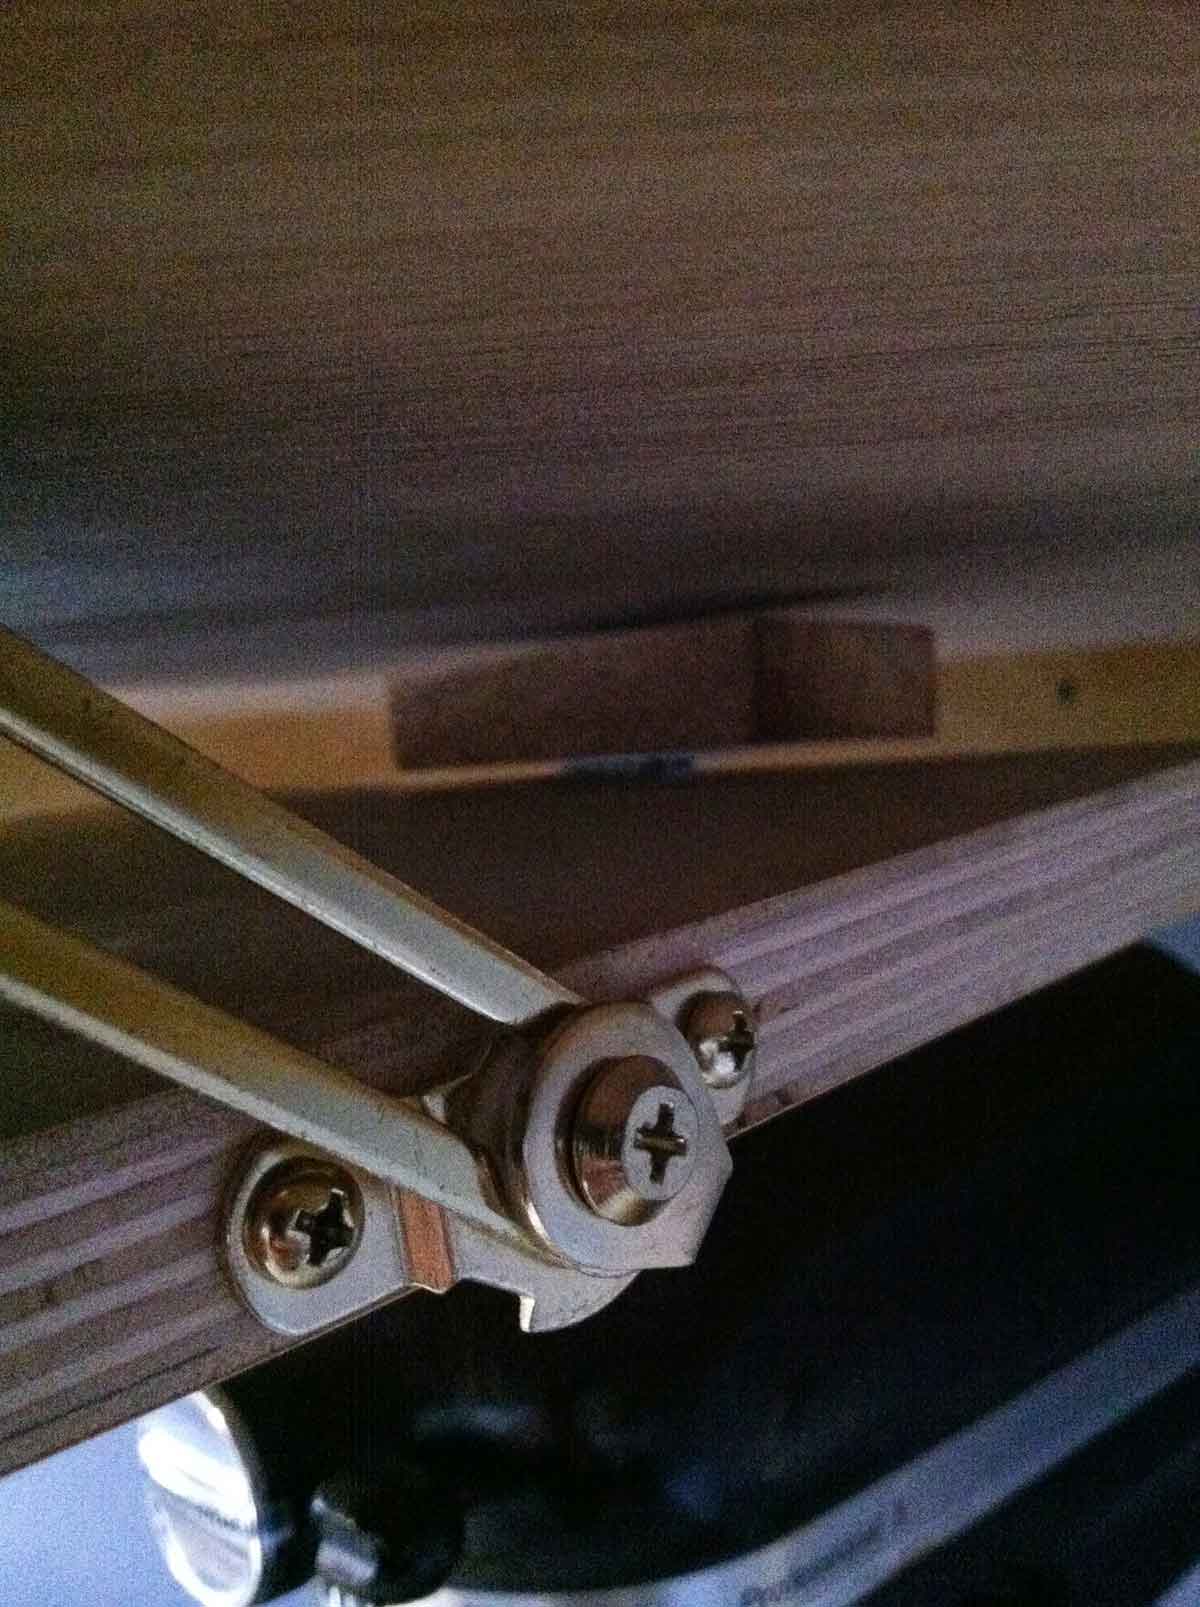
The best way to start is to secure the hinges to the cabinet first. Then secure the wood slab for the tablet to the hinges. To determine where to place the hinge, do a dry run and see where you want the square wood to end up when you’ve folded it into place. Notice the wooden block with the metal plate is not attached to the cabinet yet, I used this method then marked with a pencil where to attach the block. Then secure the hinges to your slab of wood.
Make sure it unfolds the way you want, once you are pleased with that then you will fold it in place and see where the top edge of your square wood meets up with the bottom of your cabinet, this is where you want to place your metal plate (mine placed on a block). You may need to adjust the thickness of your wooden block, depending on the depth of the under-edge of your cabinet.
As you go, make sure to always check the length of your screw with the thickness of the wood to make sure it will hold the hardware, but not go through the finished part of your wood. I check my screw with the wood by placing it on the edge, giving room for any hardware to be attached. In this example, I am checking the screw depth for my Pull-Out Kitchen Trash.
Also be sure to pre-drill any wood where you will place a screw. This will prevent your wood from splitting. As you see here, I have attached the metal plate to the wooden block first, then I did a dry run. The next step is to screw it into place.
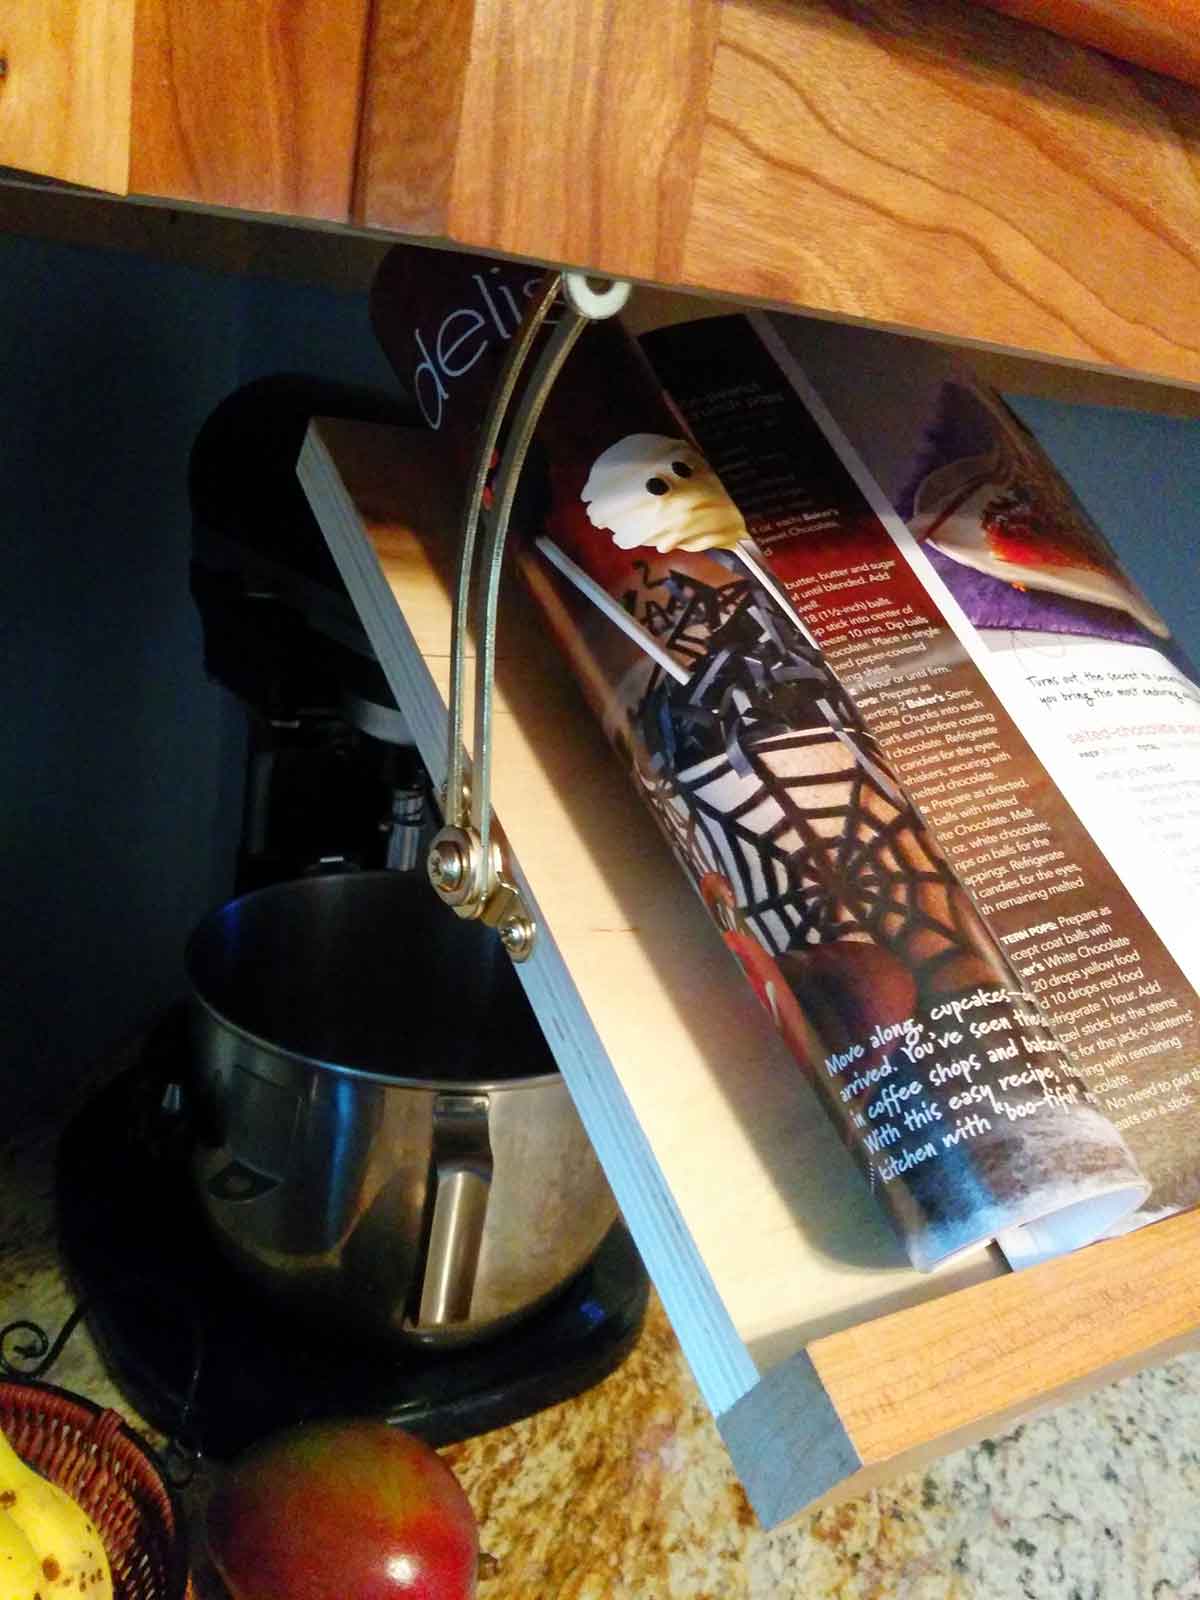
There you have it, a pull-down recipe/tablet holder that makes it easier to read and mess free. If you have a wider cabinet spot you could also do this for a recipe book. I just folded up my magazine or used my tablet. It was pretty handy. Share your recipe holders and any insights you’ve had on your designs below. Happy building!
You know back when chalk boards were all the rage and they were being painted everywhere? It looks like the style is starting slow and now ease out of the kitchen, I think because they were often big and black and well…permanent.
It’s hard to commit to something like that. I never painted my wall black (though I did try magnetic paint at one point, that’s another story), deep down inside I kind of wanted to know what it would be like to have a chalkboard that could have cute things drawn on it, still it was so permanent. My husband had reviewed these awesome chalk markers and I had no place to use them.
until now….
The day came while we were at a city festival and one of the booths was giving away blackboard wall decals – basically removable chalk board walls. I had to try it and since I am trying it, why not tell you about it.
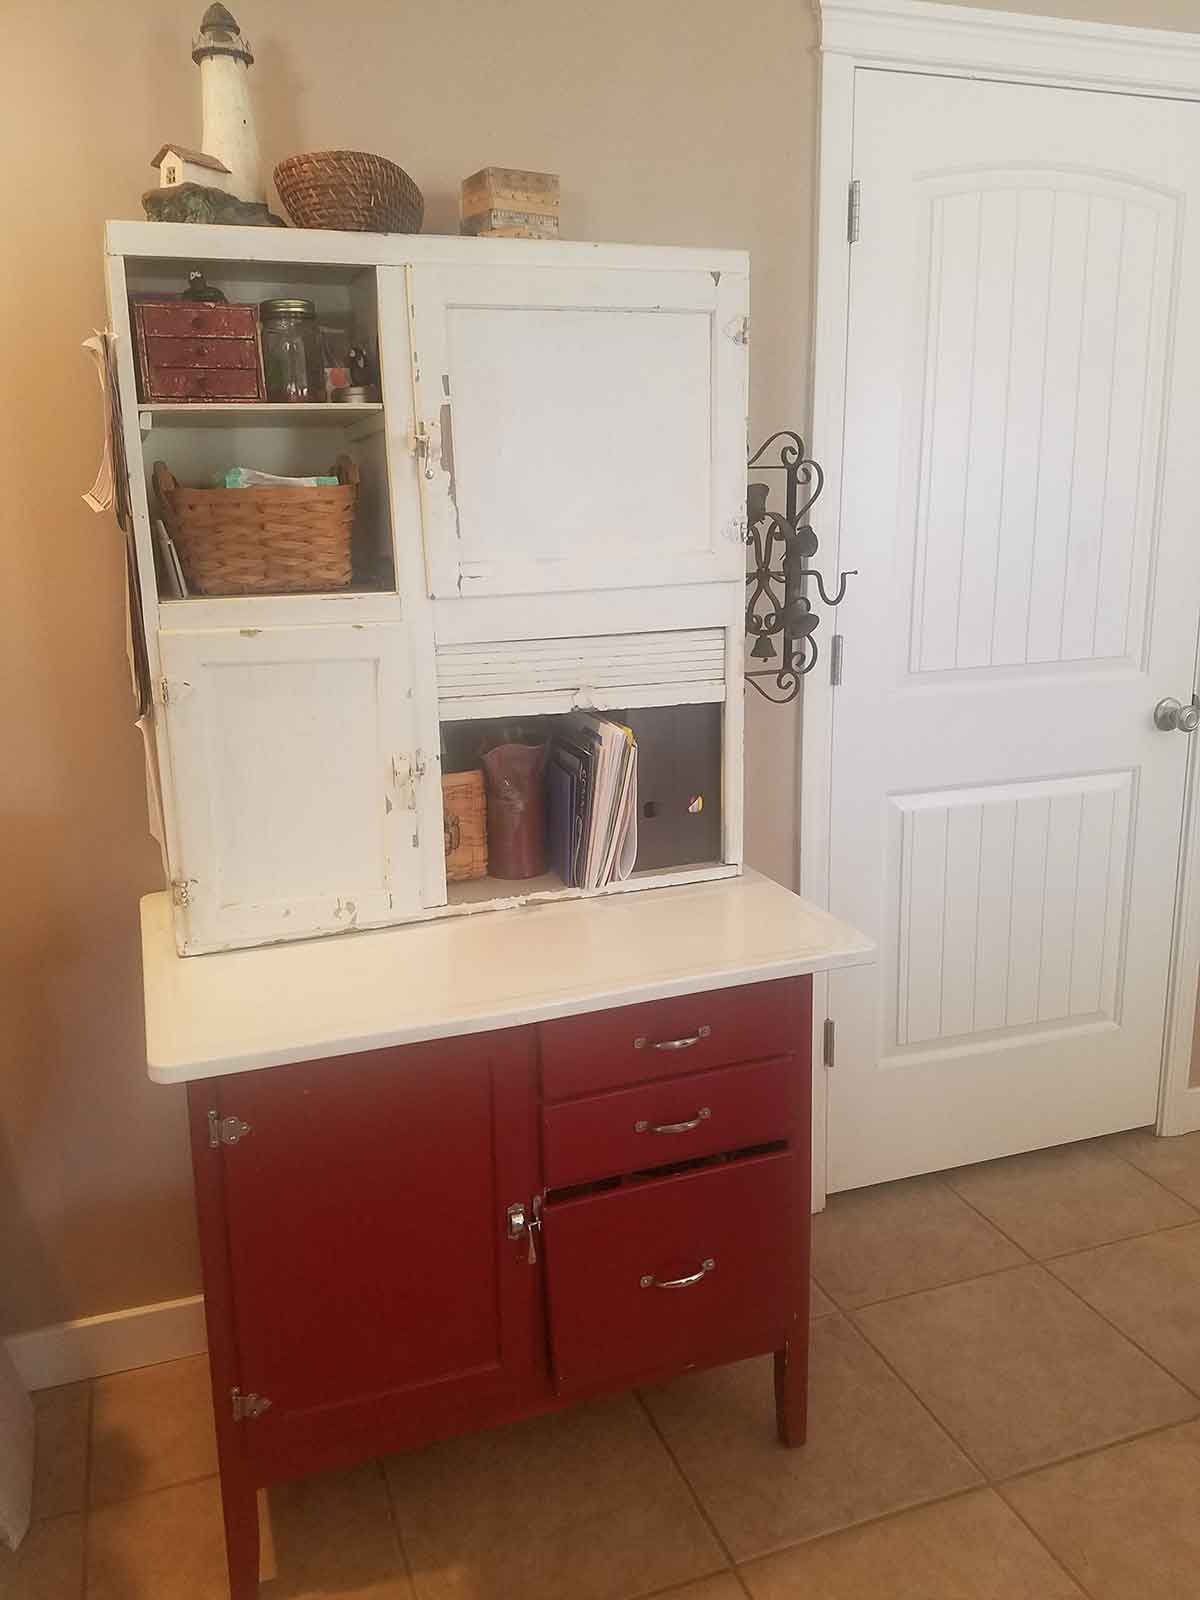
This removable chalkboard is a plastic like paper applied just like contact paper. It also works just like a chalk board as well except it is easily removable. I used it in the play space in our basement and on my antique Hoosier cabinet. Since it is removes easily, I didn’t have to worry about it changing the look or ruining the surface.
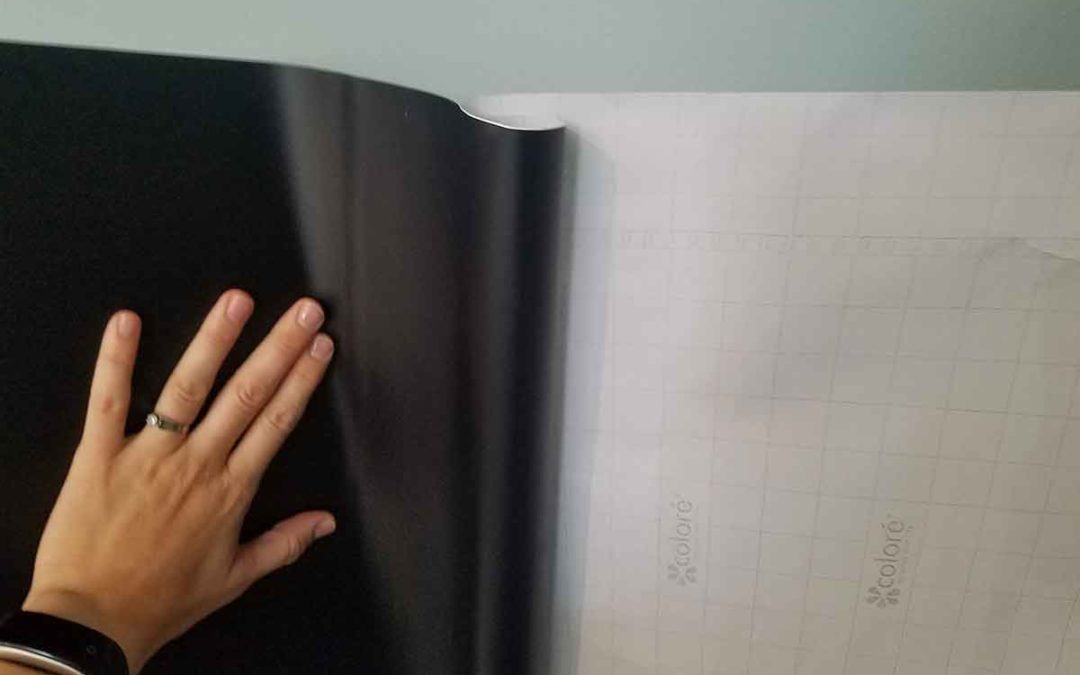
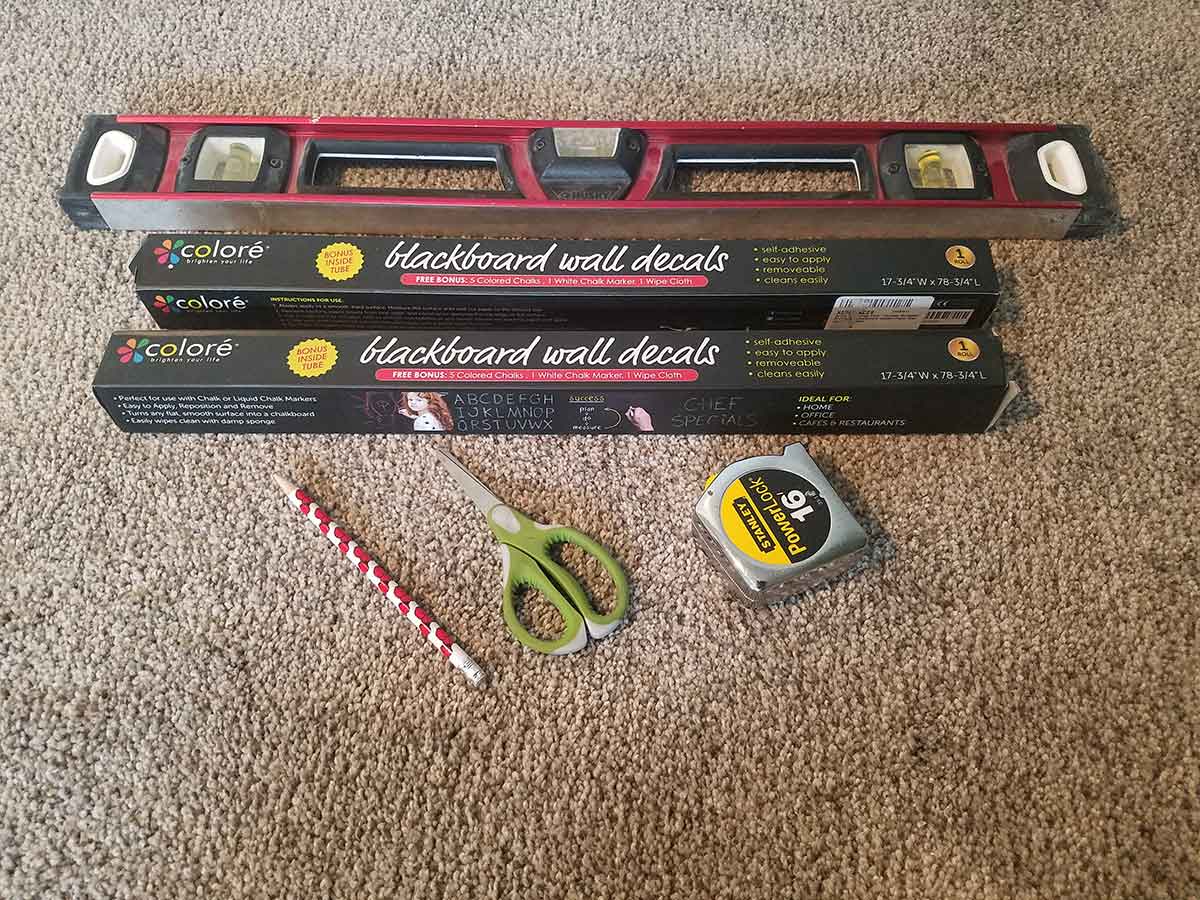
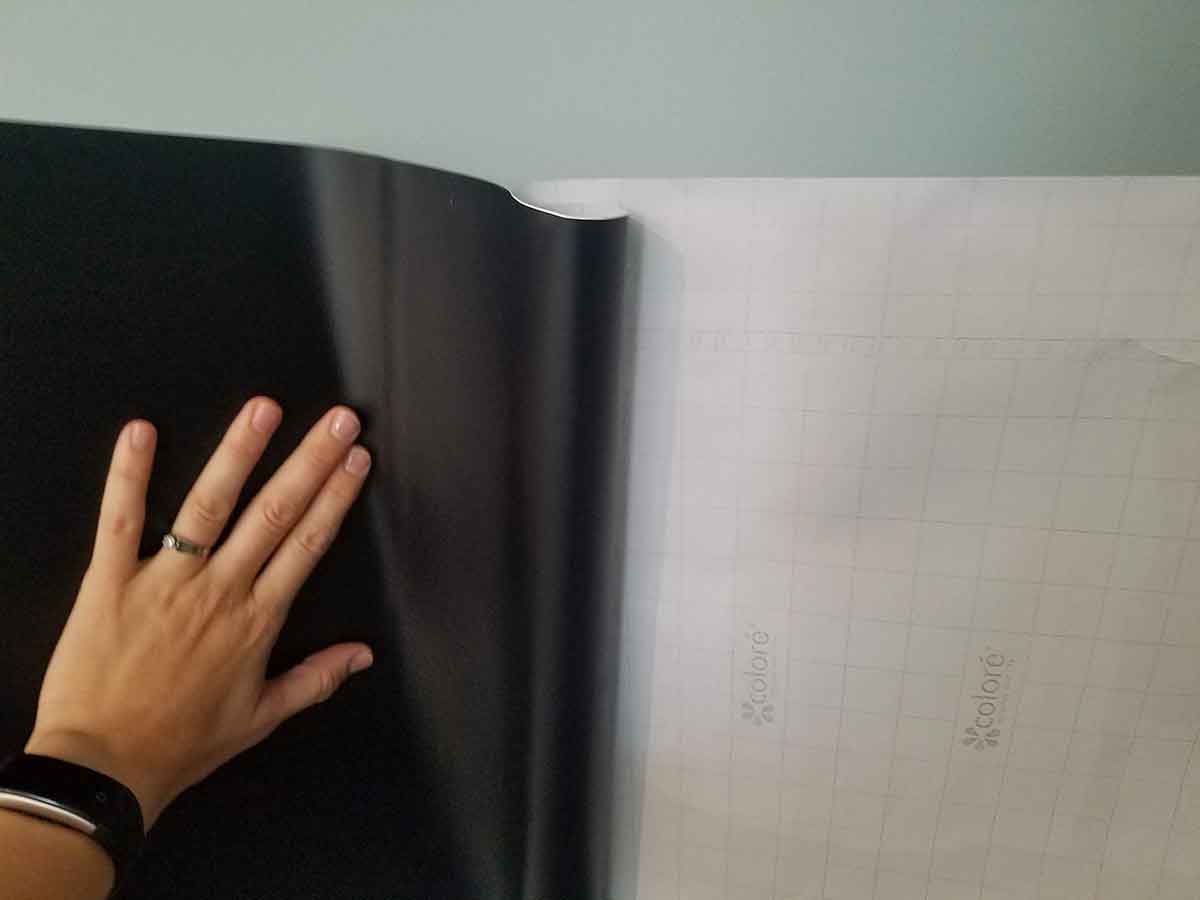
You will need the Blackboard Wall Decals by Colore, a level, tape measure, scissors and a pencil. There are several options from different companies for contact blackboard paper, but as of this post Colore was actually the cheapest and it worked well.
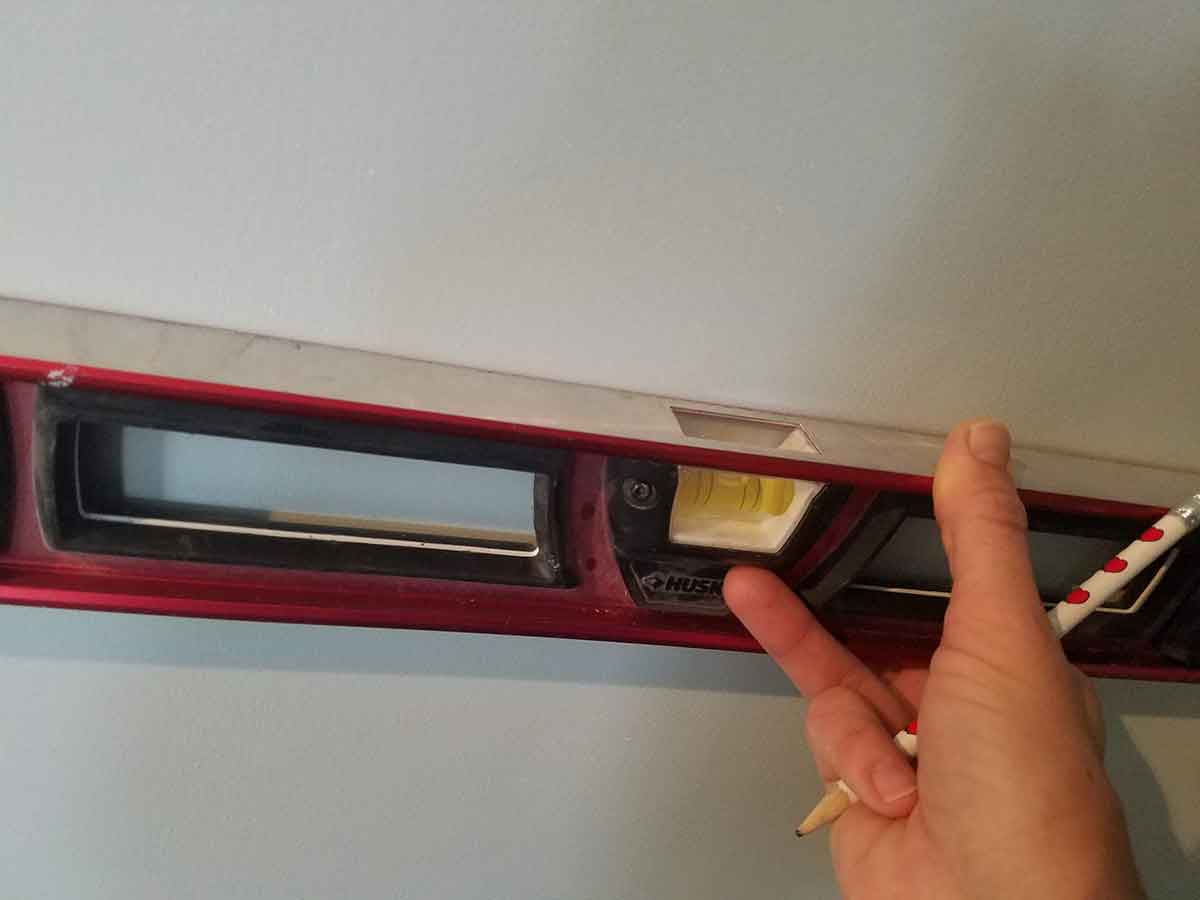
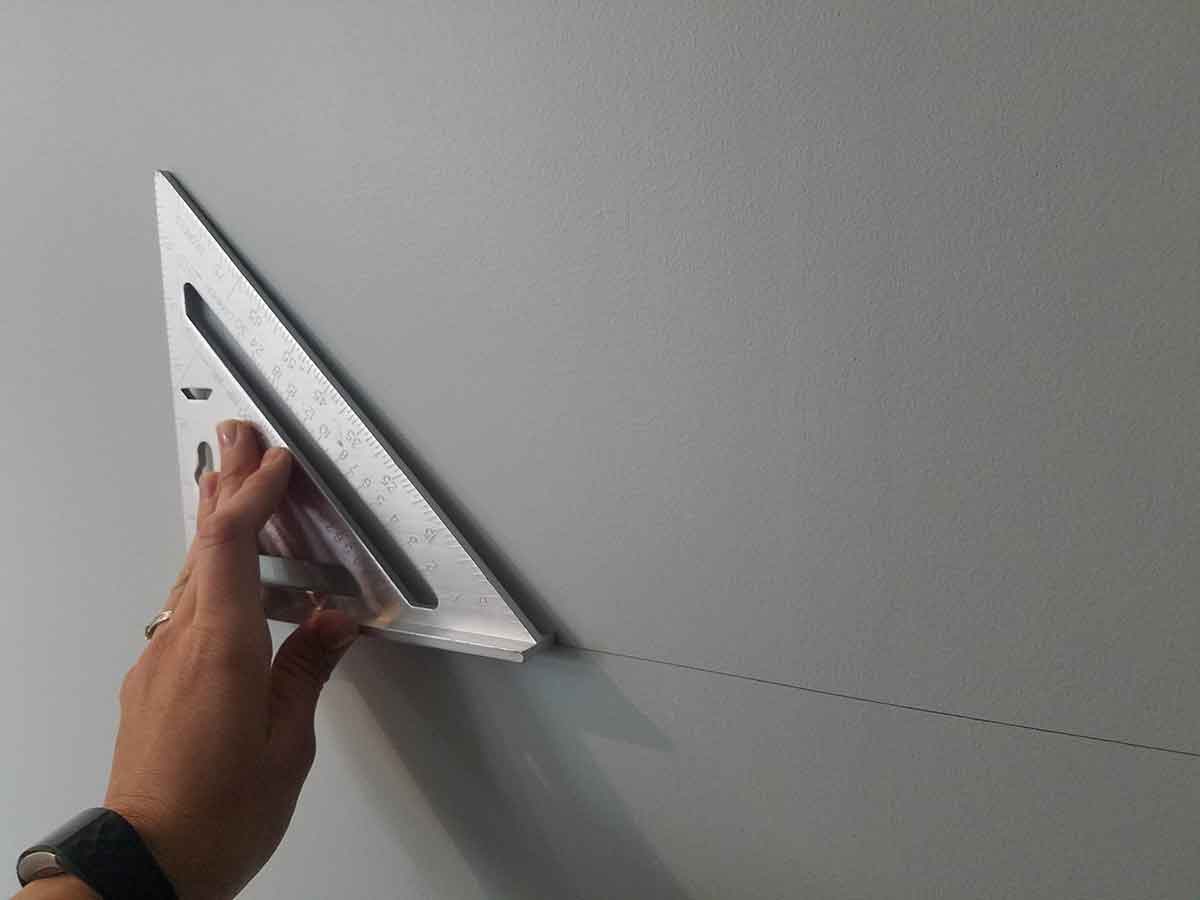
I used the tape measurer to decide how high to place it on the wall. Then I used the level to make sure both my corners would start at the same height. A square edge at the corners made sure I had the chalkboard decal going up at the correct angle.
Start in one corner and smooth it out with your hand as you pull the paper backing off. There are also handy cutting lines on the back to help you get a nice straight edge.
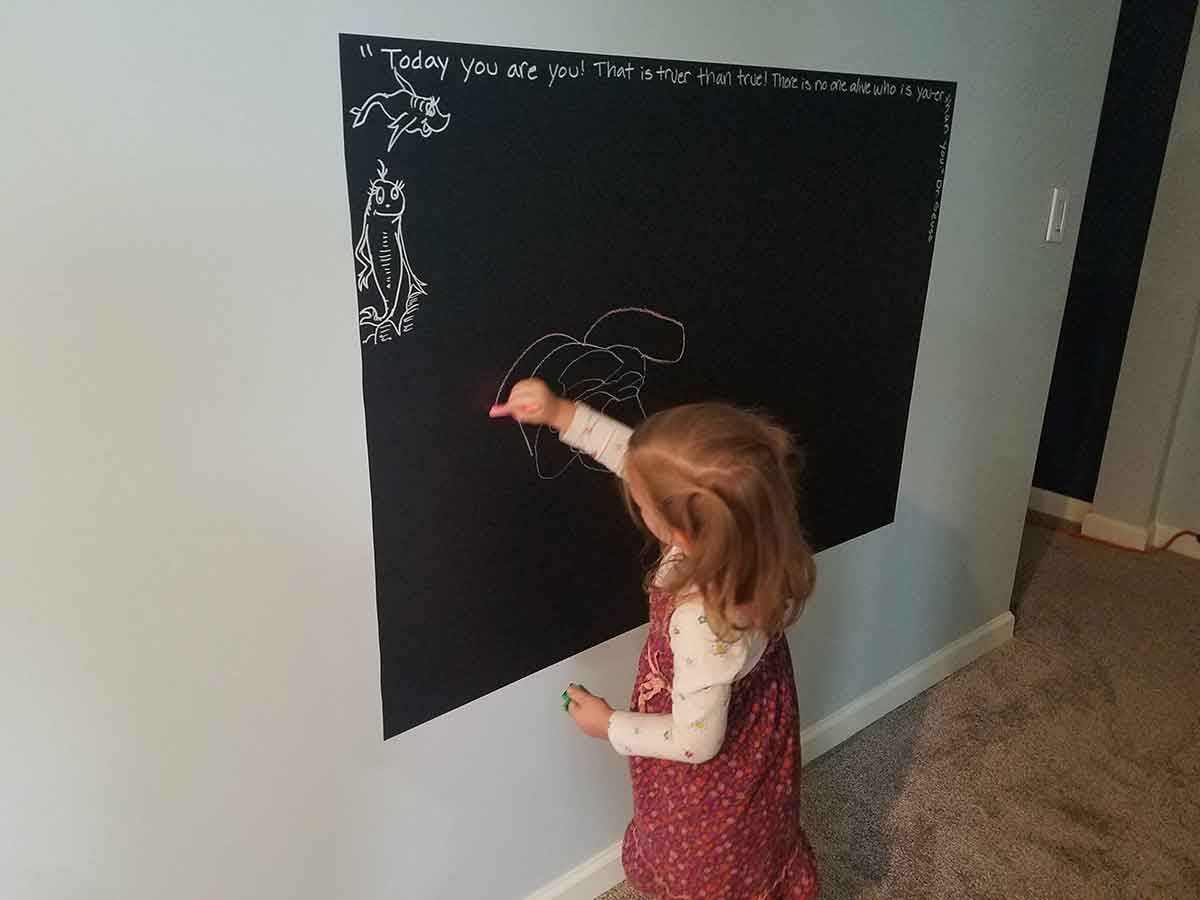
And Voila! You’ve got yourself a temporary chalkboard that works and can be taken down whenever you feel the need. Be warned that the chalk markers are much harder to get off than traditional chalk. I really like the look of the chalk markers, but tried to draw things with the chalk marker that I wanted to stay longer and let the kids draw with the regular chalk for easy clean up.
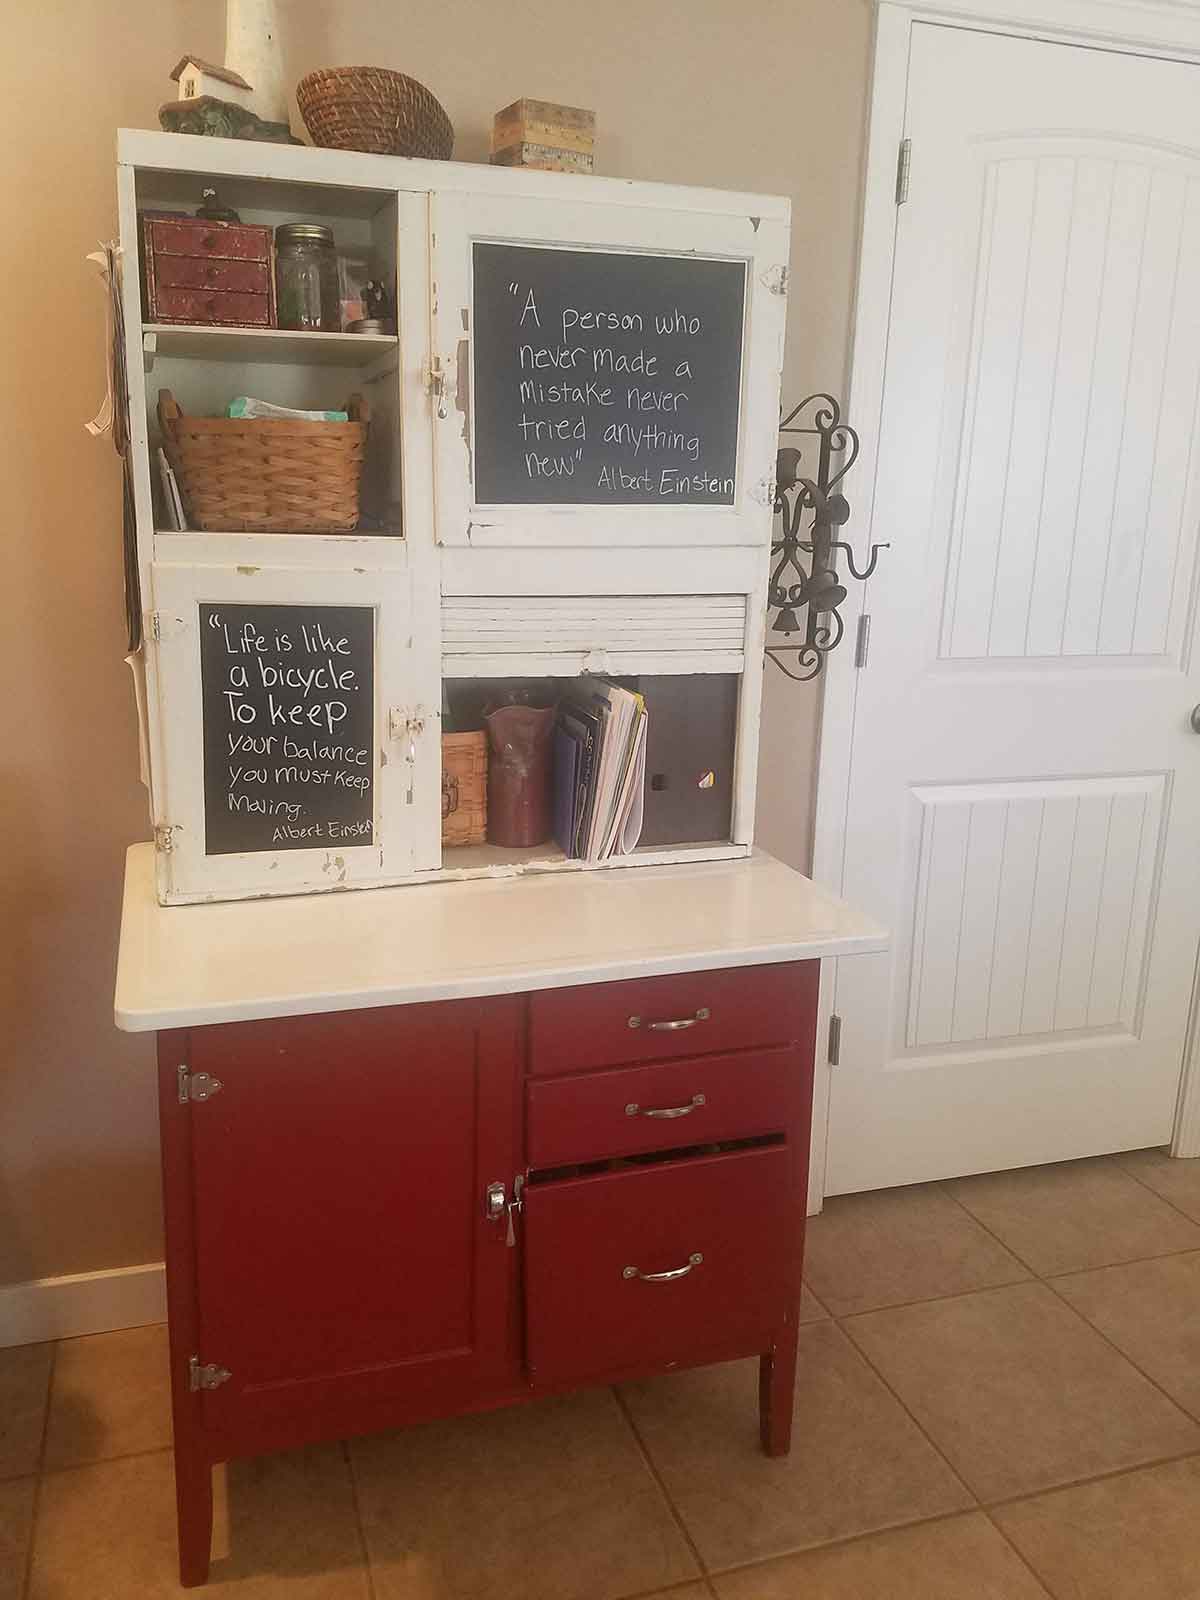
The chalkboard below was made with one and a half of the Colore box sets and I used the left over portions to change up my Hoosier Cabinet a bit. Hope you enjoyed the demo. I’ll keep you posted on my next adventure.
At no other time in my life had I been as cold as I was then, living in the northern state of Wisconsin. The wind pushed the damp cold right to my bones and no wind breaker or down coat could keep me warm. On top of finding myself in this extreme cold, we were also living in a 40 year old house with old drafty windows and cold (but beautiful) hardwood floors. The heating bill was much higher than other homes our size and yet we weren’t any warmer.
To say I was motivated to tackle home improvements was an understatement. There were only two things on my mind, I was cold and how could I fix it.
Little did I know that within three years, this first time home re-modeler would not only be warmer, but would have cut the energy use in half – not of what we were using, but in half of what other homes our size were using. We actually cut it by more than half. (I know because our charming little town sent letters regularly telling us where we stacked up). Our water bill was also cut by more than half – but that is a post for another day.
How did we do it, an average couple, fresh out of grad school, with no nest egg of backup money? The truth is even more affordable and possible than you would think. We learned to increase comfort and save money through securing leaks in windows, doors, ceilings, floors and outlets all for $10 or less. There are more expensive options, but these work and you can be warm now and have a lower electric bill. If you want to do the environment a solid you can, by using less energy for equal (or increased) comfort. You don’t always have to invest in $10,000 improvements to be environmentally wise.
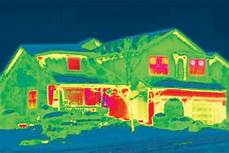
The first big issue for us and for more than 25% of American households, was leaky, inefficient windows. The image below is infrared, the red shows where heat is escaping this house. The average home loses up to 30% of its heated and cooled air through the windows. At this point almost every other site will tell you to get new windows. Which would be great if you have a huge amount of money waiting to be spent. The cost varies, a single story home with 10 windows can cost anywhere from $3,000-7,000.
The truth is, we did have a bit of money, but that was for the whole house, not just the windows. It is possible to increase the performance of your old windows now and one day get new ones, but be warm now.
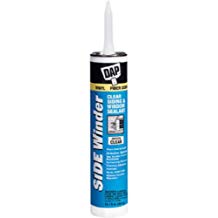
There are three things you can do for windows each costing $5-10. First caulk the outside of your windows, filling in any crevices or cracks that have been developing over the years. This will help keep out cold in the winter and heat in the summer. It will also keep out bugs. Choose a caulk that is labeled for outdoor windows and trim with a silicone base. These are often not paintable, but I just get the clear color and don’t paint it. Dap is a great brand because you can count on it holding up. It can cost $5 more than the cheapest brand, but it is worth it. You will make up the money in energy savings and effort.
After you’ve sealed the outside, seal the inside crevices with this awesome caulking cord. Because it is in thin cords packaged in a wide row, you can fill small spaces or large. This is very useful for old windows that may have large gaps. It never cracks and remains mold-able and seals completely. I always use this in my daughters room because of her asthma. It seals out most allergens from outside and helps her sleep more comfortably.
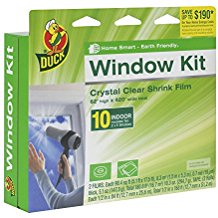
The third window treatment is your classic shrink wrapped window – on top of doing the other two things. Shrinking plastic to your windows is easy to do and can be done in a way that is almost hard to tell it’s there. Follow directions for shrinking it. I like to try and put it on metal around the window versus painted walls or wood – it can pull paint and varnish off. Windows may be old, but with these three meathods they will not leak.
Your next big energy loss is heat rising through the roof. In fact for many homes, 25% of the heat produced by your boiler escapes through the roof. There are a few things you can do. First, you want to make sure the ceiling joists are covered. Chances are, if you have an old house, the insulation has compacted over time, or didn’t have enough to begin with.
A tell tale sign that you are losing heat through the roof is if on a snowy day you can see your roof beams through the snow. Once you begin to notice this you will see how common roof heat loss is.
It took me a while to clue into this. I noticed there was a draft in our kitchen. In fact when I opened the corner cabinet cold air would rush out. This was in a large part due to the fact that the first electrician we hired to install fire alarms moved the insulation around the ceiling joists in the attic and never put it back.
In a way it was a blessing (though I was totally annoyed with him) because I finally got up the nerve to climb into the attic. Not only did I find all he had done, but also found that ALL of our joists were showing. We got a quote to have more insulation blown in and they quoted us $4000! It turns out that the average price is around $1200 and this company offered all kinds of extras we couldn’t afford. It wasn’t that we didn’t want insulation or didn’t see the value – we simply didn’t have the money.
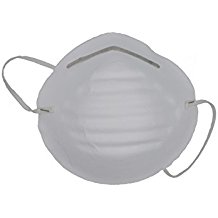
So this is where you save money and stay warm. Wear a dust mask, long sleeves, pants and gloves. This is to protect yourself from fiberglass in the insulation, especially your lungs. I then took a broom, swept a section of insulation into a pile towards me, pulled it apart, fluffed it back up and placed it gently back in place. I was able to re-cover most of the joists completely. For one 10 square foot section I had to buy more insulation, but the cold draft was gone and we were much warmer.
One note, it is very important that the roof has circulation or you will have condensation, which will breed mold and ice jams. Make sure you do not cover attic vents and that no insulation touches the roof. Think of attic insulation as a big blanket keeping warmth in. It’s ok if your attic is cold – you want it cold, but you don’t want the level below it to be cold.
Cold air also travels into your home through poorly insulated outlets. You can tell if an outlet is leaking cold air by licking your finger and placing it near the outlet opening. If you feel cold air moving past your finger you want to insulate the box. If this is a new build or basement,you can use spray foam to insulate behind outlet boxes.
If the home is built and walls are up, place outlet insulators behind all outlet covers and light switches that are found on the inside along exterior walls.
Replace weatherstripping around your exterior doors. The link here is for convenience from amazon – note it is not $10. But if you go to a local hardware store you can find many options.
Floor – insulate floor joists from the basement. Cold air transfers from outside walls, travels along your floor joists and settles in your basement. If you have an unfinished basement this is a very easy, slightly annoying job.
One option is to hire a professional to come in and spray all floor joists with a special insulating foam. It guarantees energy savings. It also cost several thousand dollars. Meaning it would take along time to regain your cost of installing.
Instead I bought 8 cans of spray foam. Sprayed along all crevices where joists meet support boards.Then placed blanket insulation in the space for further cold air protection. I am sure the professionals would have sealed it better, but my version cost about $30 and with all of our affordable energy improvements we cut our usage by more than half. I know it works and it doesn’t have to cost thousands. *while I was researching products I’ve used, I came across a DIY version you can buy for about $800 and possibly get close to professional coverage if you want to check it out.
And that is my quick and easy 5 ways to get warm for less than $10 a project.
I wish you the best in your energy efficient DIYs. I would love to answer any questions you might have on other projects.
Until next time, stay warm, for as little as possible. 😊
A few months ago our family room was beginning to feel cramped, messy and boring. Though I had ways for my family to put away blankets and toys, they were not following my well thought out plan. The basket meant for folded blankets was crammed with toys or shoes kids didn’t want to put away and became just another object taking space. Our coffee table, while great for putting up our feet, lacked much use beyond that and stood in the middle of the room horrible and brown, so so brown.
A professor of mine once said, during his lecture on strengthening relationships, that if you have a problem with something your spouse is doing, you may see it as his/her problem, when in reality it is your problem. Your problem, because most likely your spouse doesn’t care or is blissfully unaware that something is an issue for you. This is how I was beginning to feel about our messy family room. It was my problem and if it was my problem I was in a position to fix it.
The professor went on to suggest there was a solution found in the way you chose to look at the problem. For example one husband dropped his dirty socks on the floor every day and no matter how much his wife asked him to put them in the laundry he continued to leave them on the floor. The husband, while truly wanting to please his wife constantly forgot because he was so anxious to get into the shower after his long day and the laundry basket was on the other side of the room. Once the wife understood more of the story she in turn decided change her approach, because in the end she just wanted the socks off the floor and he wanted to take a shower. She decided to move the laundry basket just outside the bathroom and with the ease of laundry access, never had socks on the floor again.
I constantly look back to this story when I am trying to solve a behavior, sometimes it is easier to move the basket than it is to convince someone to change what they value. In my case, my kids valued “cleaning” up the floor as quickly as possible, more than they valued actually putting the toys away. So I changed my approach. I began to search for a chest that could double as a coffee table, but had blanket storage. I placed the collect-all-basket in a hard to reach place and made room for a few puzzles and games inside our TV console. Before you know it, the family room was back and though toys and books and random shoes still made their way into the room, there is no easy place to stash them. Clean up has become much more straight forward.
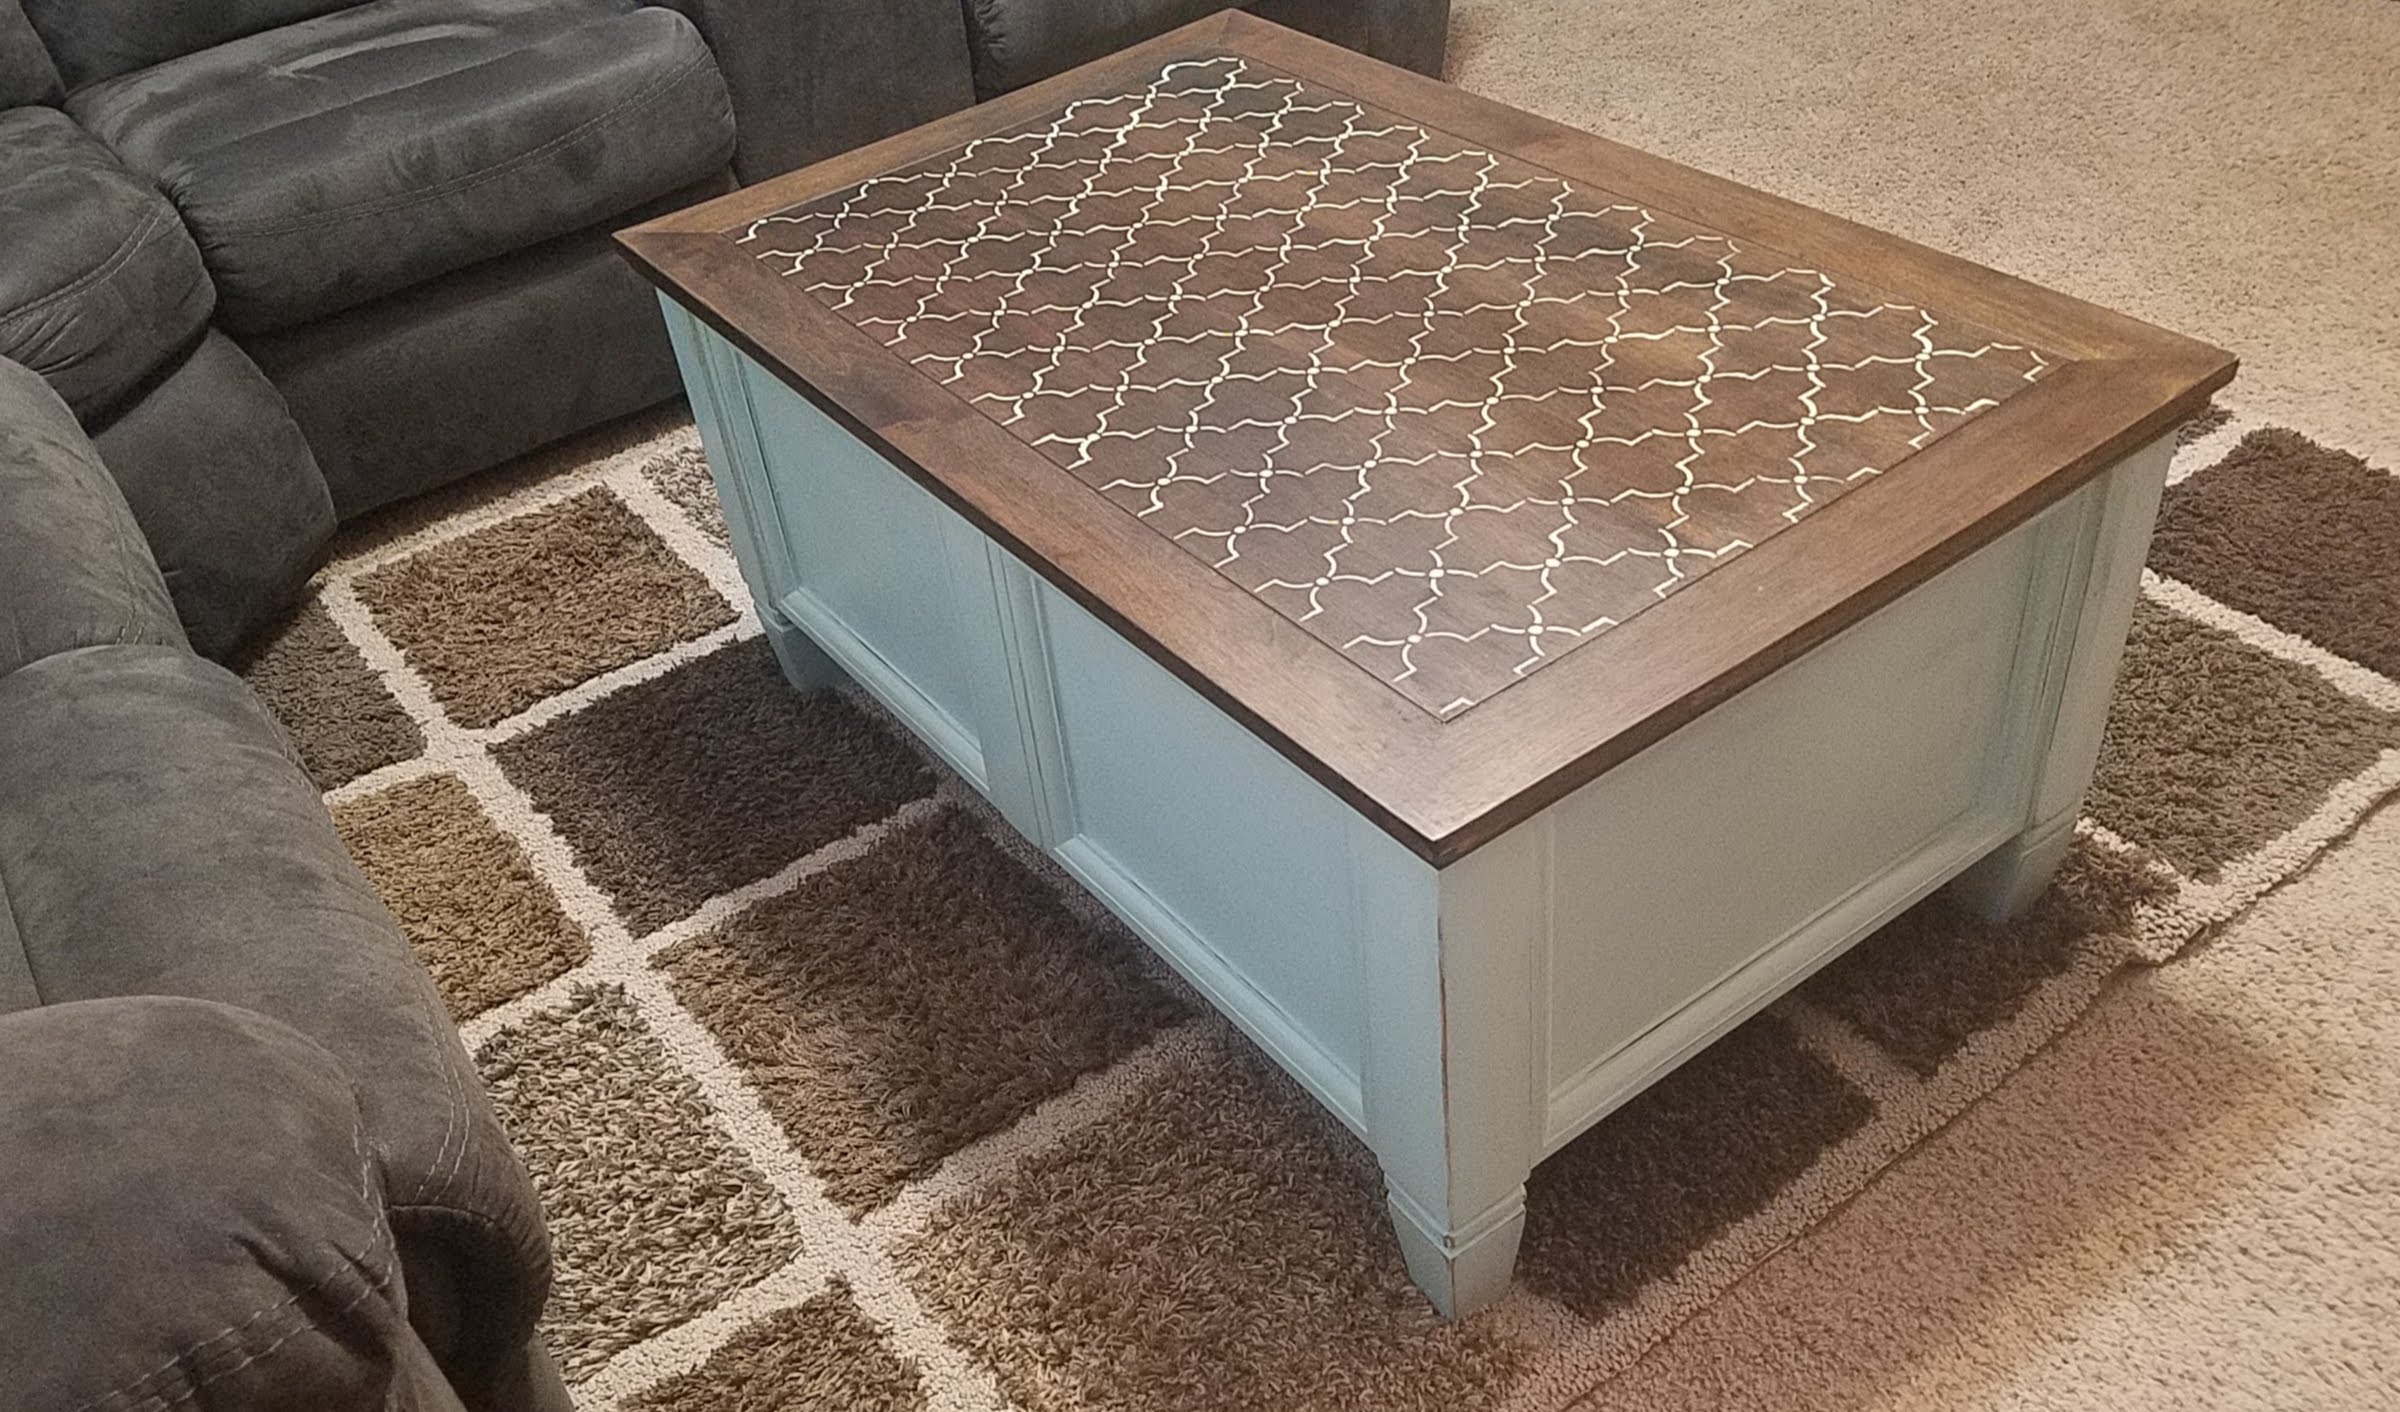
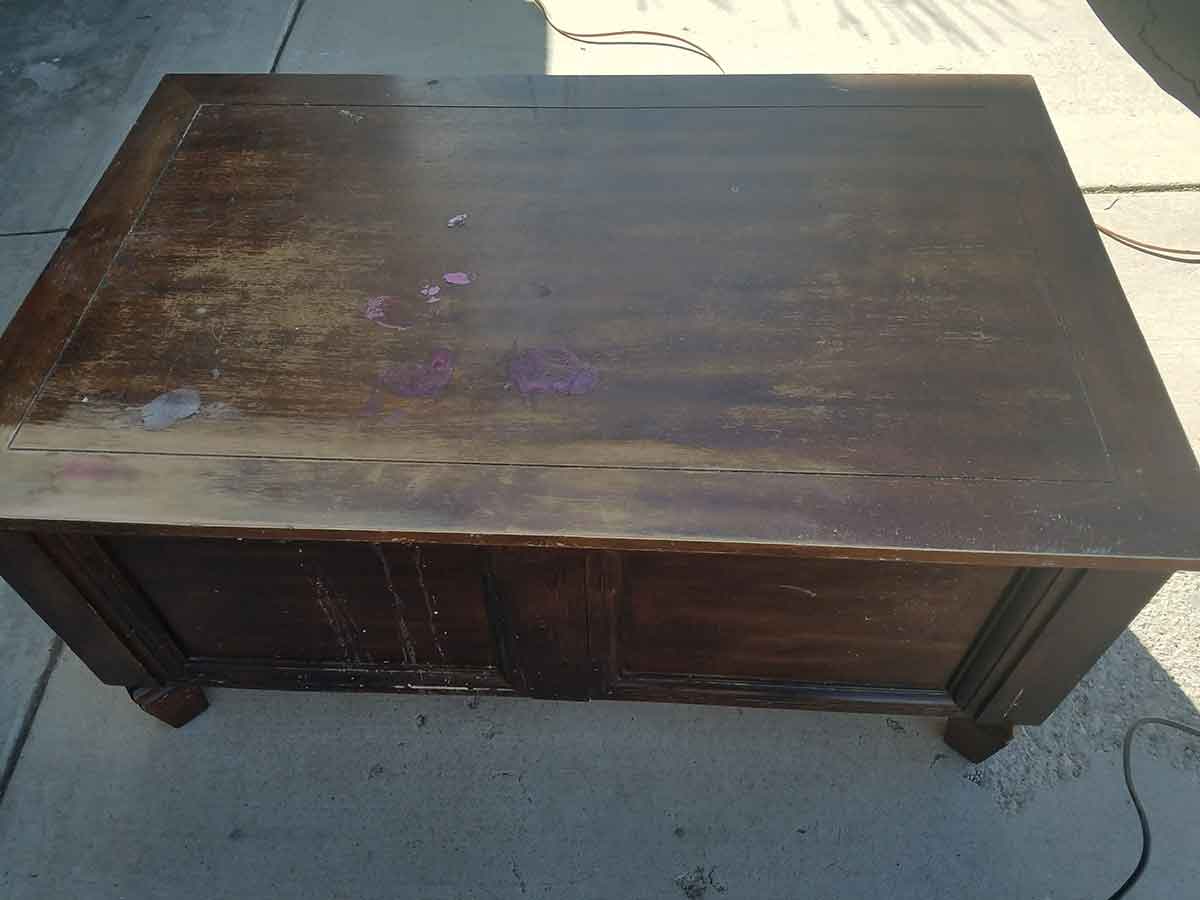
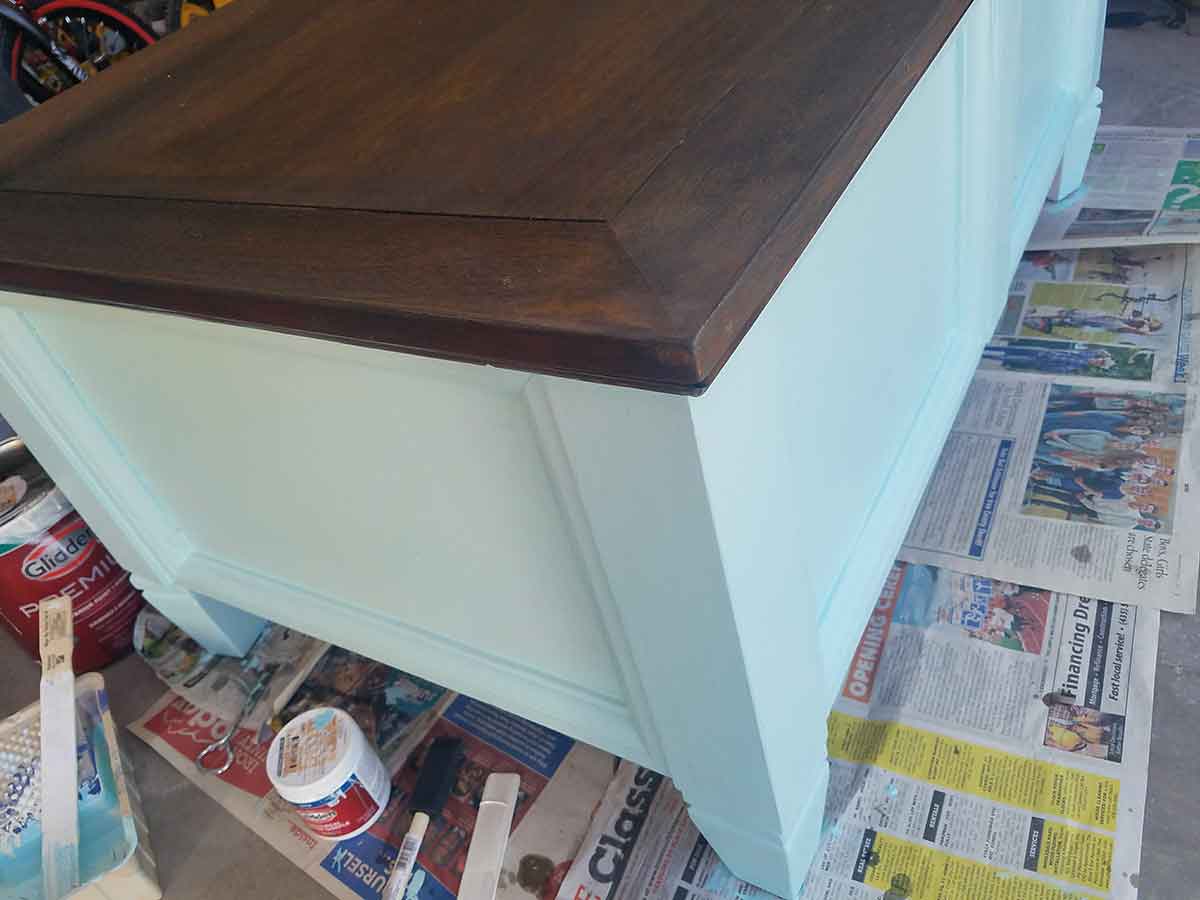
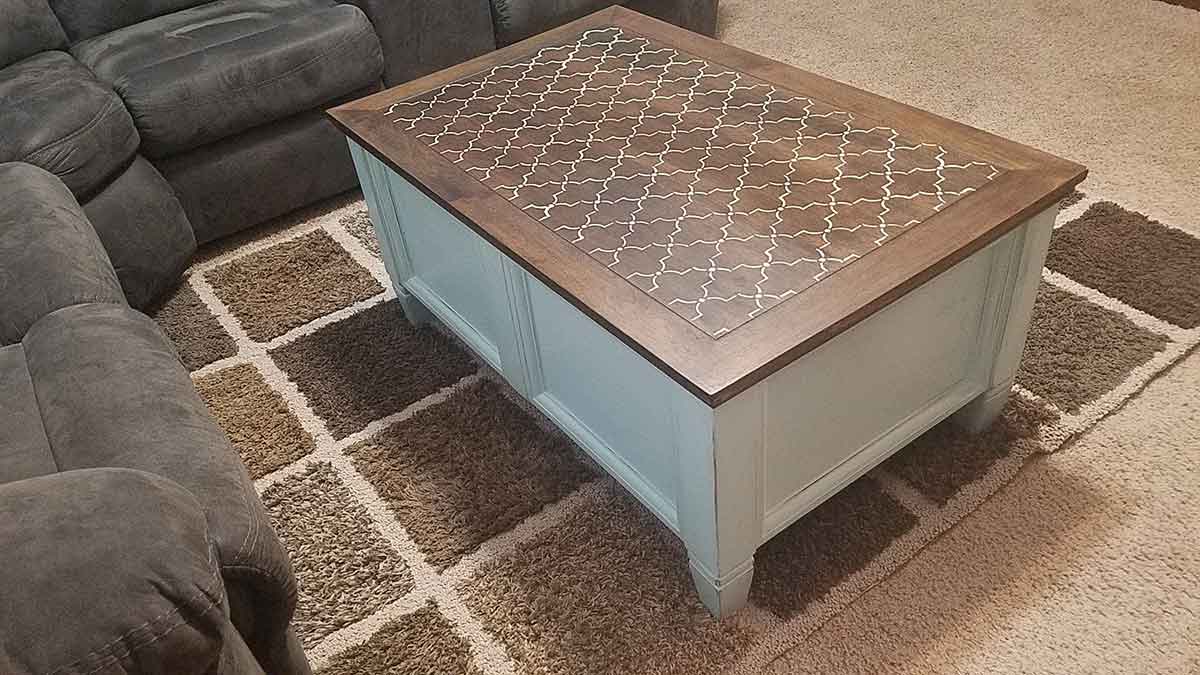
Here is the journey of my storage chest that started out looking like a little girls fingernail polish station, guessing from the princess cards and bubblegum pink puddles on top…I could be wrong. 🙂 The change was exciting, adding a pop of color to this very brown room was just what was needed, I love propping my feet up and admiring the stencil work. In the end, it was my problem, but with a beautiful solution.
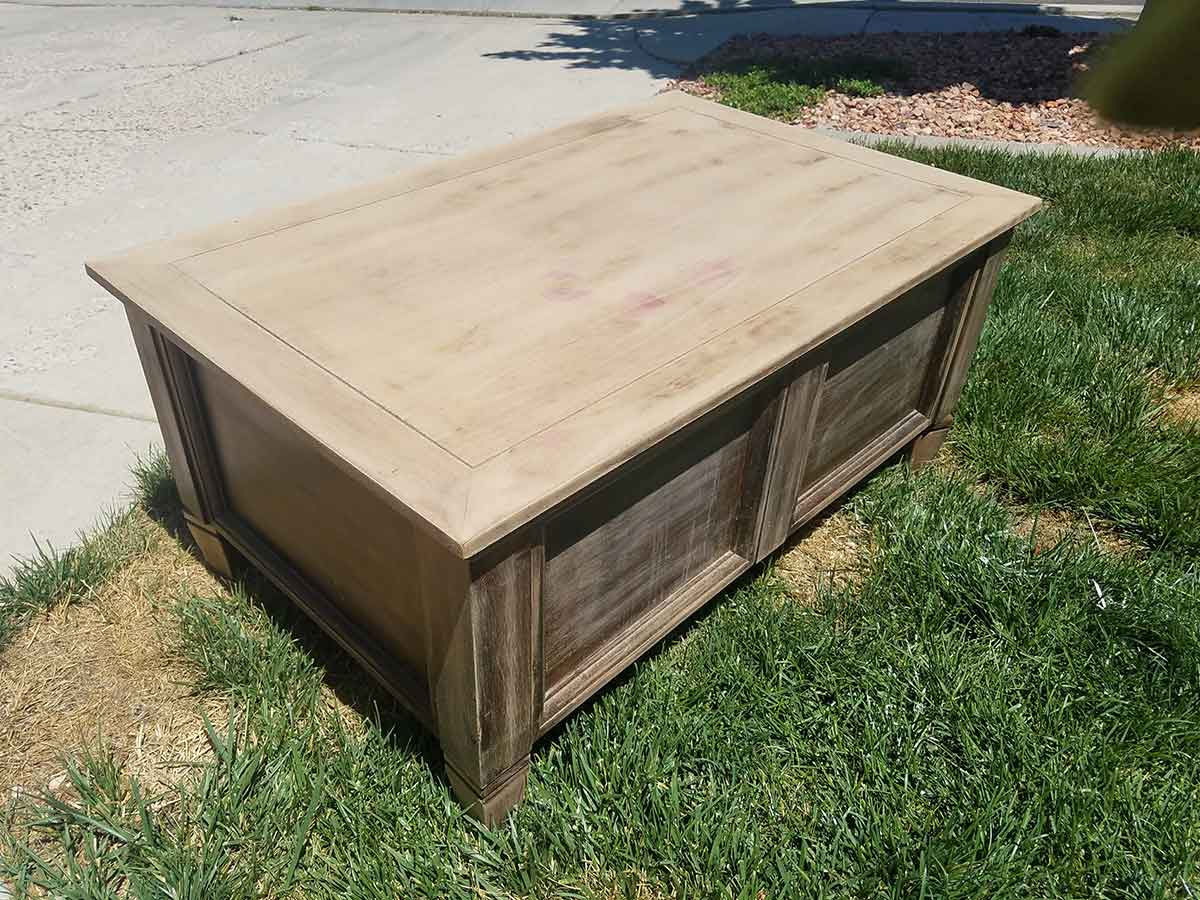
The chest was in rough shape, but it fit the qualifications of internal storage and I loved the wood work on the outside. I thought that with enough washing and sanding I would be able to remove the pink goo.
I was wrong. After dedicated sanding there was still a bit of a residue. I had wanted to have a wood tone on the top and add color to the bottom. I considered painting the whole thing, but I love to see a bit of wood grain. At this point I changed my design and decided I would stencil it, to draw attention away from the pink wood, if still visible after staining. I also roughed up the surface of the bottom portion to prep it for primer.
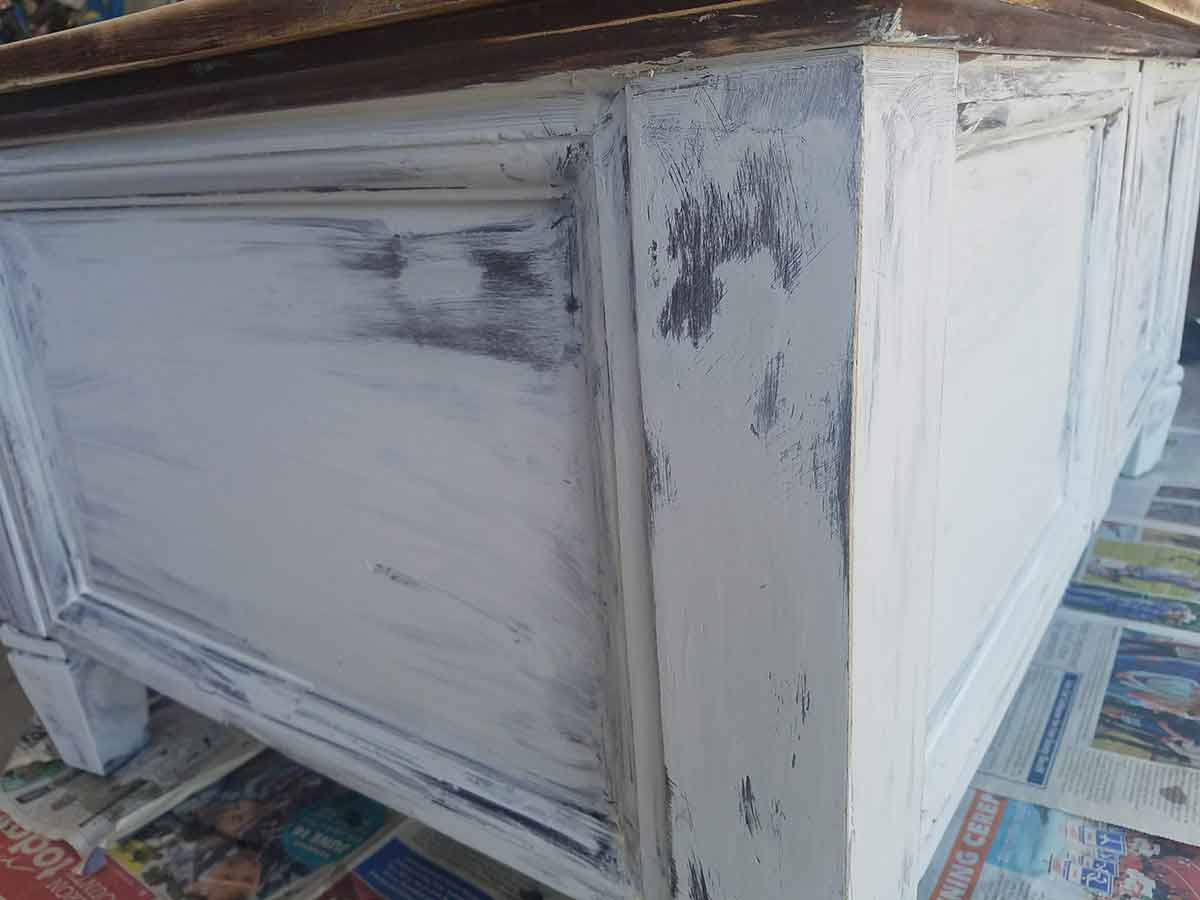
I like to prime pieces that I am going to paint for two reasons. One it really helps the paint stick to a roughed up lacquered surface and two…
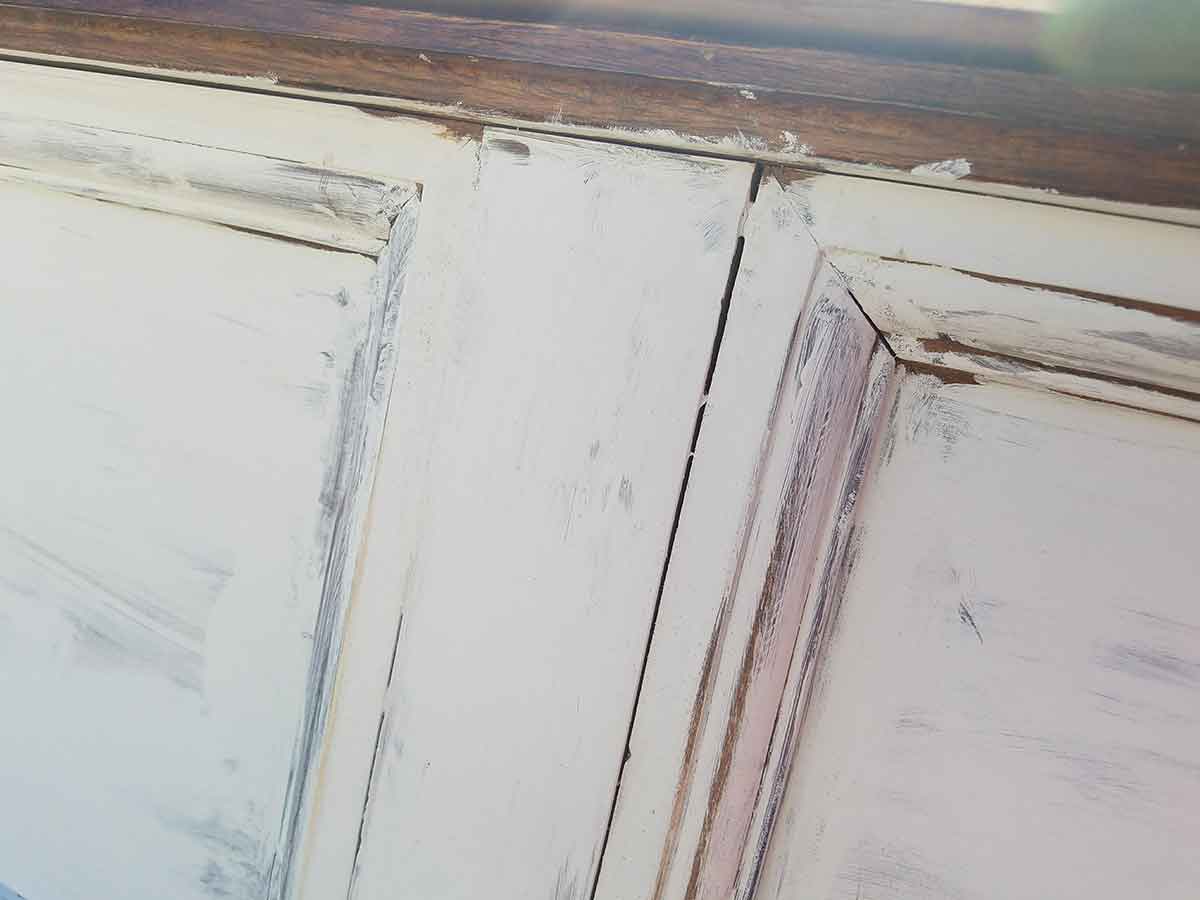
… it helps you see the gaps between the wood joints. At this point, I let the primer dry and then come through with caulk and fill in all the edges and cracks. Caulk is the secret to transforming a piece from looking amateur to professional. That and a good quality paint to give a nice hard finish. Caulk is also not difficult to use correctly once you know a few tricks (I will be posting on that soon).
Apply the paint of your choice. I picked Glidden Satin from Home Depot, the original shade was True Turquoise. When painting furniture I like to get the paint samples. One or two sample sizes are often plenty to complete a piece and then I don’t have large amounts of random colors filling my space. I also feel more at ease with branching out to different colors or picking the shade that is just right for each item. This chest took less than one sample can.
In all honesty, I picked out the color and then worked on a different project. By the time I got back to finishing this I didn’t like the color any more –I know I was a bit shocked myself that I changed my mind so quickly. I added some trim paint ( Glidden, Satin, Raffia Cream) from our basement remodel and mixed until I had a shade I liked.
Here you have the finished piece and I guess I could have kept it this way (except for the pink stain on top that still showed through and the fact that this piece is totally boring! I knew I would be adding some character, but needed to let it dry.
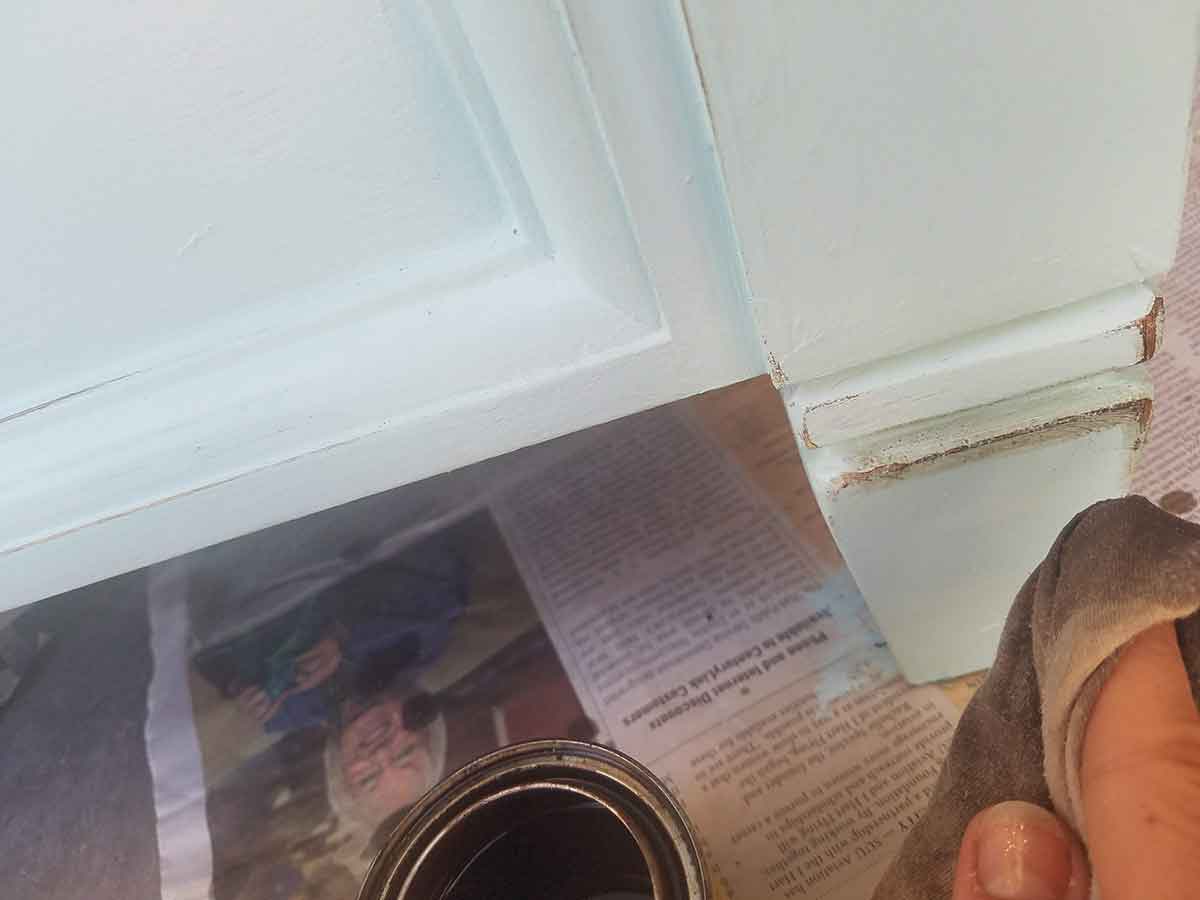
Once the paint was dry, I sanded the edges of the feet and along the wood trim to give a little character. Then I came through with walnut stain and stained the wood so it would stick out a bit. If you ever go too far and don’t like the amount sanded off, simply repaint the section you want unroughed (that’s not a word, but you get the idea).
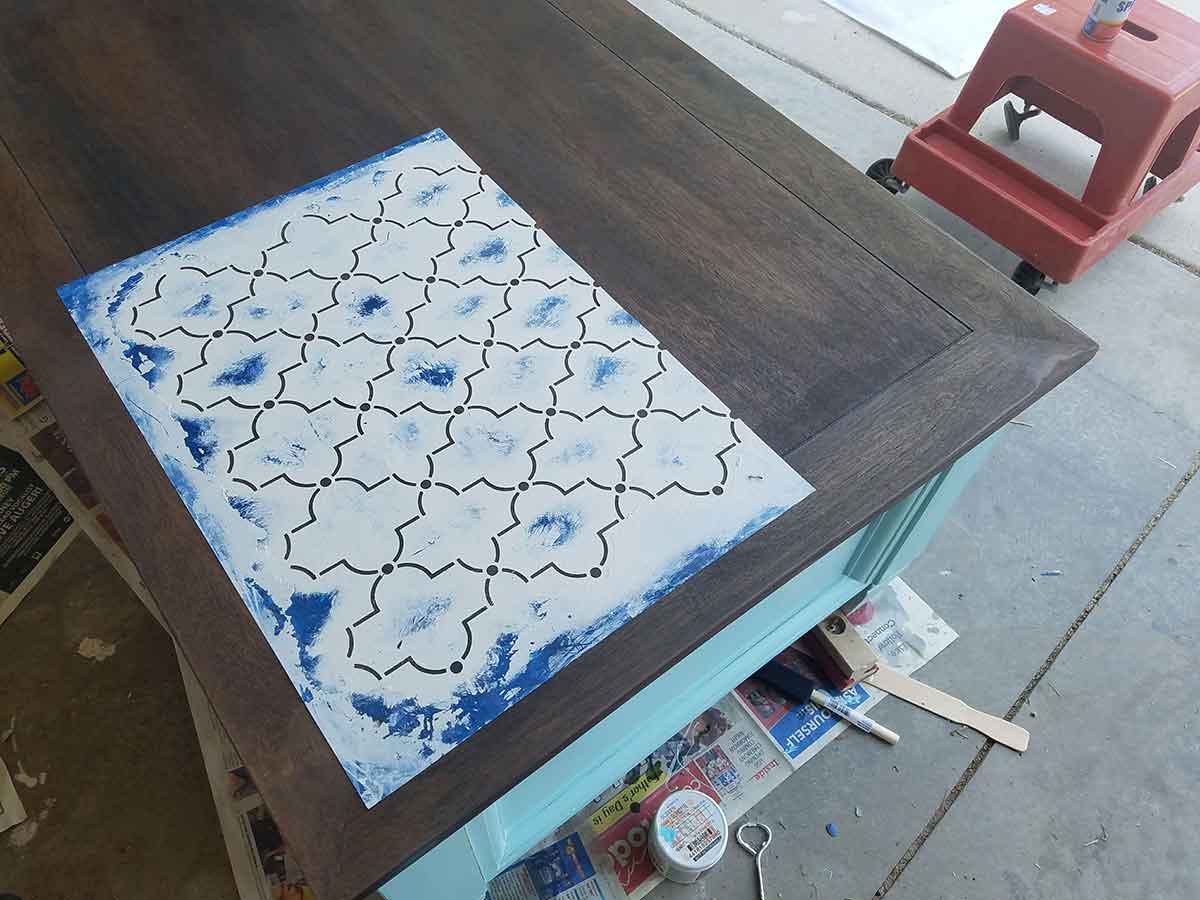
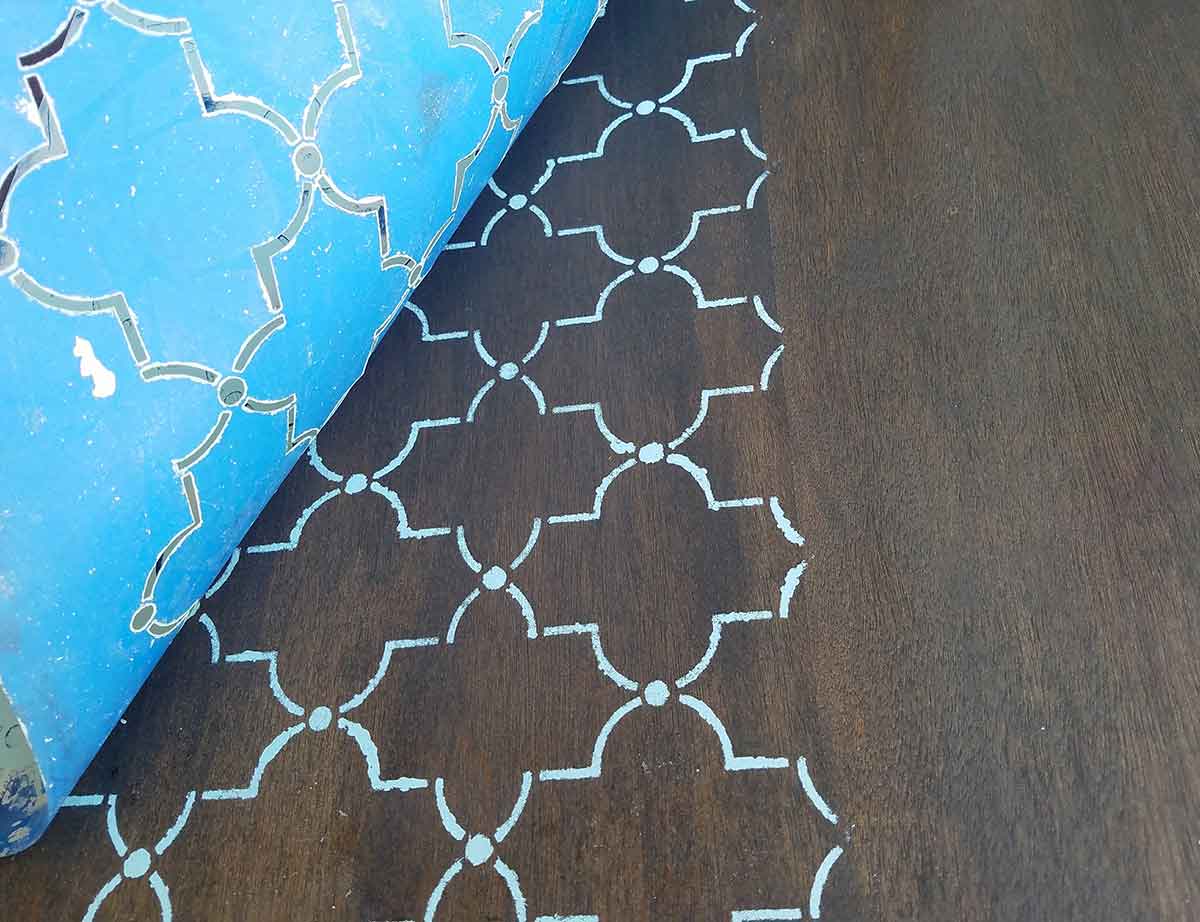
Stenciling furniture is much easier than stenciling a wall because it is smaller and in this case it was not on a wall with all the blood running from my arms. That was tough, I actually really liked this. It went fast and added great color and texture to my room. It also did a great job tricking the eye so you couldn’t really see the pink stain.
To keep the stencil in place while you work, spray with glue adhesive. I highly recommend Elmer’s glue because they are just better. I made the mistake of using the dollar store brand because I had run out of Elmer’s and I spent a long time scraping the horrible glue from the top of the storage chest. Just spray with Elmer’s spray let it dry a minute or two then lay down on the surface.
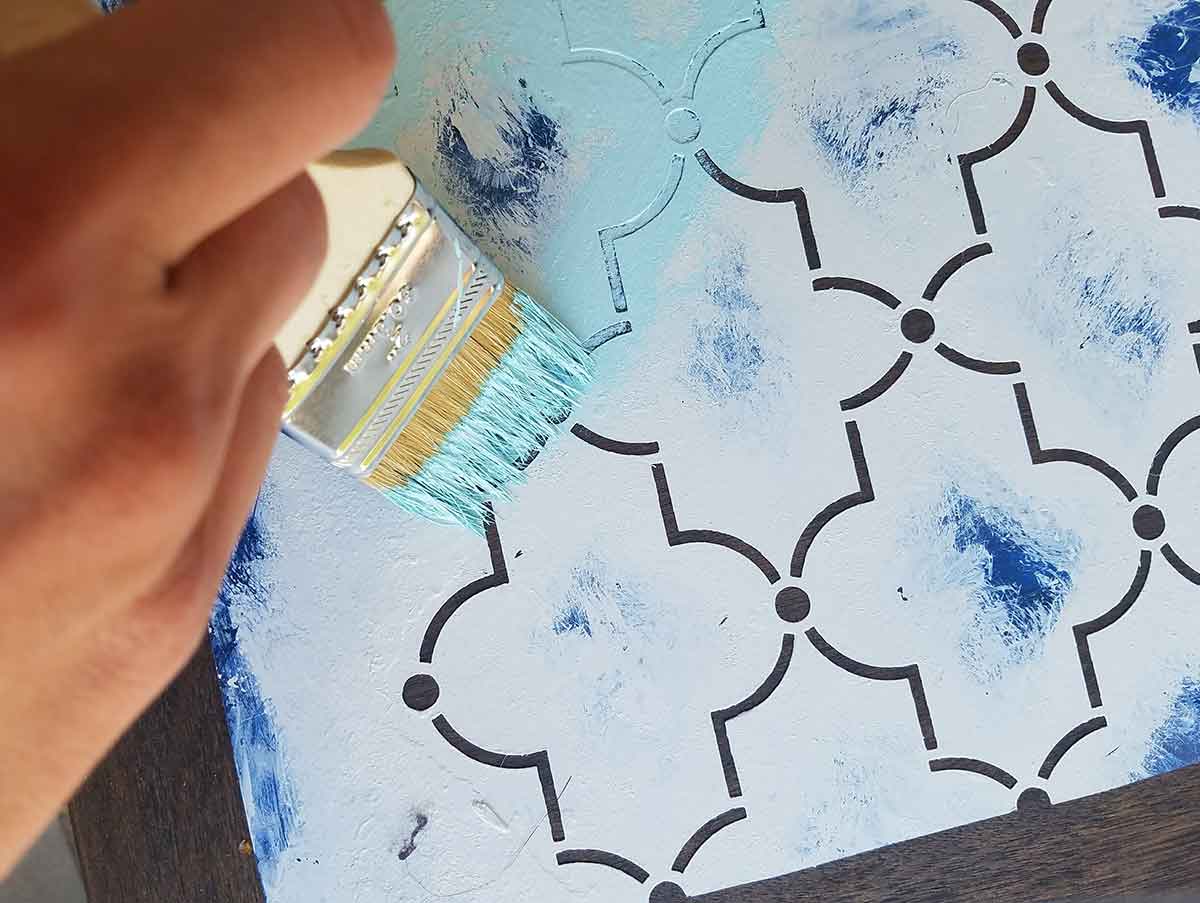
I like to use my trusty cheap brushes, they work really well for many jobs, including stenciling. Now the trick to getting a good stencil look and not many big blobs of paint on the other side is to keep very little paint on your brush at a time. Just enough paint to get the color on. Use a tapping motion and avoid strokes of paint as those pull the paint under the stencil.
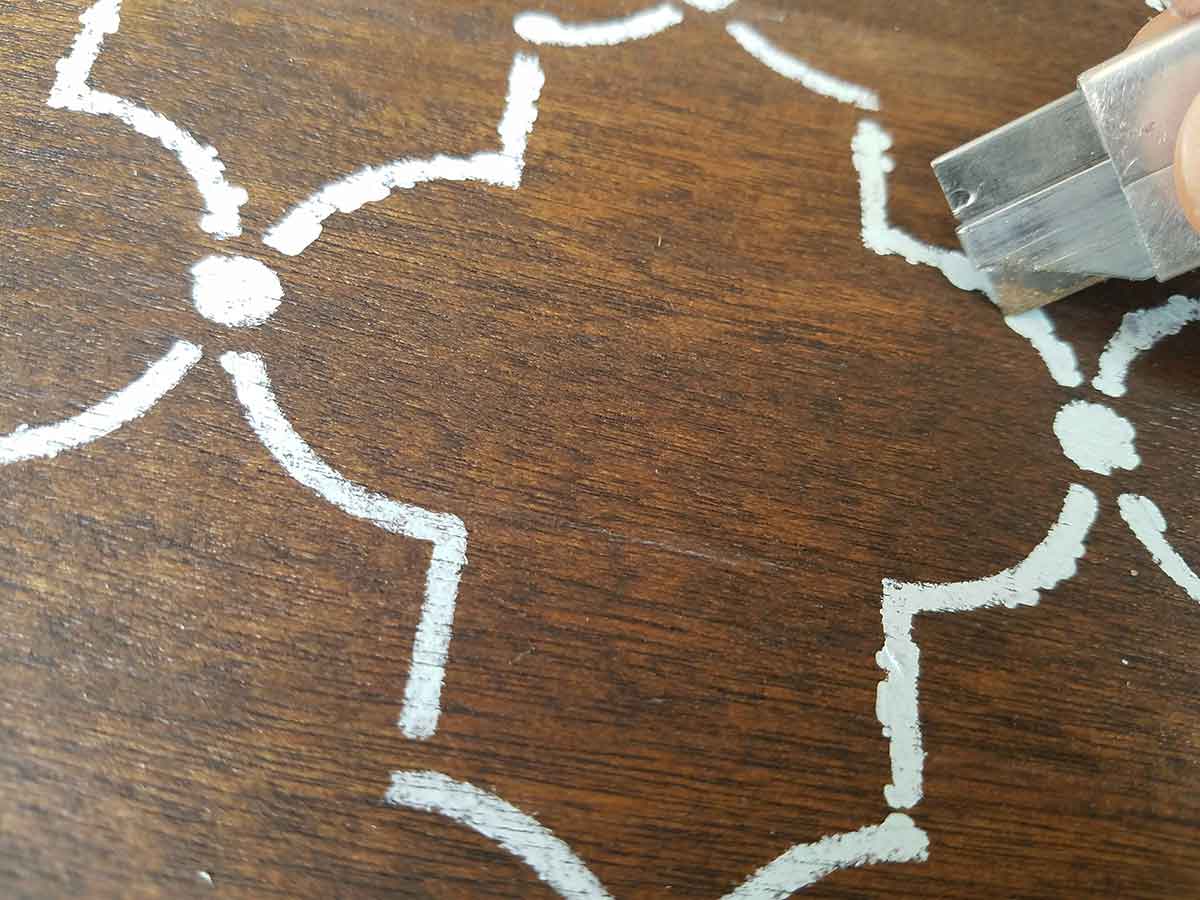
And now for the moment of truth, how well did this section take? Wait a minute or two for the paint to dry just a bit to avoid a string of wet paint accidentally dripping in the wrong place.
It looks good, I’m happy.
Some sections didn’t fair as well. If you are a perfectionist like I am, a razor blade is an easy way to clean up any edges where the paint came through too thick. When stenciling a wall you can simply touch up with the contrasting wall color, no need to scrape it off.
When finished, I put on an outdoor/indoor lacquer to hold up to the wear and tear of a family all putting their feet up, after all, this is one of it’s jobs now. It has held of beautifully and protects from scratches as well and it holds a ton of blankets.
Until next time. Happy building, reusing, refinishing, recycling. Post below on your awesome home solutions and have a great week. Remember to subscribe for the latest projects at This Homemade Home or follow us on Facebook, Pinterest, Instagram or Twitter – whatever you want. 🙂
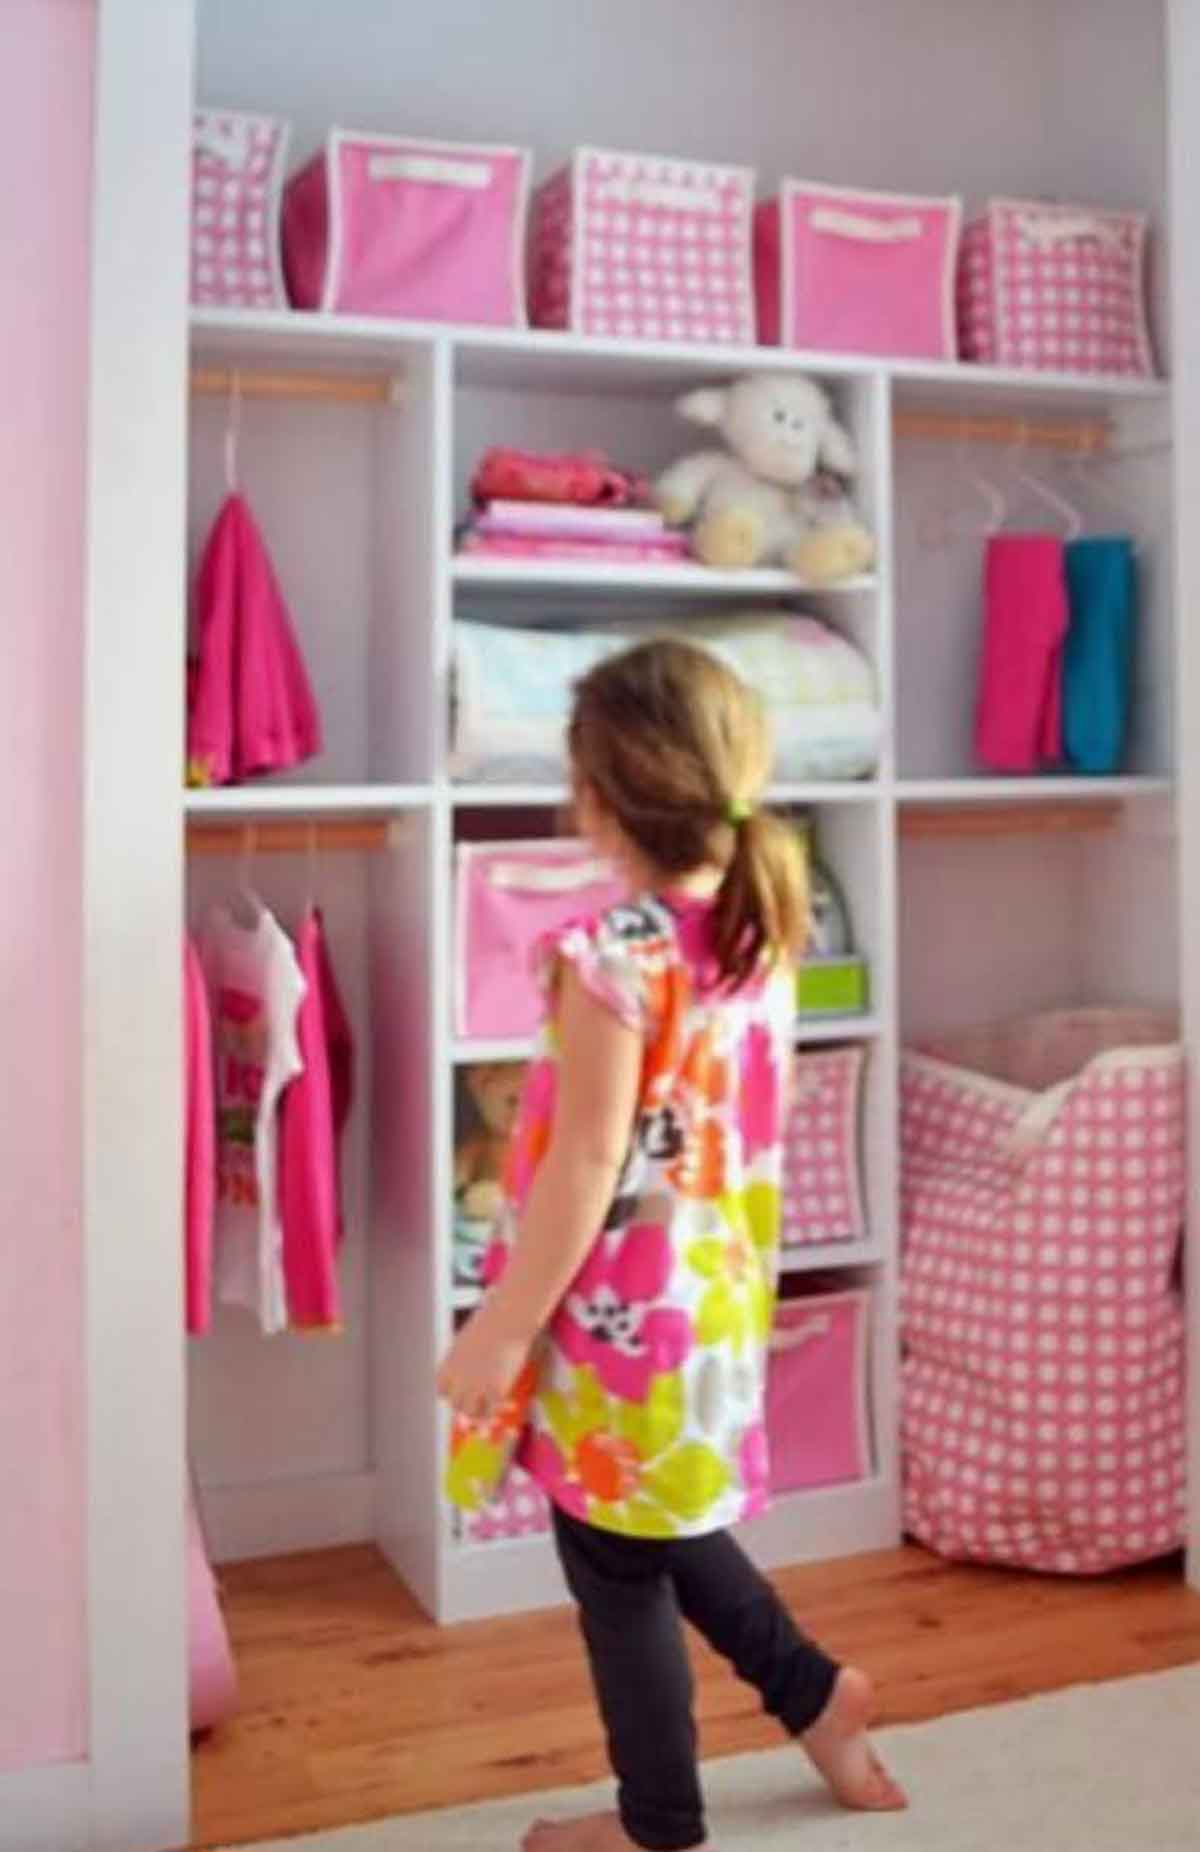
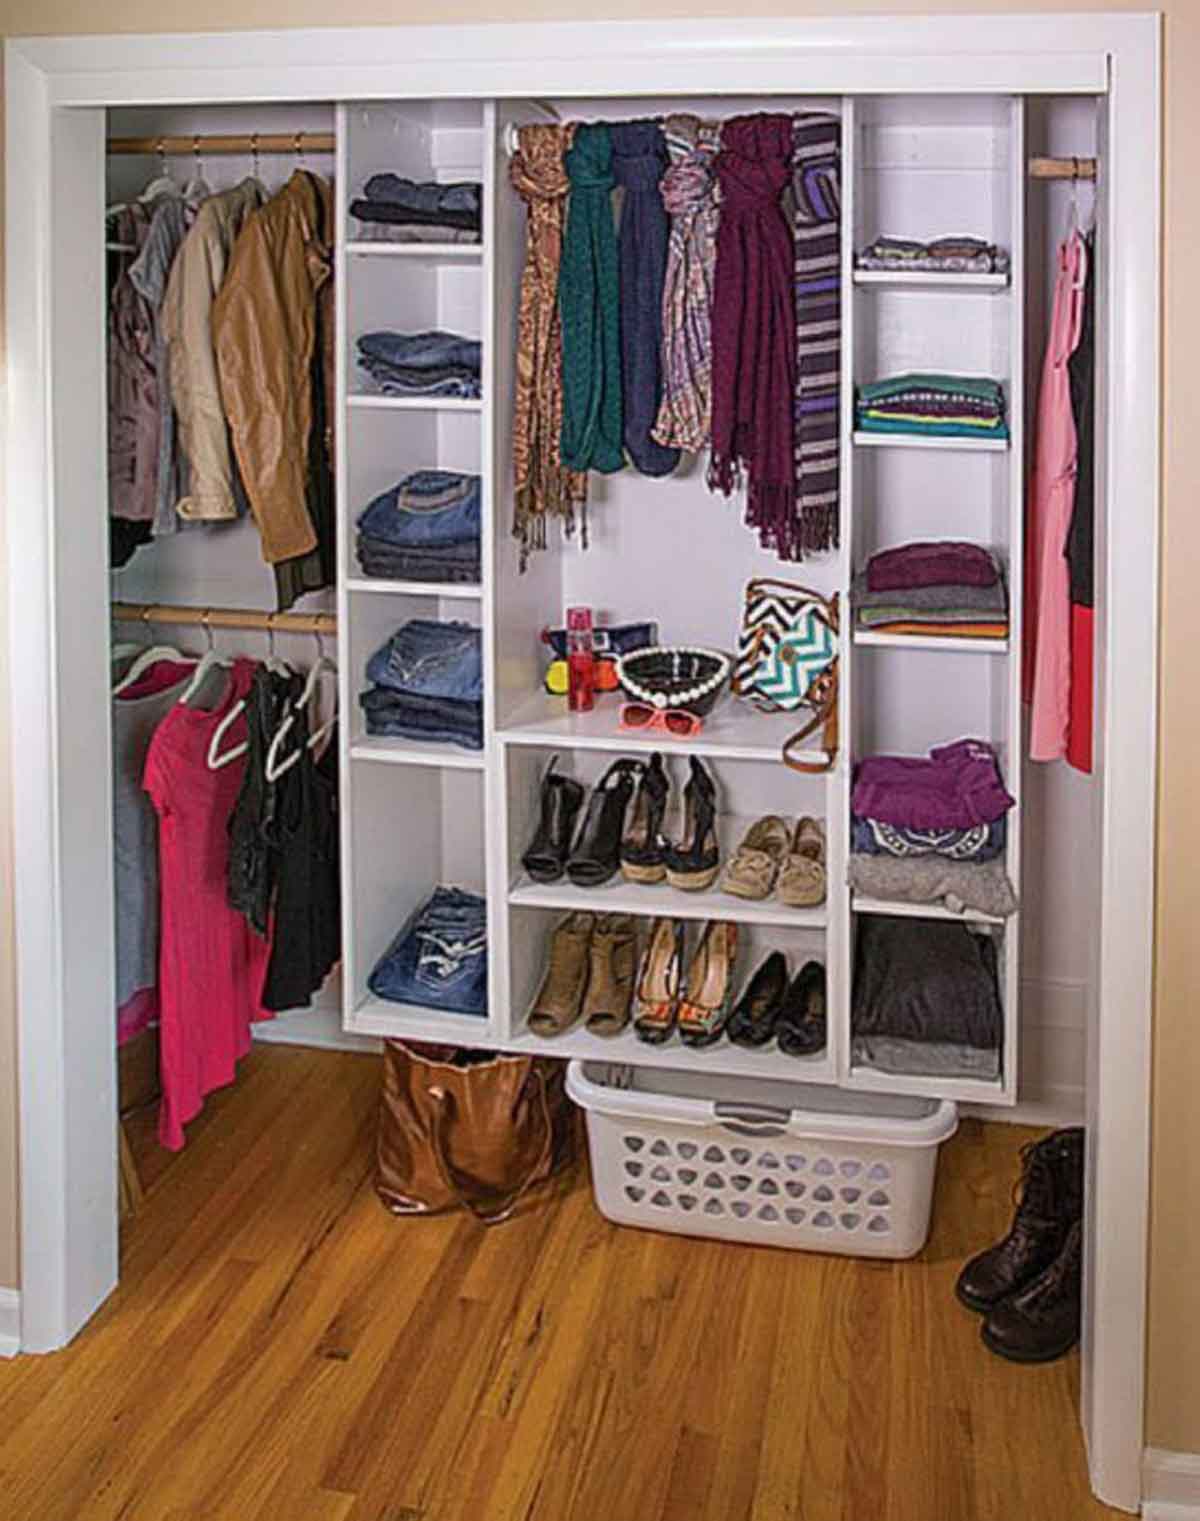
A friend asked if I would do a post on DIY closets. So here you go Alanna! I have built three closets and have a few tips to share, I hope you find it helpful. I am going to take you down the road I took as I began researching how to build an organized closet. First I would suggest you look through several layouts to see what you like, what meets your needs and what looks possible. Below are 5 closets you can build yourself and is a great place to start your search. There is a bit of sweat equity, but it is doable. I will also give explanations, links and videos on how to accomplish each one. Note, these are not all my closets. My closets are full of clothes and I’m not in the mood to empty them to photograph, but I will show you how to get each look and you will feel amazing when you are done.
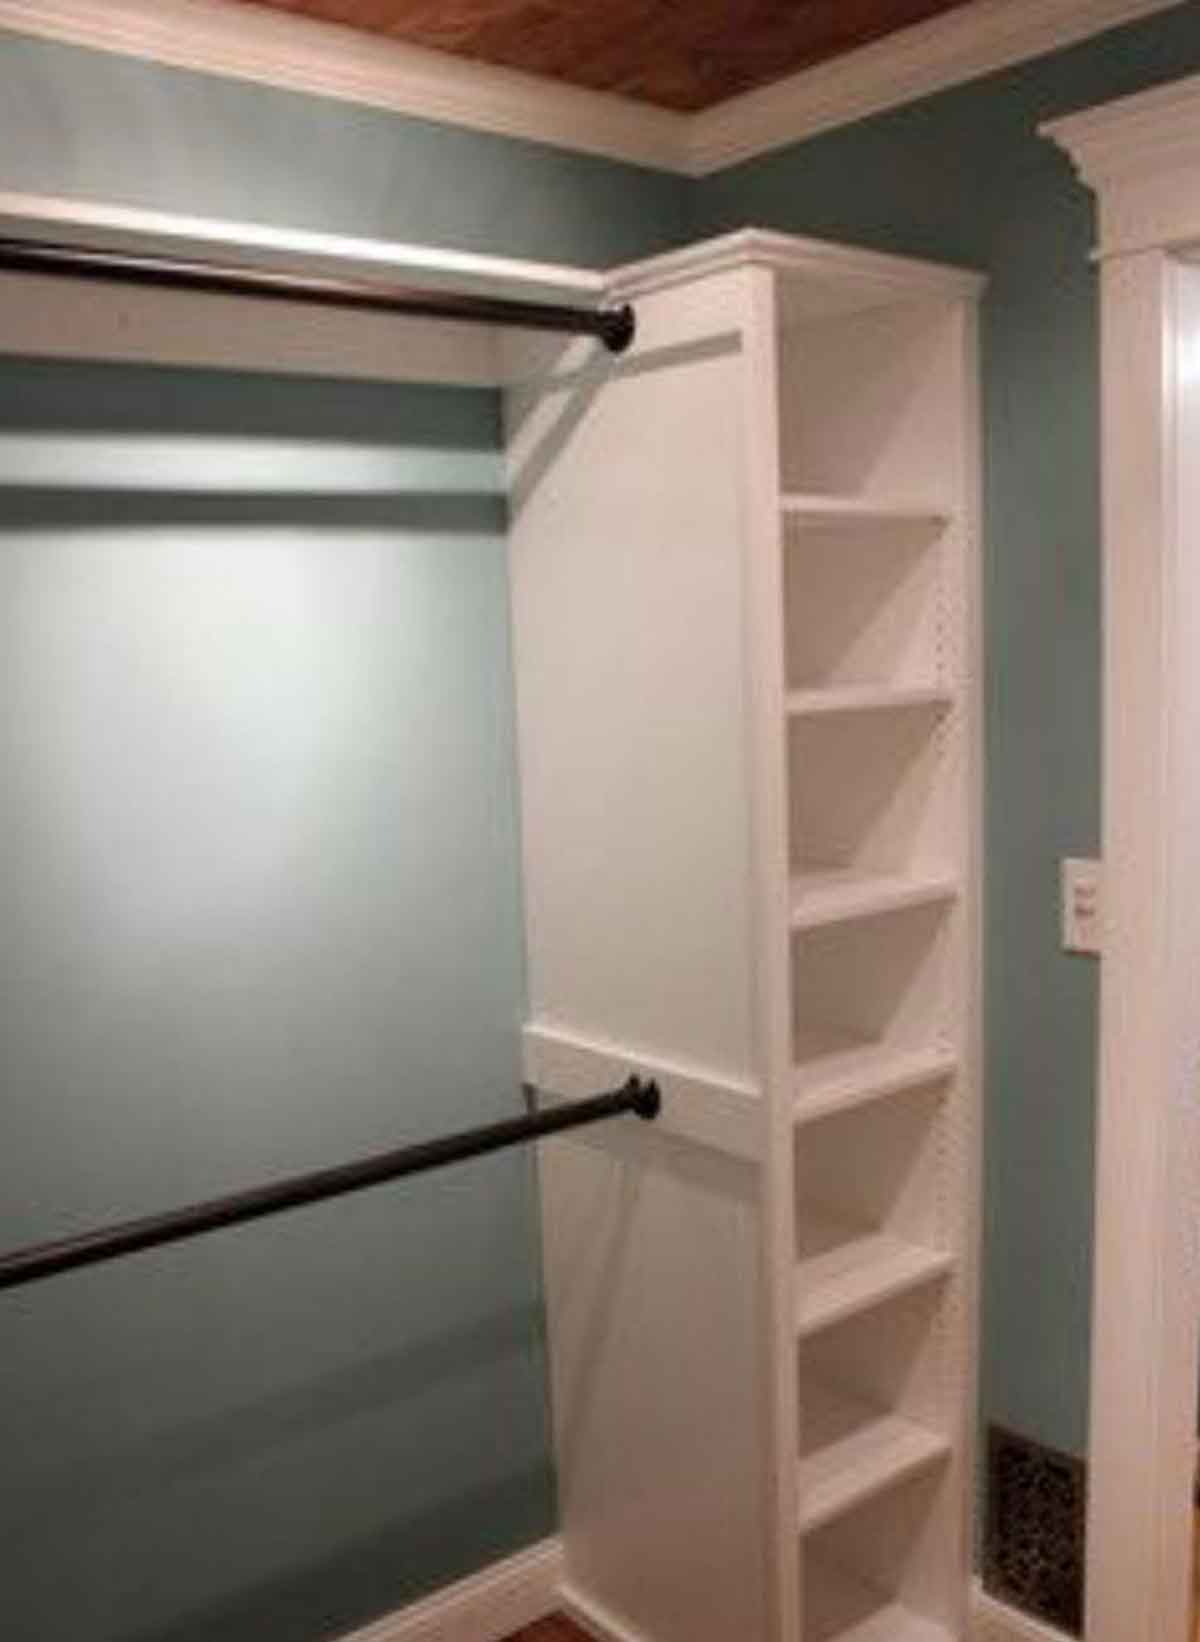
Closet #1 Why not start out with an Anna White, she is after all my hero and most of her designs are straightforward to build and beautiful. Two of the three closets I built were to encourage my children to hang up their clothes and have no excuse for putting them on the floor. Anna has step by step instructions so I won’t spend much time explaining here. Anna used screws to tighten the shelves into place from the outside of the shelf, she also made adjustable shelves with shelf pins, but you could make yours permanent if you wanted.
Closet #2 Another great option is to consider a floating shelf as found here at buildsomething.com.
To get this look you need a support boards screwed into studs like this. The shelf is then built onto this support board with another support board underneath the shelf where it is floating off the floor.
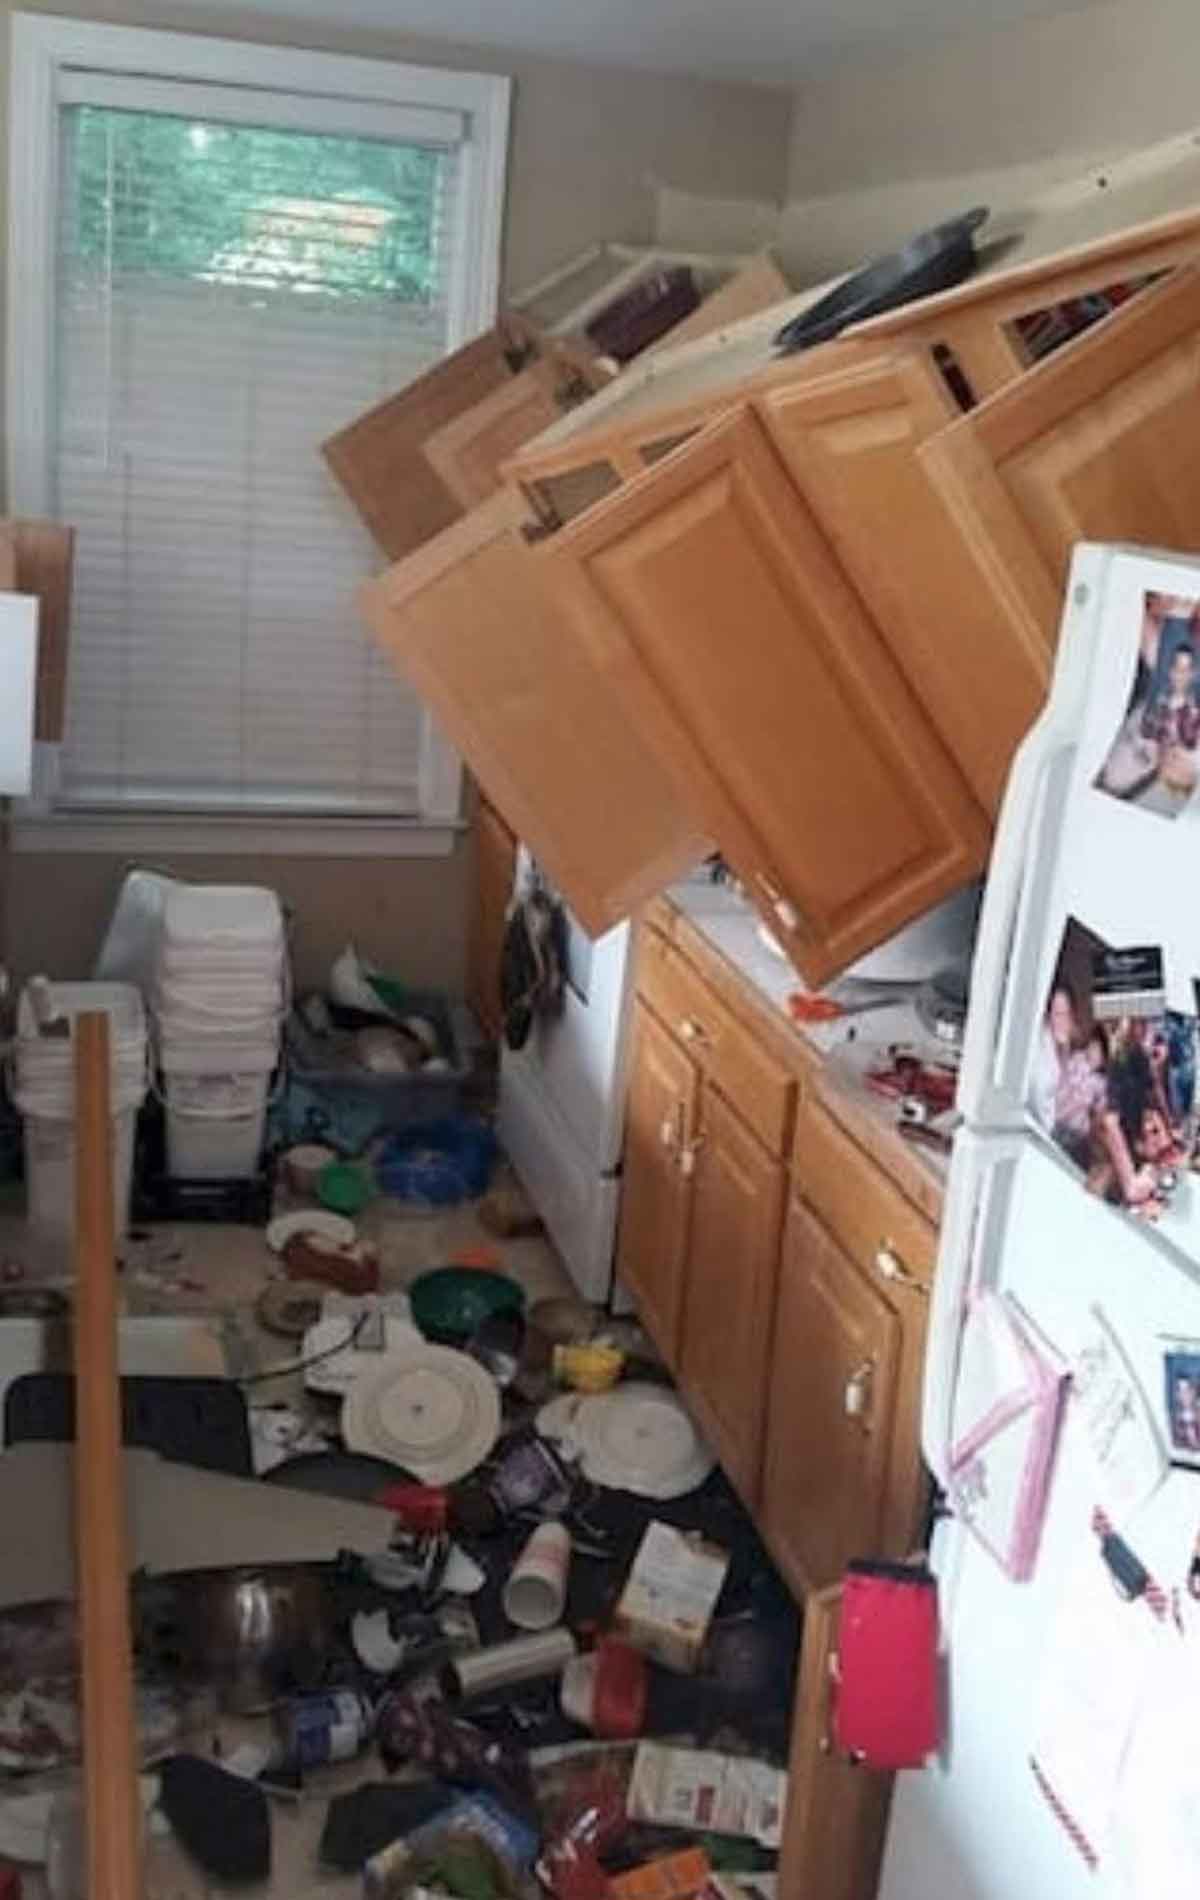
In fact support boards are needed in all the areas pointed at by an arrow. This allows you to add lots of clothes to your clothes rod, lots of stuff on your closet shelves and not have a disaster. This photo (minus the arrows) is found at garymkatz.com I can’t provide the exact link because I could not find it! So sad, but it was labeled with their website and I want to give them credit.
And this is what I mean by disaster. Find those studs and secure your support boards and shelves well.
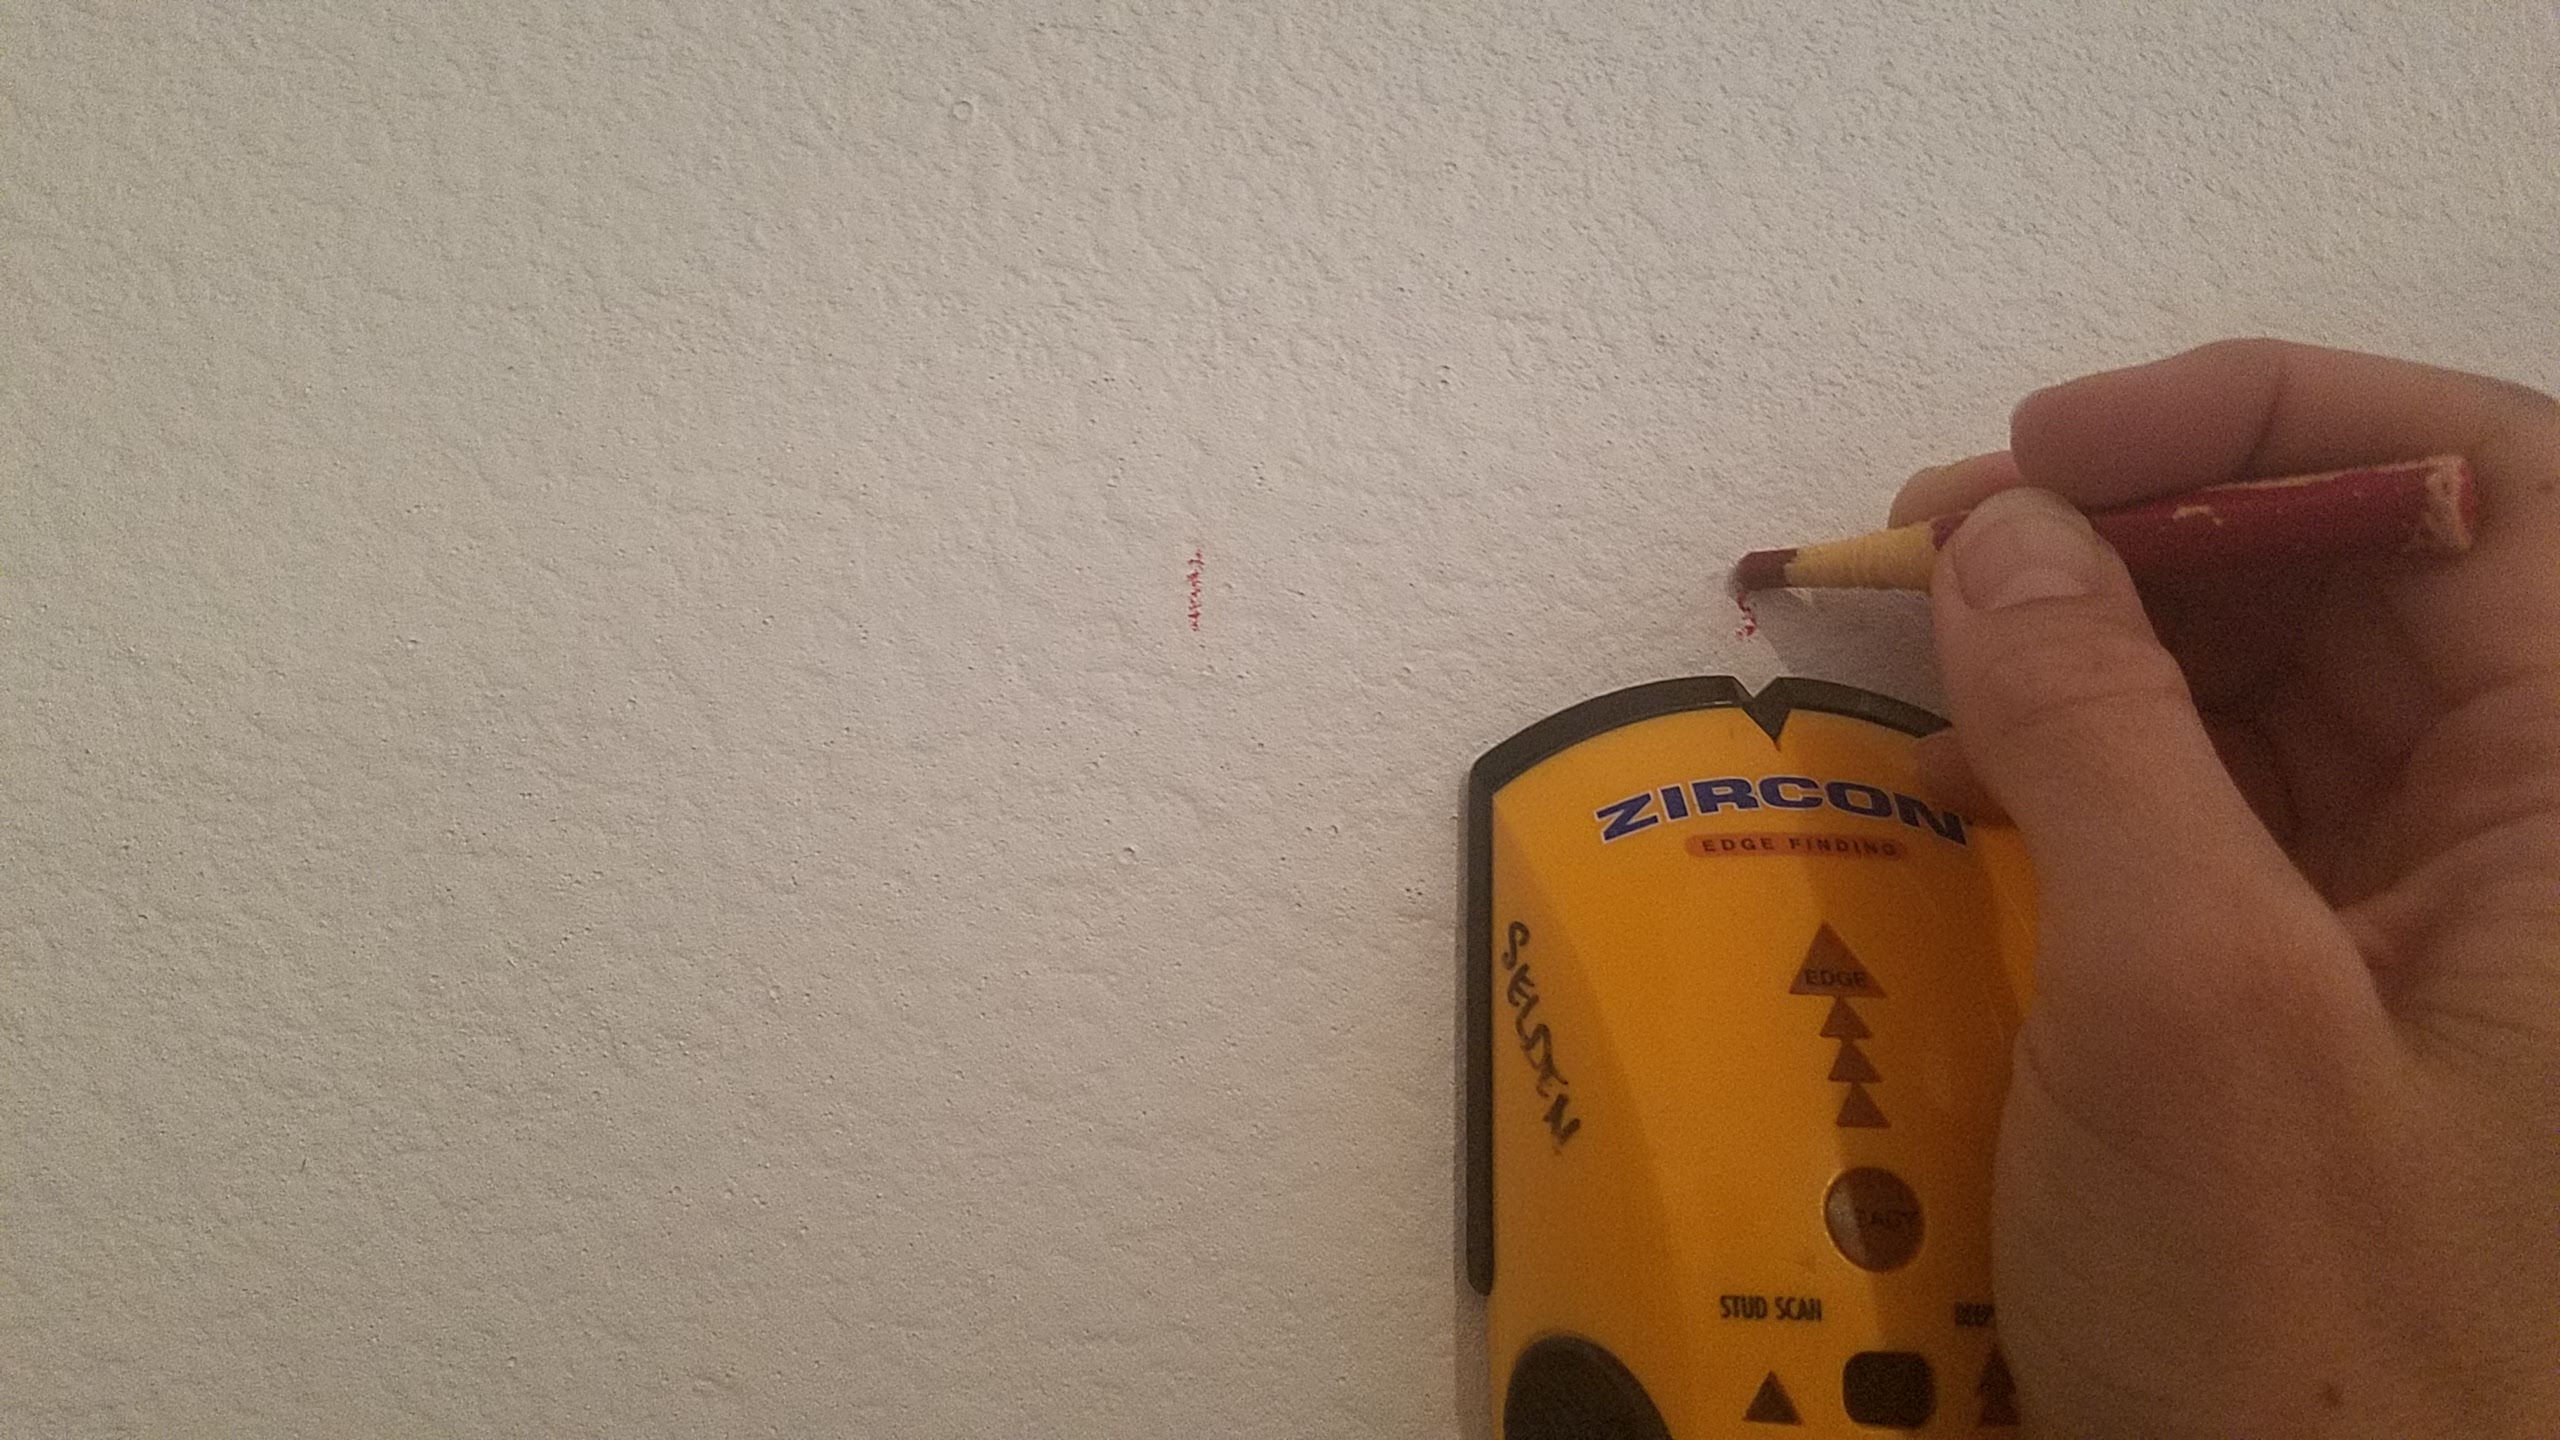
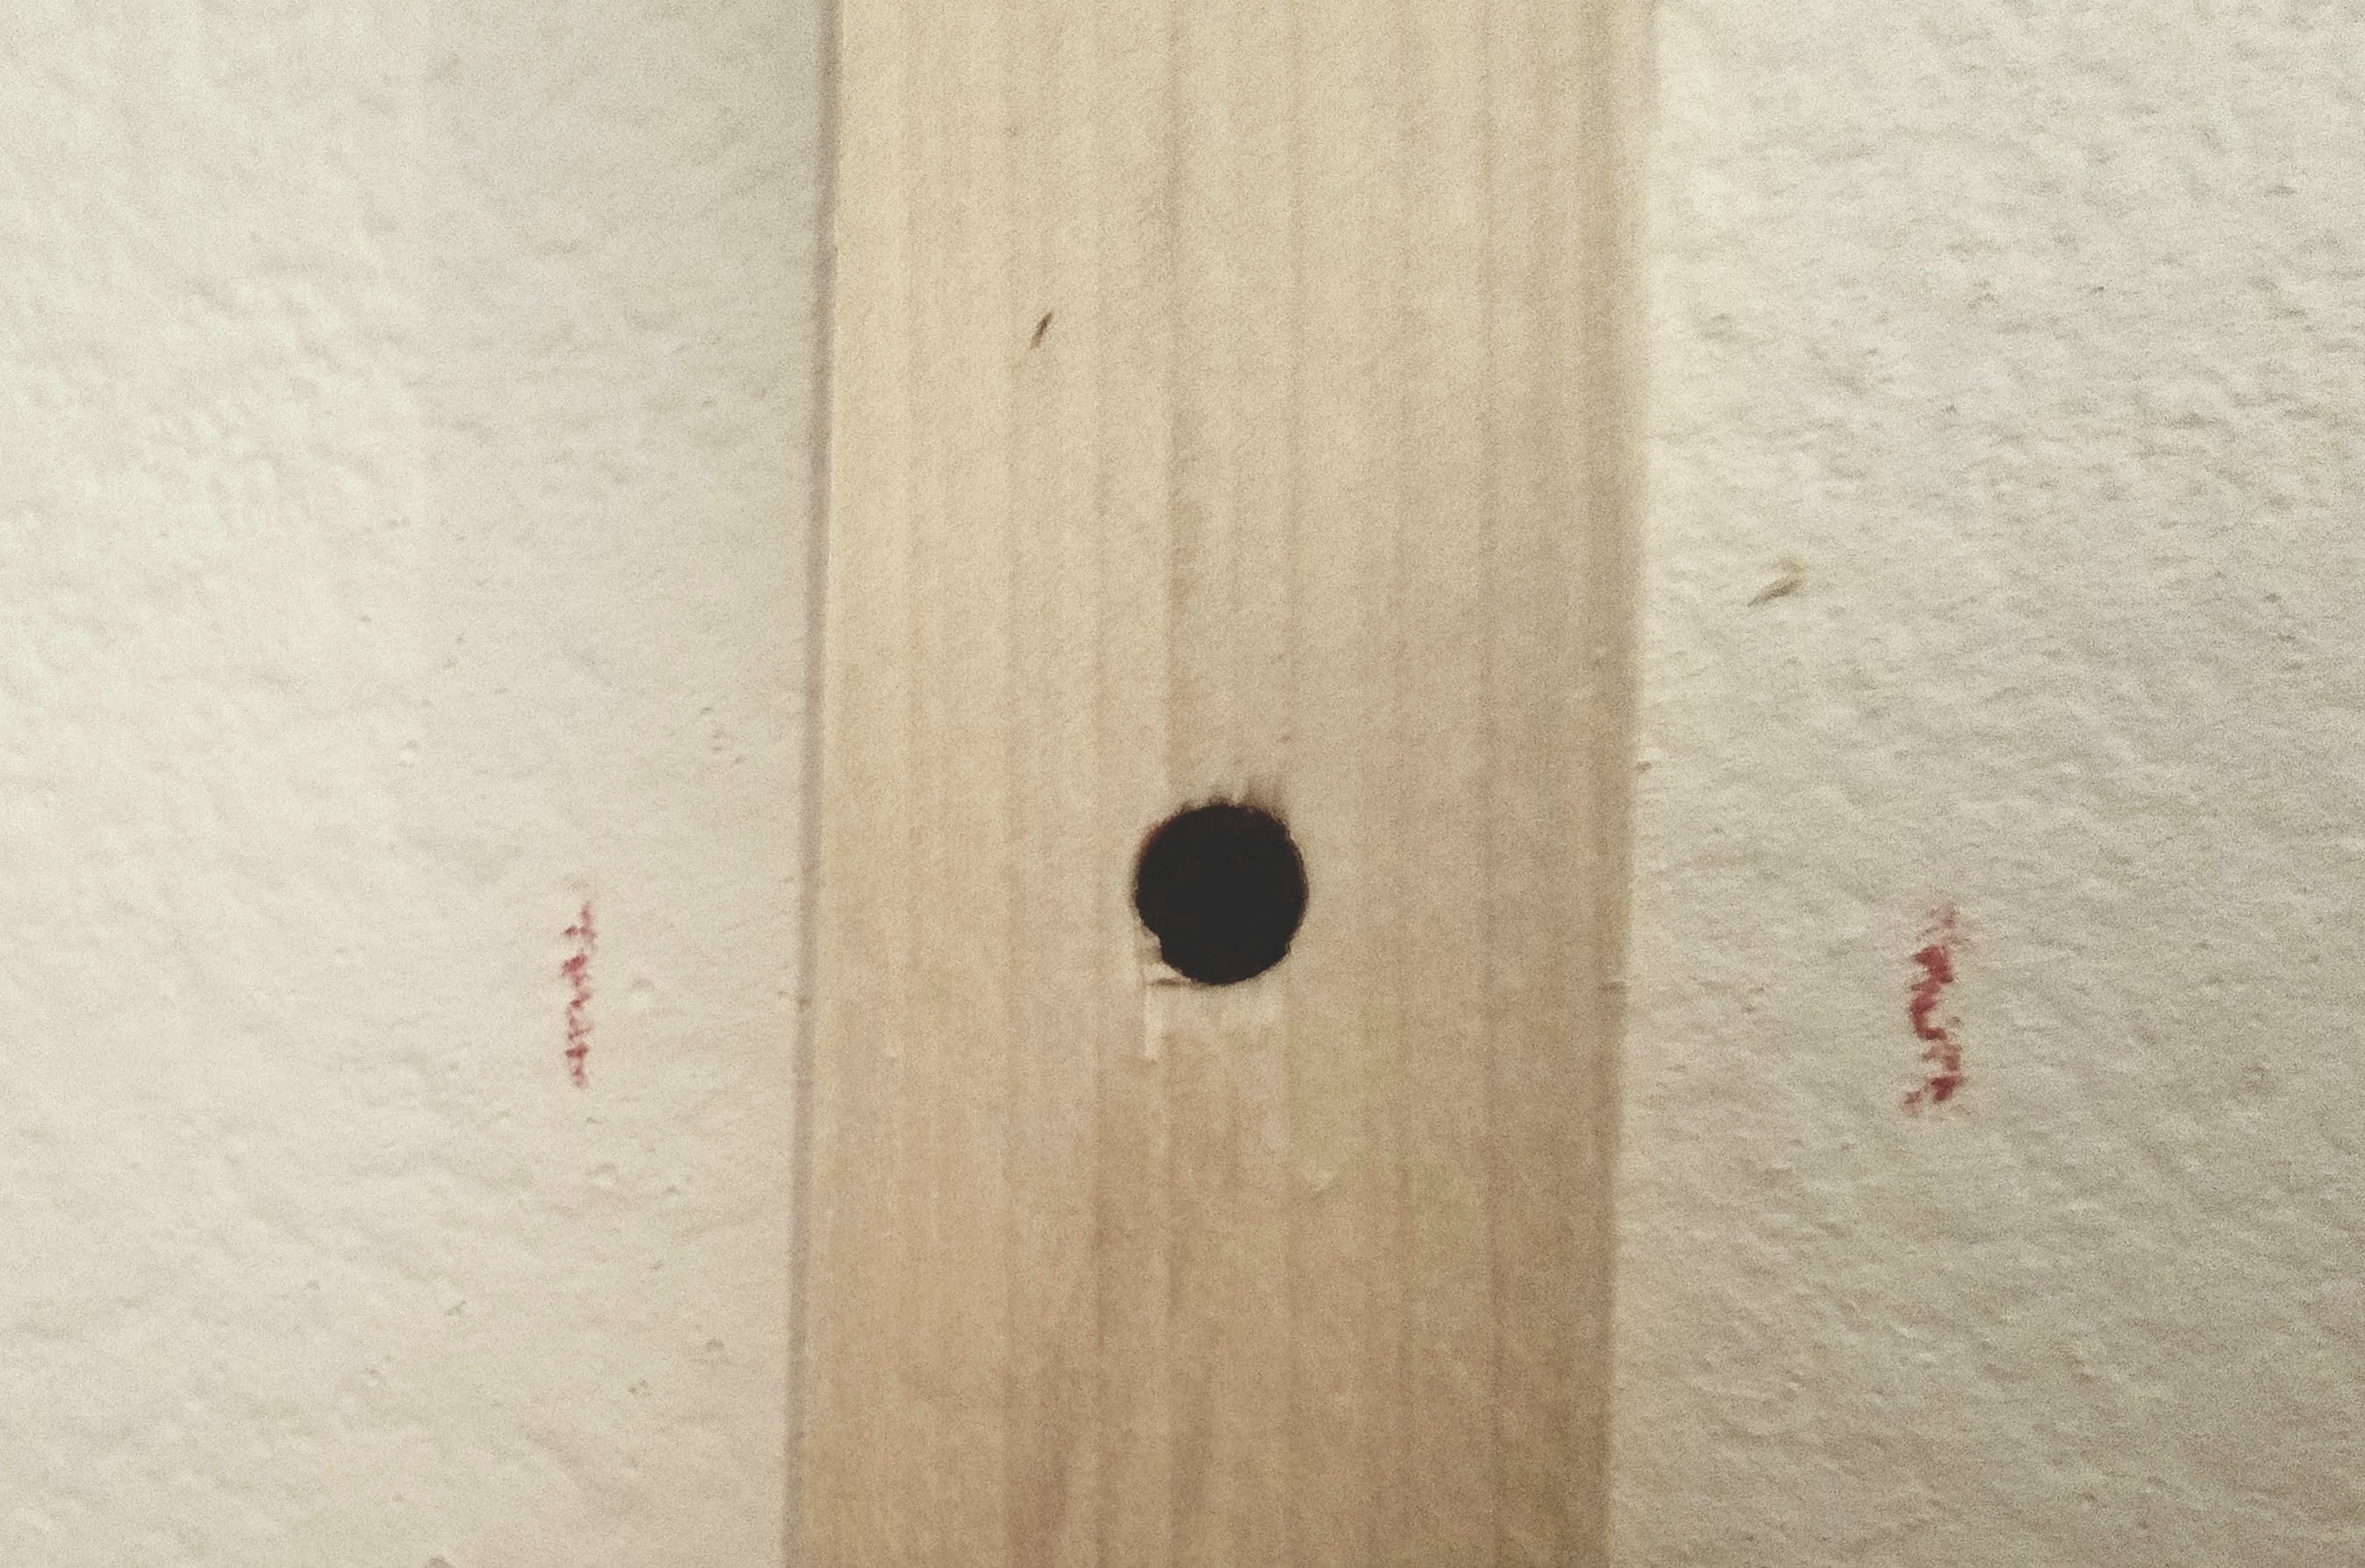
How to find a stud – as in a 2×4 behind the wall, I know what you were thinking 😉. If you are using a battery operated stud finder – first, hold down the button on the side of the stud finder, move from left to right, when it beeps make a mark. Now move from right to left, when it beeps make a mark. It should look like the picture below. This is an estimate of where the stud is. Place your screw between the two marks.
If you have a magnetic stud finder simply move the stud finder back and forth feeling for a magnetic connection to a screw in the stud. When found it will stick to the wall like a magnet on the fridge. This method is much more accurate as it actually finds a stud, where the battery operated at times may find a wire, the exact thing you don’t want to drill into. I have the battery operated stud finder, that is breaking and had to borrow one. When I read reviews the magnetic stud finder was highly rated, I think that will be my next tool purchase.
You will know for sure that you hit the stud because the screw will give a bit of resistance and pull into the wood. Remember to pre-drill to avoid split wood. If you are covering a large section of closet, 4-6 feet, it’s ok to miss a stud here and there, but make sure you have at least 3 studs secured to your support board.
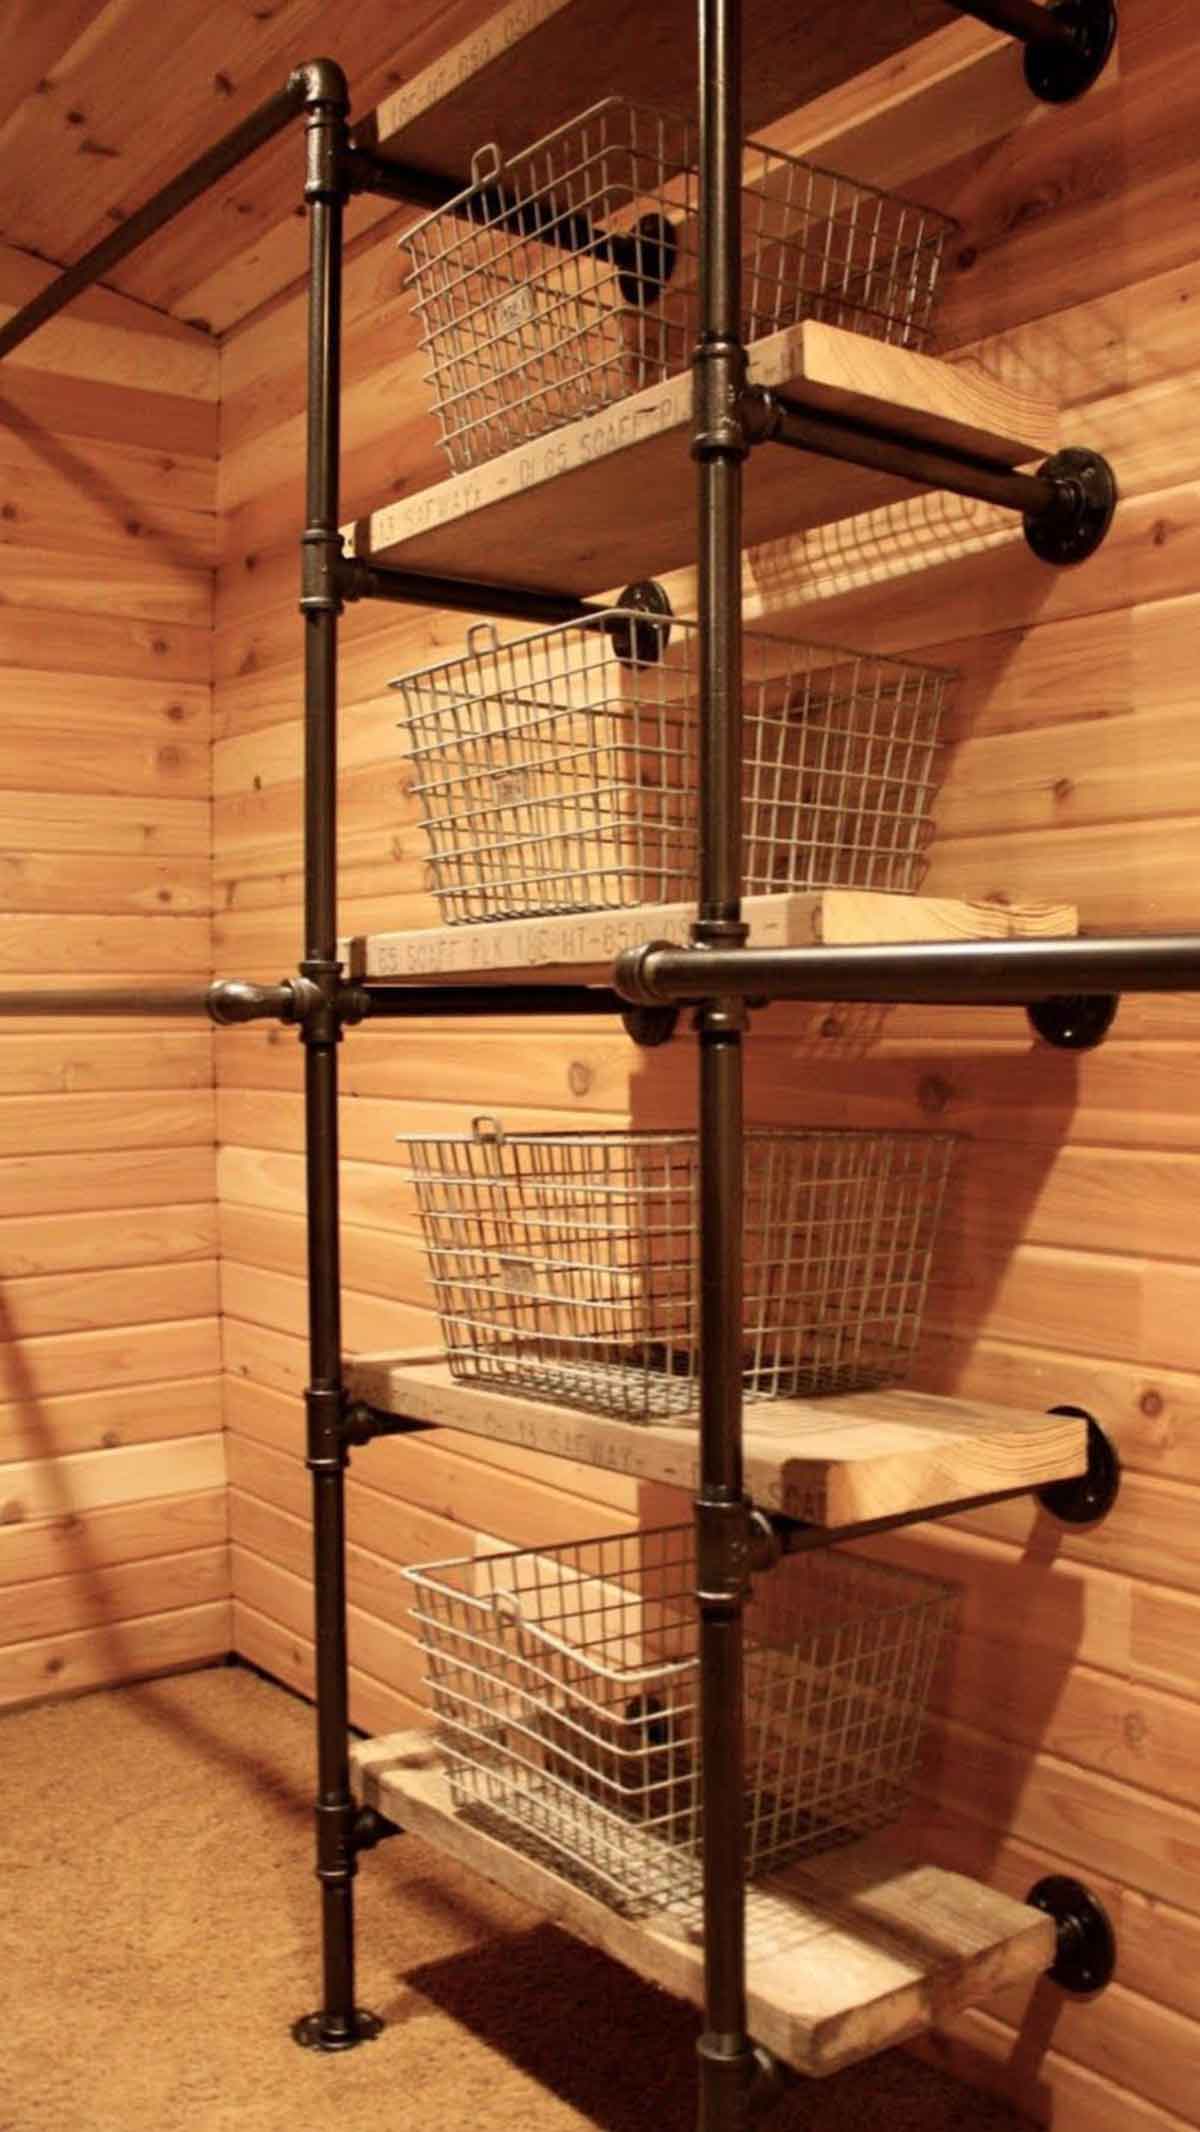
Closet #3 I love this look from Mysweetsavannahblog.com, its modern and and sleek, but calmed down by the cedar plank walls and ceiling. To cut plumbing pipe you will need a pipe cutter. You are then able to get this whole look. Check out thisoldhouse.com for a great tutorial on how to cut the pipe.
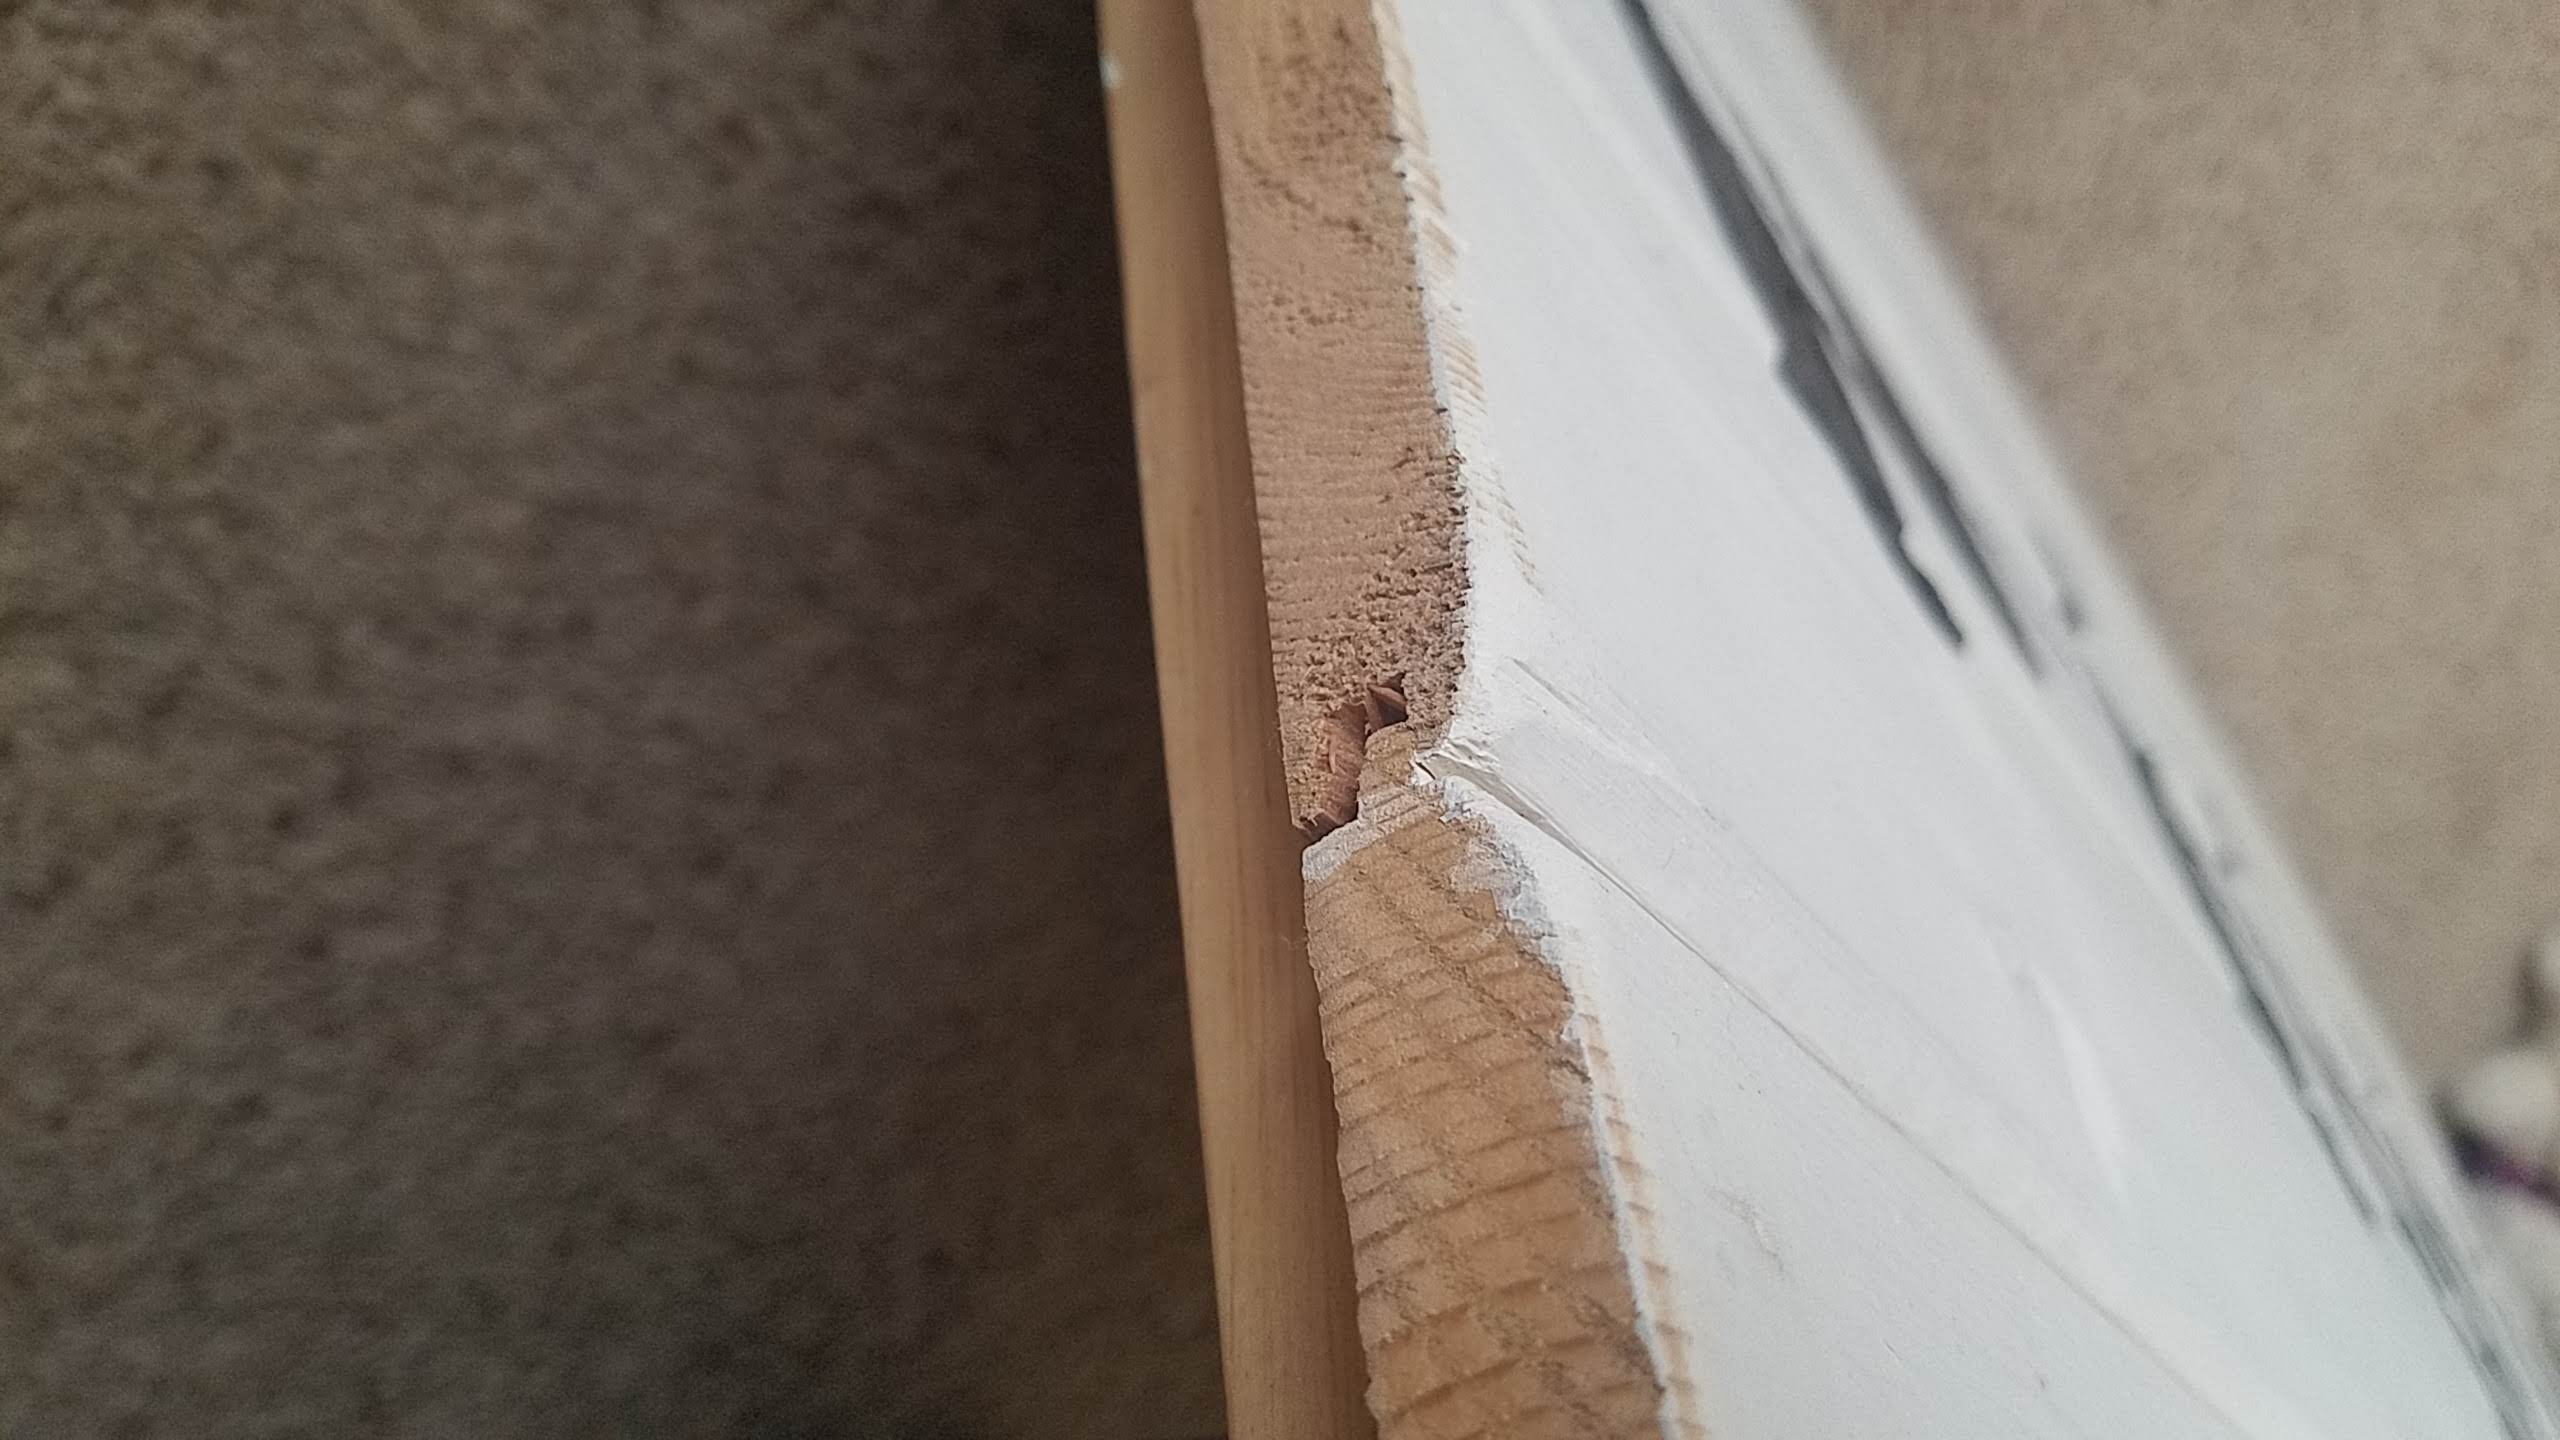
If you really want the ceiling and walls too, the pieces hook together tongue and groove like you see below. make sure you use a level or right angle because the boards can quickly tilt at an angle, by the time you notice they’re already nailed into place and it’s a pain to fix, not that I’ve ever done that 😉 , I’m just trying to save you time.
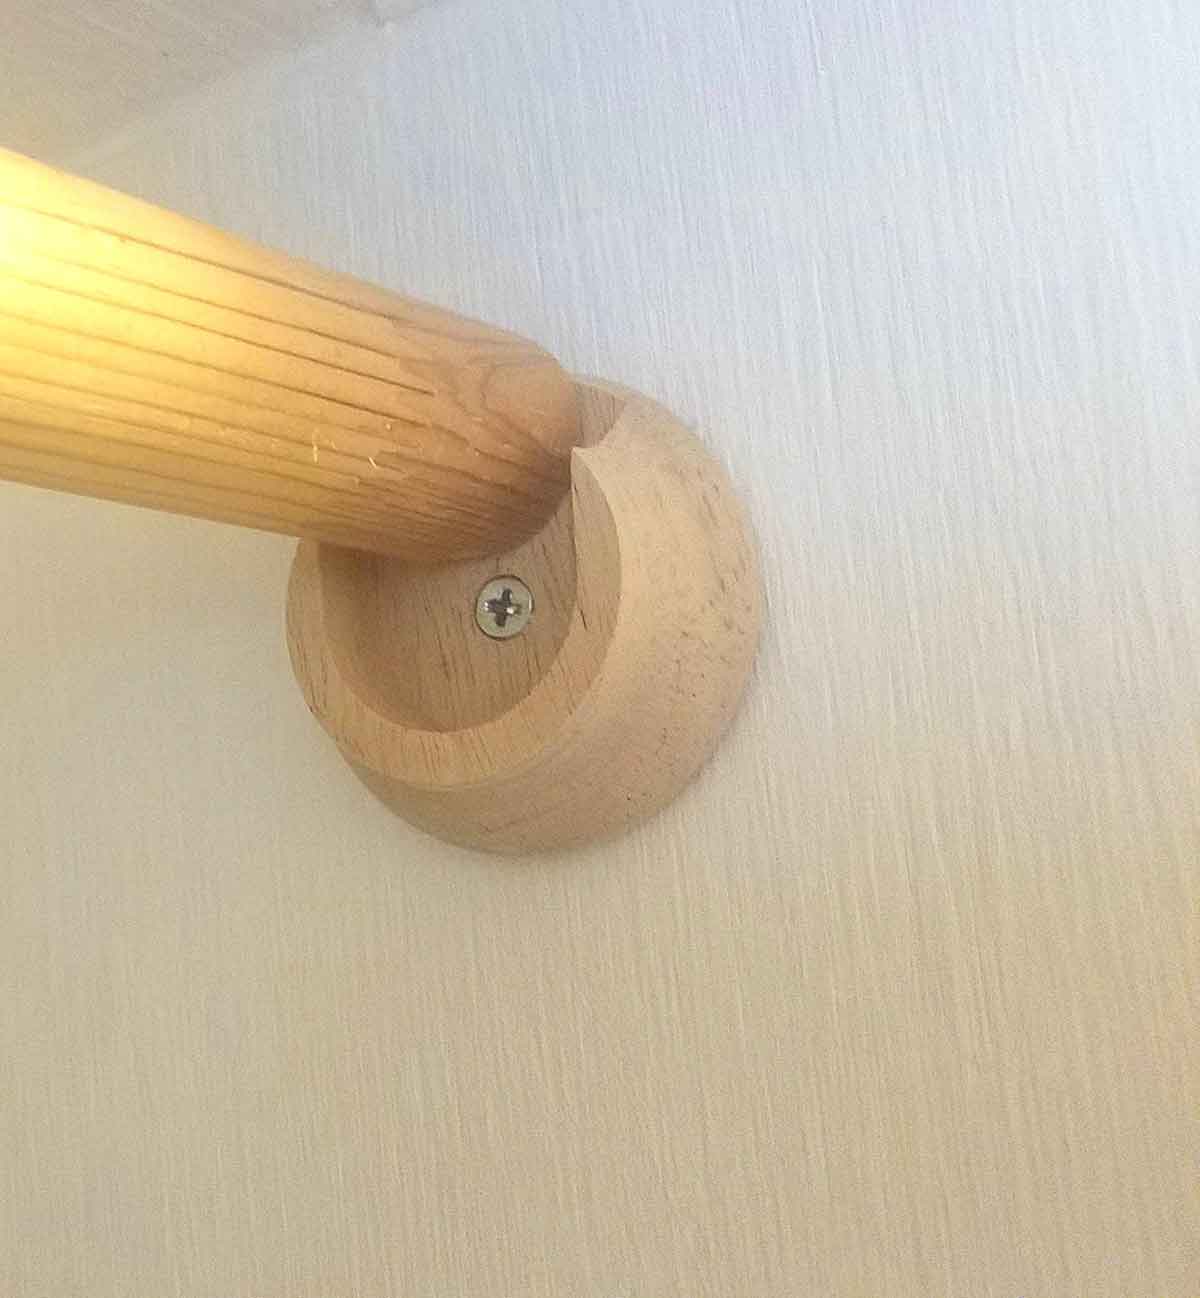
Closet #4 This design found on Houzz, is a great example of reinforced clothes rods. Put a hanger with a shirt on it and give a few inches, this is how far from the wall you should place your rod holder (about 11 1/2″). I like to make sure at least one end is in hardwood or the stud. You can see in this picture that a piece of wood has been fastened to the shelf to hold the rod in place.
To install the rod holders make measurements and screw into place with the opening facing up. Then simply cut the clothes rod to size and slide into place.
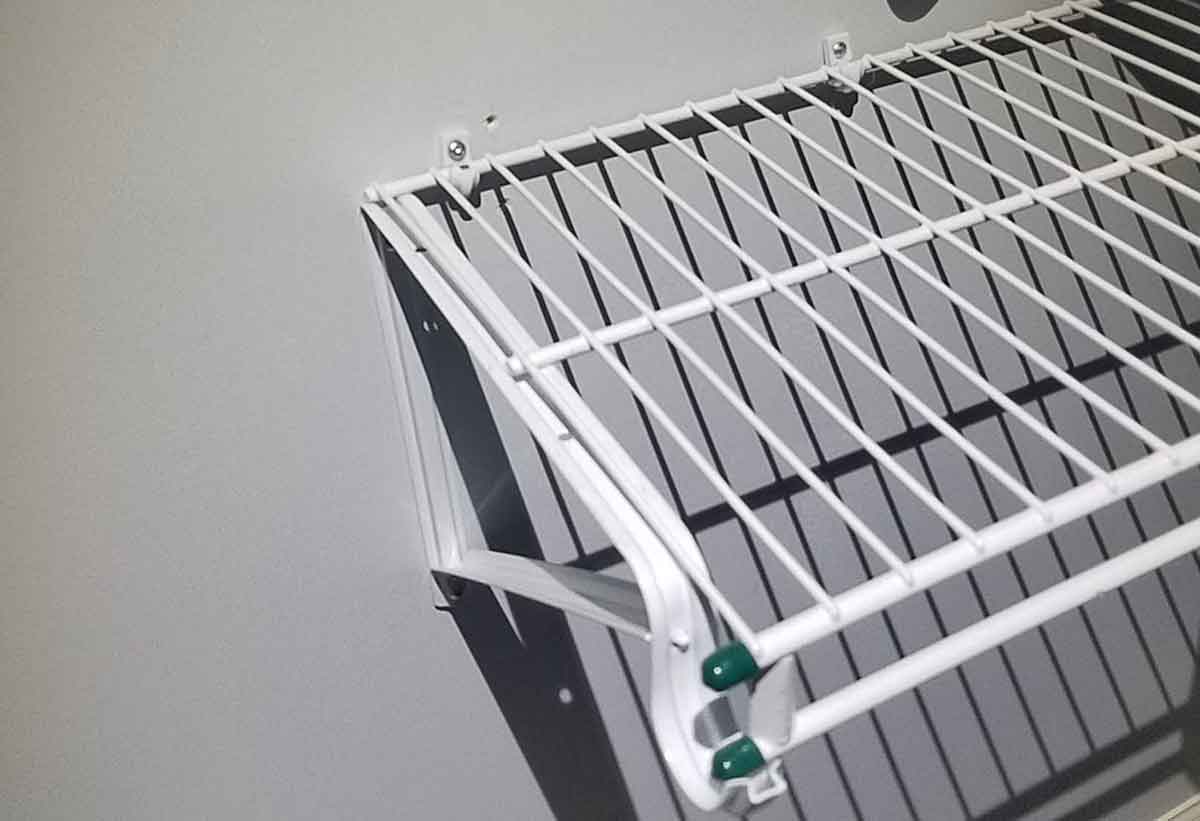
For shelving that is below eye level, I like to install metal, wire shelves so you can see what you have without having to bend down. Check out your local ReStore to find wire shelving to do our earth a solid. I found these at the ReStore, and washed them up then spray painted them to give a nice new shine. Cut to length with a hacksaw or bolt cutters. I would suggest you use whichever tool you can access. A hacksaw takes a long time, but bolt cutters cost a lot for a tool you may never use again. For added convenience there are many options online for wire shelves if you can’t get to a ReStore. Notice that there are plastic support clips along the wall. I tried to get these into studs as often as possible (like the hole there in the wall where I missed the stud and readjusted? ha ha, that happens, I’ll fill that in with caulk and no one will know, except for you of course).
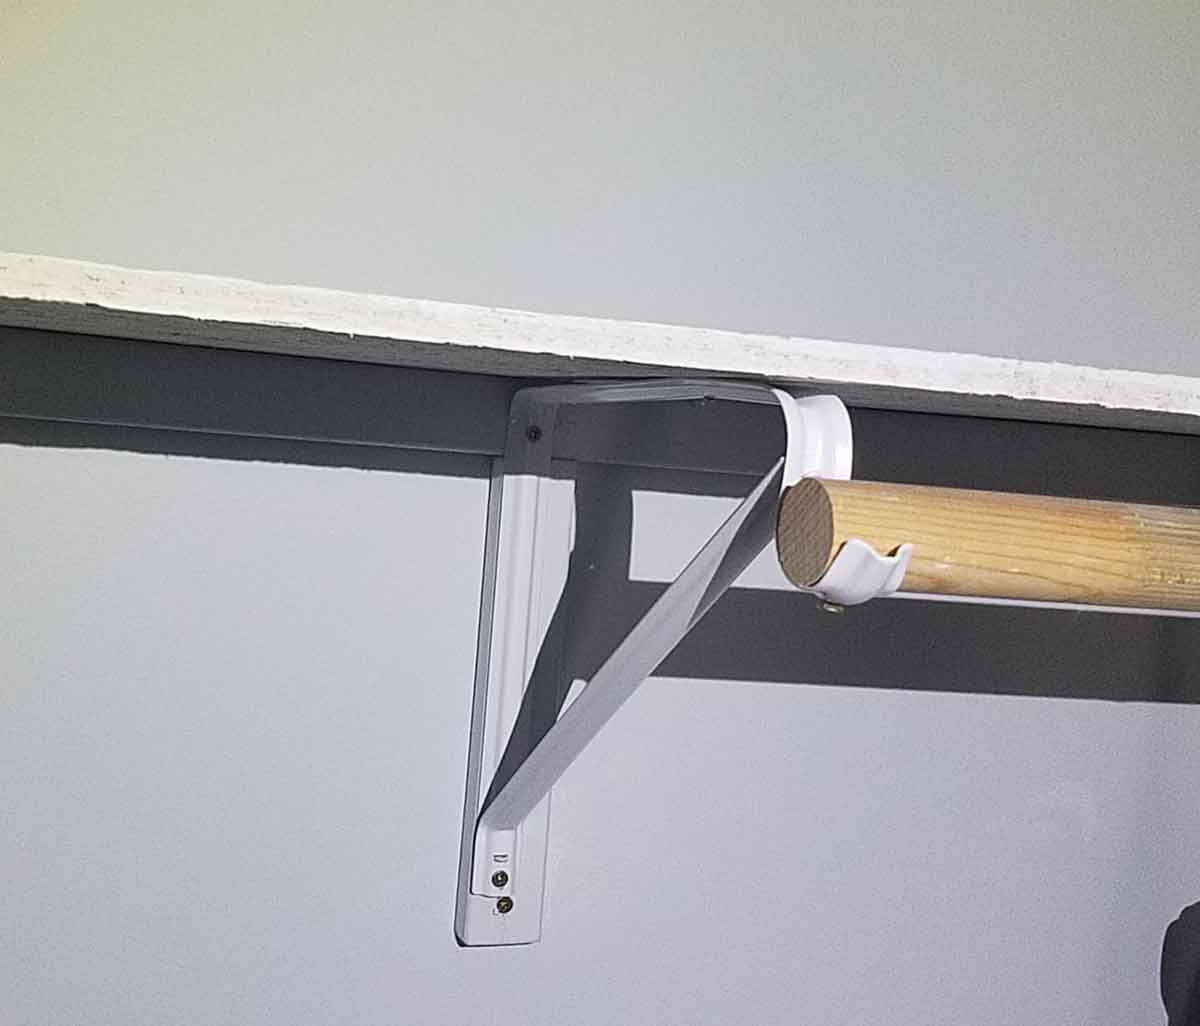
I also used these closet brackets to support the shelf and hold clothes rods. Notice how I have screwed the closet brackets into wood and not just into drywall, this gives better support and makes sure it can hold the weight of the clothes and what is put on the shelf. If possible I try to place my brackets over a stud, if that isn’t possible having wood for the bracket to go into will still give added strength.
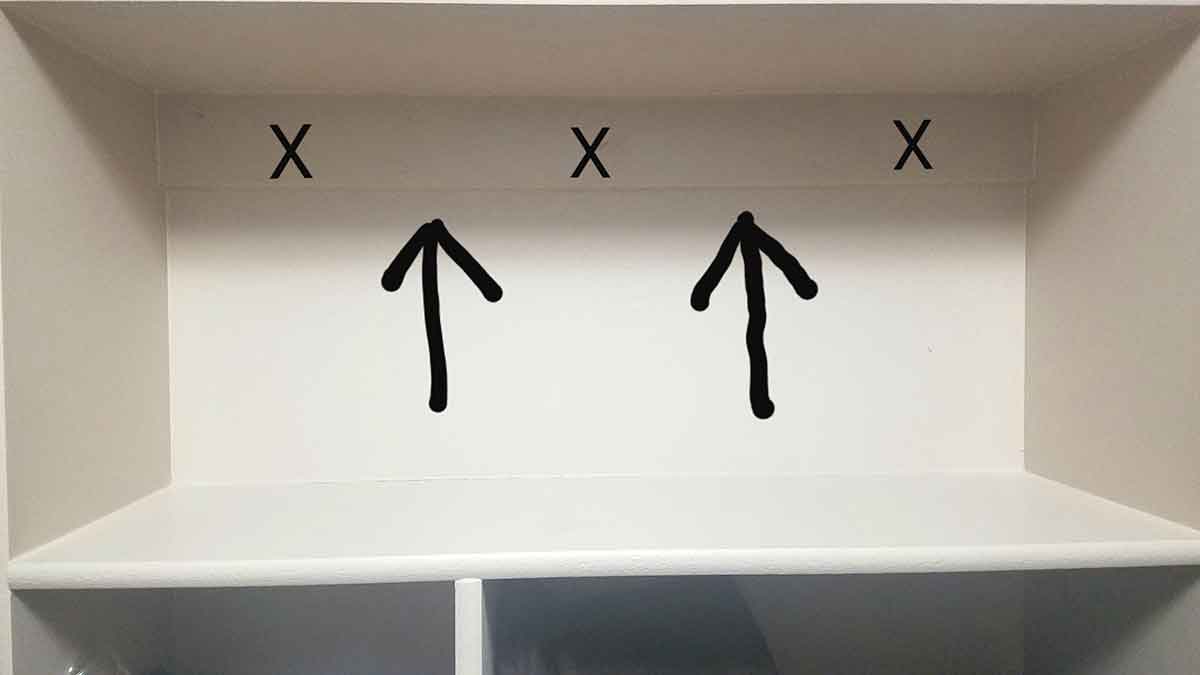
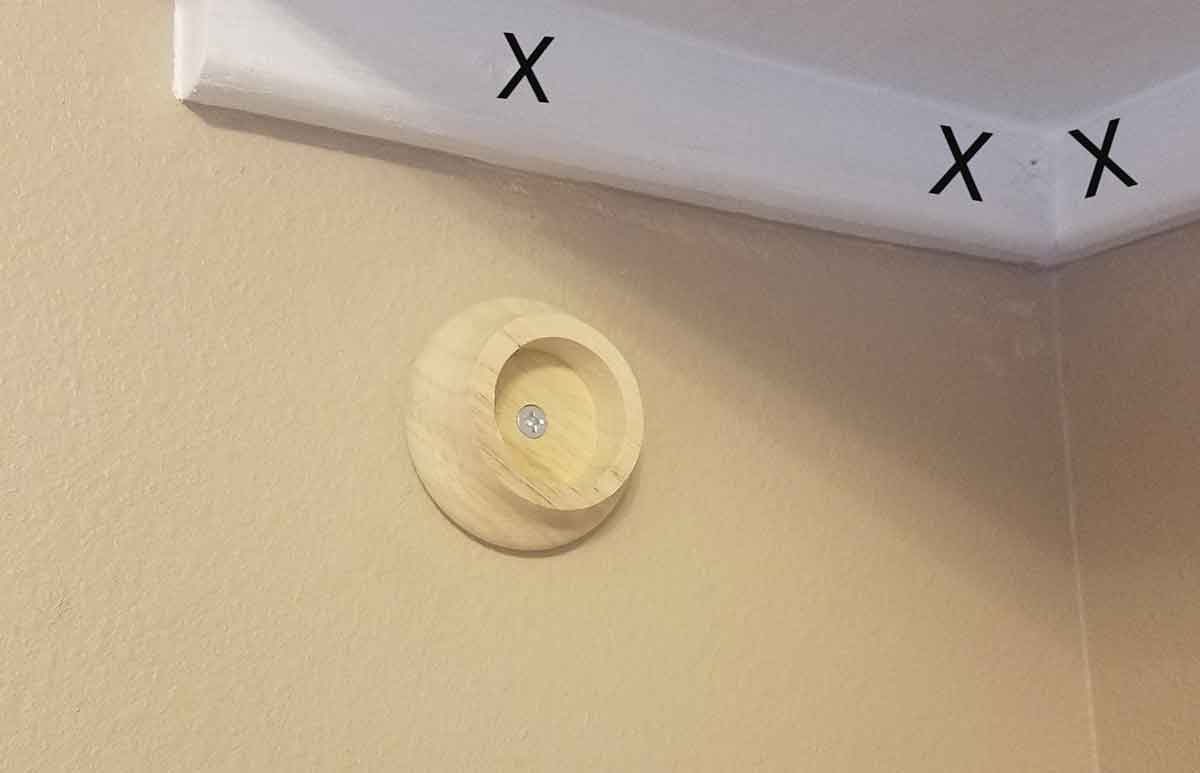
I also support the underside of the shelves in the corner like this. Each X is where it was attached to a stud. I then placed plywood on top of the supports and screwed them into the support boards from above.
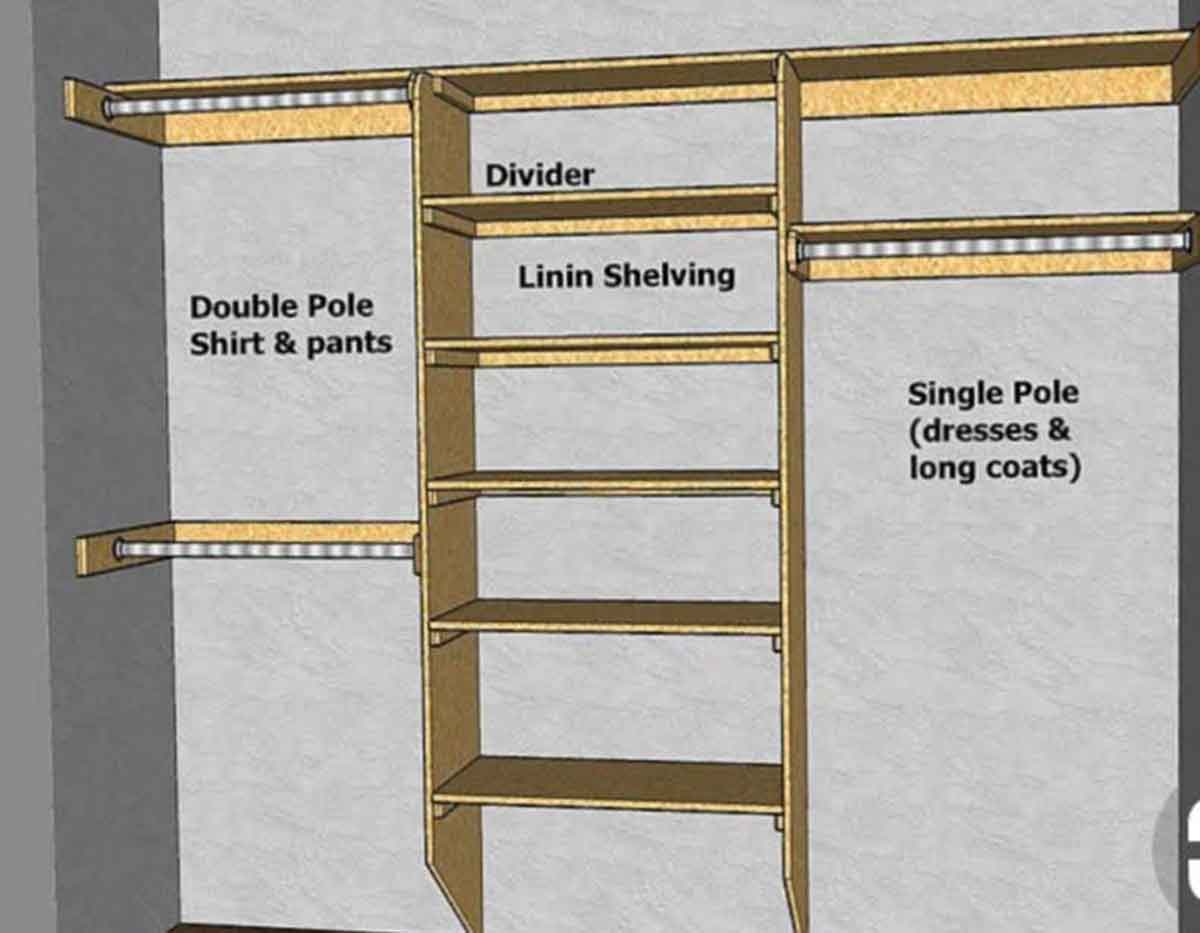
Choosing your own layout is the best part of a DIY closet. It is great to pick what you think you will need. The diagram below that I referenced above from GarymKatz.com clearly shows where to put support boards and how to position clothes rods so you have room for all your clothes. Basic closets usually have one long rod for dresses and long coats and nothing else. I love how efficient shelves and multiple clothing rods can be.
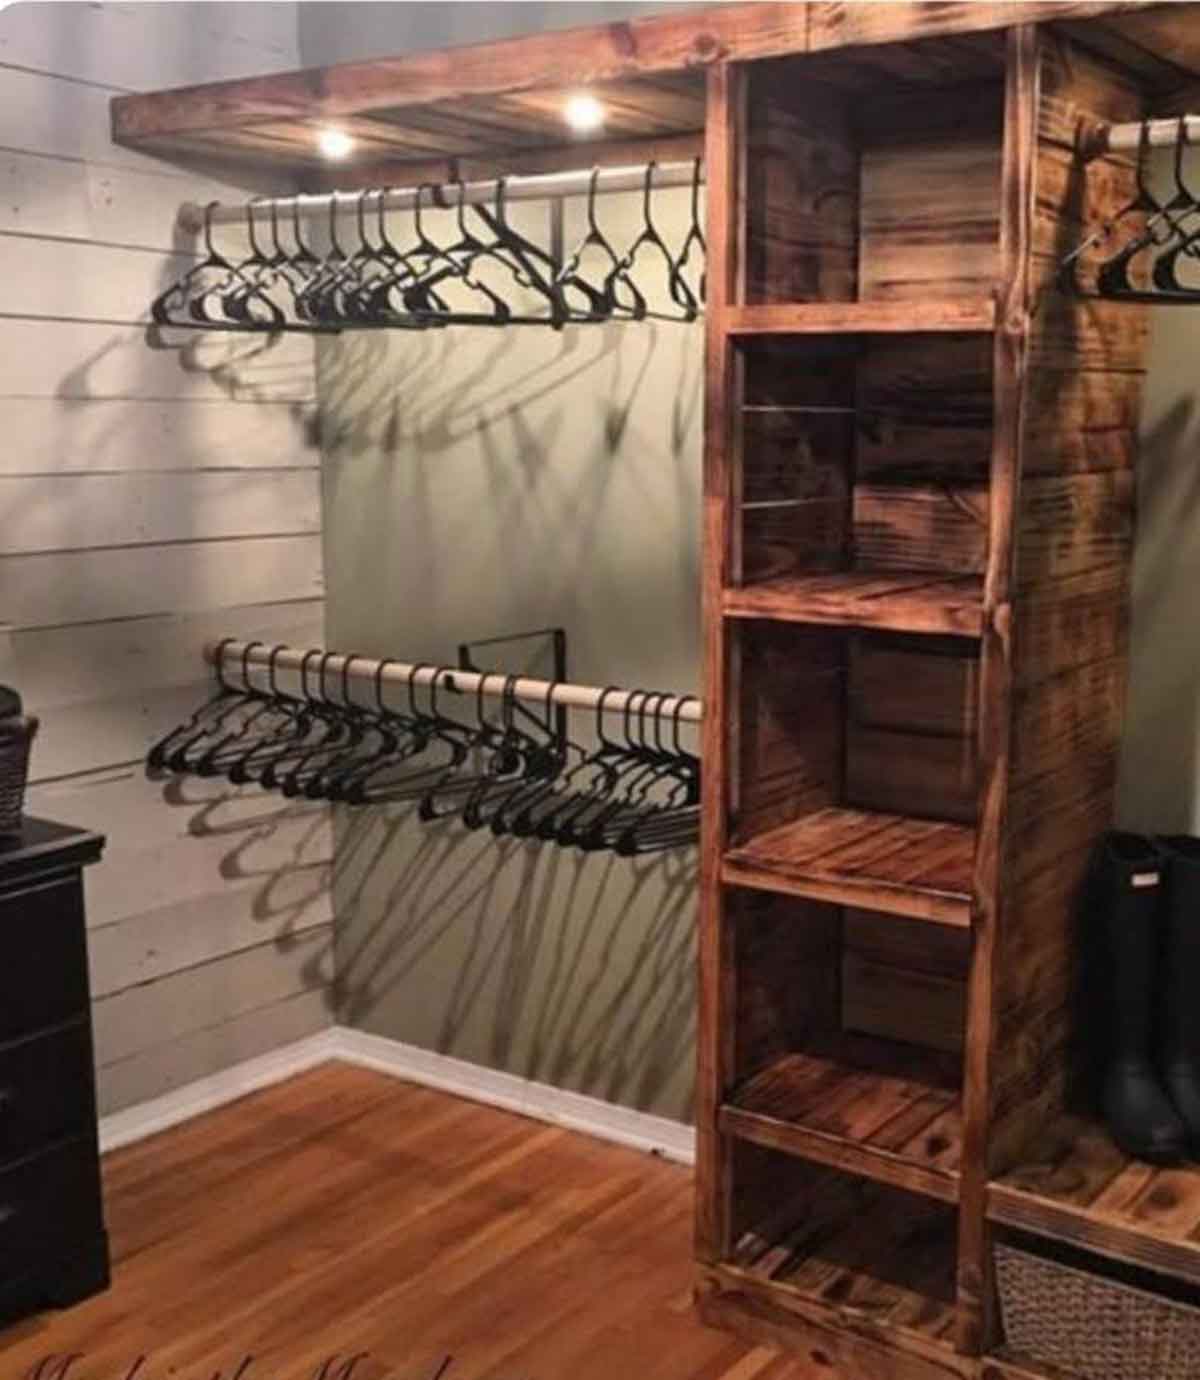
Closet #5 from MadeintheMeadows.com, is a beautiful closet. I love the ship lap on the wall and though the website does not say how they made this closet, it looks like it was made from pallet wood- Yay for reusing! You will see the same concepts of support boards and clothes rods as described above. The one thing this closet has that others don’t are those awesome lights under the shelf, lighting the clothes rod. Pretty awesome. It would be most convenient to have these wired in (the shelves here definitely look thick enough to hold wiring). If you are not handy with wiring or don’t want to hire it out, a close second is battery operated lights that can be installed anywhere and have a remote control. I used these in my kitchen to add extra light, they are awesome.
Well, there you go, my quick 5, closets you can do yourself. Anytime you spend building shelves in your closet is well worth the sacrifice. It makes life easier and less cluttered and if you have children they have nothing to hold them back from cleaning up. I wish you well on your upcoming projects. Post below your closet successes and remember to share this with someone who is looking to build their own closet.
Hi, I’m Natalie. I’m a mother of four, an artist, and a DIYer that loves to reuse, recycle, and refurbish. I like power tools and teaching others how to save money while improving their home.


 There are three things you can do for windows each costing $5-10. First
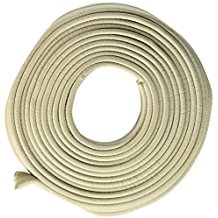
 The third window treatment is your classic
 So this is where you save money and stay warm. Wear a
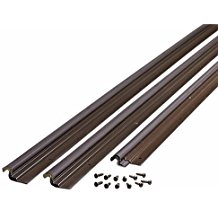 Replace
 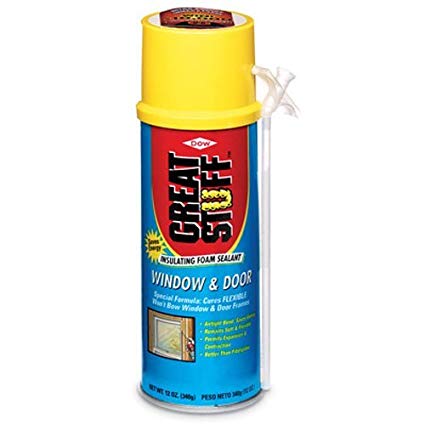 Instead I bought 8 cans of


Recent Comments