Here you will find my favorite tools and products to use while building. I hope this is helpful as you work on your own projects.
This page contains affiliate links. Which means if you decide to purchase from one of the links, I receive a small portion of the sale at no additional cost to you.
I have been pleased with the performance of these products and recommend them.
Paint and Lacquer
Cheap Paint Brushes

Most projects are just fine using cheap paint brushes in fact sometimes they are better. Cheap paint brushes have fewer brissles than more expensive ones, this actually makes it easier to get a finer edge on furniture pieces. When applying lacquer, it saves money and hassle because you can simply throw your brush away when you finish instead of working really hard to salvage a nicer brush.
Give it a try, they don’t cost a lot and you might find you like them.
Tip: keep a wet paint brush in a zip lock bag between working on a project. This keeps the paint from drying and you don’t have to wash it out after every use. It can remain this way for a few days before paint begins to dry on the edges.
Wood Glue

Elmer’s wood glue is great for bonding wood. It adds strength to the wood and makes your pieces sturdy. This was much needed when I restored my childhood dresser.
Tip: wipe away all drips and streaks of glue while wet. Hardened glue is difficult to remove and prevents stain from penetrating wood.
Caulk Gun
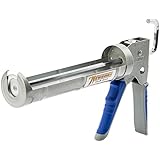
Caulk is the best when it comes to finishing up a project. It fills in gaps and cracks and gives your piece a high end look when you are finished. Skip on the little tubes of caulk, they cost more and are harder to use.
Tip: cut your caulk tube on the small side (you can always icrease the size if needed). A small bead size allows you more control. When storing, push out a marble size bit of caulk and seal the tube off with caulk. Next time you are ready to use simply pull off the dried caulk on top.
Safety Glasses
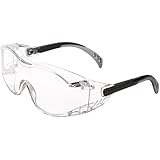
These are my favorite eye protection while working. I can see well out of them, which is important to keep your fingers free of the saw blade, and they aren’t that pricey.
Tip: make sure they are stored safely, away from dirt and wood chips that may scratch them. Once they’re scratched they aren’t nearly as useful.
Sanding Block
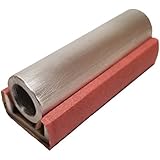
There is just something about the control that comes from an old sanding block. You can always just wrap sand paper around a block of wood, but I like how this holds the paper in place for me.
Tip: use when sanding away stain or paint along the edges of furniture. Gives great control and let’s your work space have some quiet from the power tools for a while.
Hammer
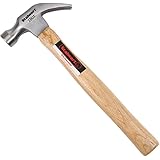
A hammer, the most basic and useful tool in building. Just give a few short taps to get the nail set then hammer in with longer, stronger strokes
Tip: remember to pre-drill before you hammer. Many if not most woods, will split under the pressure of the nail. Save yourself some grief and drill a hole slightly smaller in diameter than the nail.
Rubber Mallet
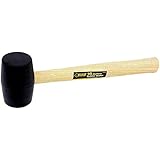
One of my best friends in DIY projects and furniture upcycling. Perfect for when you need to tap something back into place without leaving a mark and save your ears the clank of a metal hammer. Perfect for installing your own paver edge.
Tip: use a wooden block and or cloth to further protect your furniture piece and your hammer.
Hand Held Wood Plane
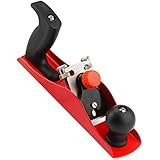
Great for smoothing out inconsistencies in the wood. Wood planes allow control and blending around wood joints,
Tip: keep your wood plane very sharp for best results.
Flat Head Drill Bits
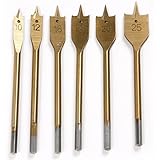
These are so useful. Simply insert in your power drill and tighten. An easy way to get large holes in hard to reach places. I have used these to add power strip access inside a drawer for a charging station or make my pull-out trash bin. A flat head bit can also be used to create a slight indent for a screw head to fit bellow the surface of the wood.
Tip: to select the correct size place the object you need to fit against the flat bit. The bit should be slightly bigger on both sides.
Finish Nail Set
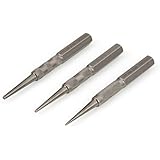
Exactly as the name suggest, these help you add the finishing nails, the ones that will be seen from the finished project. Helpful in hitting just the head of the nail and avoiding a large hammerhead indent in your finished wood. Often used in adding baseboards and trim, decorative nails to the edge of a newly upholstered chair with nailhead trim.
Tip: When the top of the nailhead is 1/4 inch from the top of the wood stop using just the hammer and use the nail set. Hit the top of the nail set with the hammer, driving the nail just below the finished wood.
Chisel Set
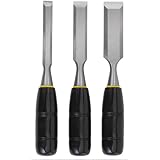
Another tool that allows you to get in small detail areas. I used a chisel to create the leg supports in myFront Porch bench.
Tip: Use a rubber mallet to tap on the end of the chisel, with the chisel held at a 45 ° angle.
Jigsaw

Useful for cutting a curved edge, removing sections of wood in the middle of your piece or cutting at an angle. Use a flat head drill bit to create a hole then switch to the jigsaw to cut out in the middle of a piece. You can see this technique in a drop top trash lid for my kitchen island counter.
Tip: remove the battery (or unplug) when adjusting or replacing the blade to save your fingers.
Square
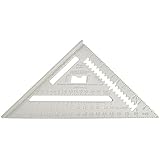
Use for getting 90° angles while framing walls, building bench seats, applying a mural or removable chalkboard surface. I use this in most projects built from stratch. Making sure you have square edges and corners allows for easier building.
Tip: this is an item that is easy to forget. When prepping for a project get out all the tools you will need upfront to save yourself time.
Dremel Tool
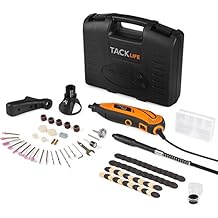
Great for small detail cuts, removing old finish in small spaces, as with this antique dresser. Dremel tools are also useful for cutting outlet holes in drywall.
Tip: when buying a Dremel tool pay attention to the ratings and accessories. This one has a flexible extention wand to allow it to be used more like a pencil and get into even smaller spots.
Level
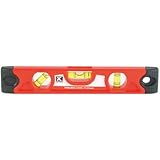
A level is a quick way to make sure things actually are straight. Close up it may look straight, but once you step back it’s easier to see slanting. Save yourself trouble and use a level. Handy for making sure a framed wall is plumb or your picture is having straight.
Tip: make sure the bubble is balanced between the two lines, not just in the two lines.
Power Drill
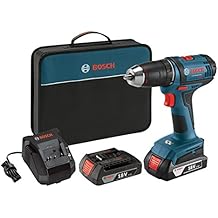
If a power tool could be my best friend, this would be it. Two rechargeable batteries so you always have a fresh one on hand, great power for getting in the toughest screws and can take some hard knocks and keep running.
Tip: when pressing down to get a tough screw in place more your extra hands further away, if possible. It’s easy to slip and hit your hand.
Circular Saw
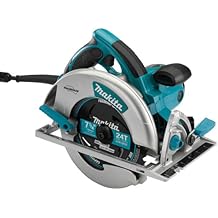
This was our first power saw. It is a great saw to start with. You can cut large plywood pieces and most other cuts as long as you have clamps to hold the wood in place. It was here that I started to fall in love with wood building.
Tip: wear goggles and keep distractions like children and pets out of the way, for your protection and theirs. Before I use any power saw, I mentally slow myself down and make sure everything is in order before I begin. Power tools are great, but never use them casually.
Miter Saw
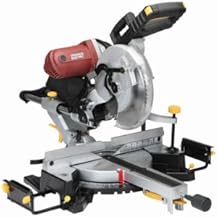
This was our second saw and loved as much as the first. Between this and the circular saw I can cut almost anything. Great for cutting wall trim, 2×4’s and any long thin piece. This saw can adjust to cut varied angles as it slants to either side and cuts multiple degrees. I just need a planer and a table saw and I’m good to go.
Tip: for safety, never pull small cuts of wood away until the blade is up and has stopped moving. This saw is very safe, patience makes sure it stays that way.

Recent Comments