
by Natalie | Mar 8, 2019 | Furniture, Home Decor, Home Renovation
The only thing worse than a room being small is actually feeling small. Thankfully there are plenty of things to do to not only increase the look, but also the feel by adding attractive, inconspicuous storage, well placed accent walls and choosing color than enhances the space.
I’ve compiled amazing tips for decorating small spaces for the bathroom, bedroom, kitchen and home, that will help you meet your goals.
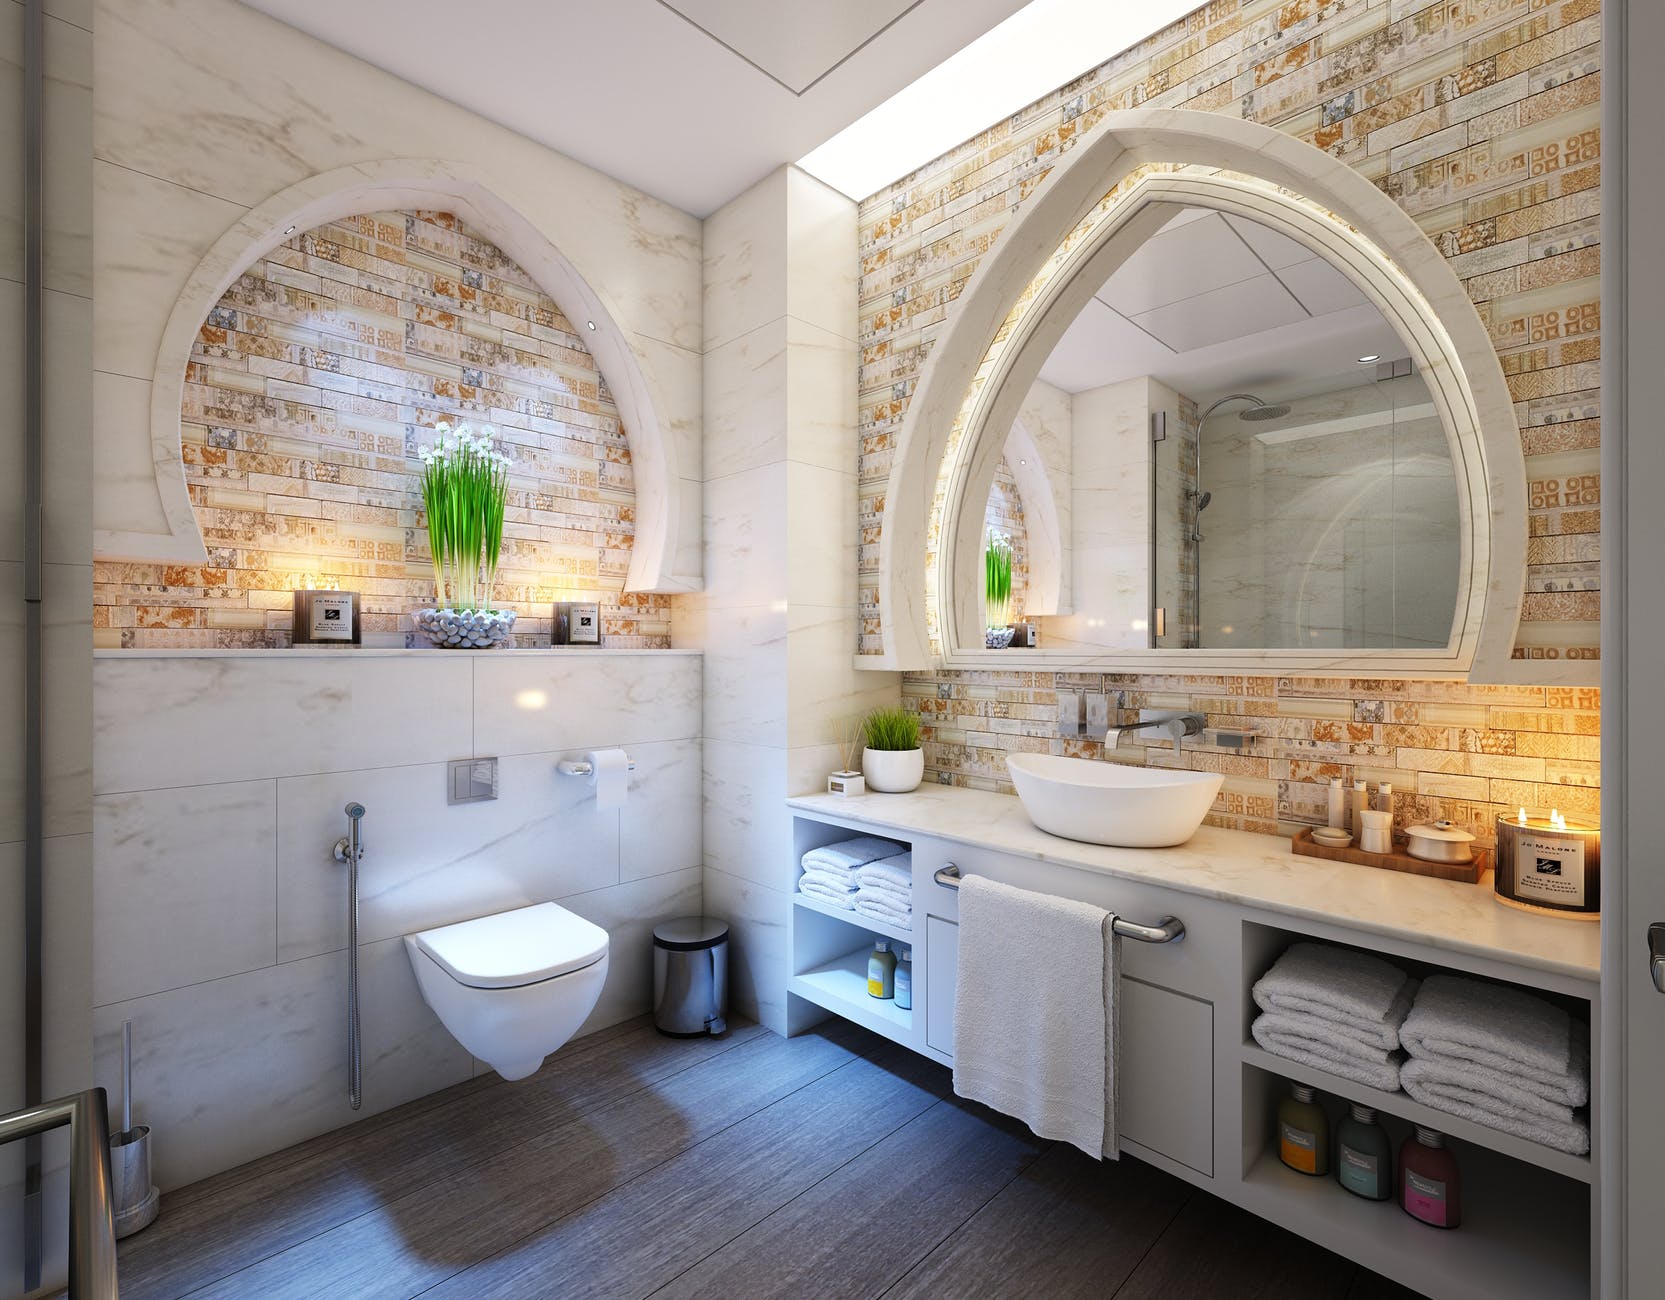
Small Bathrooms
Sometimes there is just not a cost effective way to increase the size of a bathroom. If you have a small bathroom all is not lost. At Trend4Homey you will find a variety of truly small bathrooms with inspiring decorating ideas.
The following rooms all increase their storage with the use of shelves and make the room feel more homey.


I love this pallet wall, see this and other pallet projects at AllThingsHeartandHome.Com.
If pallet wood is not your style you can also try some white washed faux brick, tongue and groove pine or shiplap.
Small Bedrooms
Small spaces can be great. Less to clean, less to own, but it also has its draw backs, namely storage.
One of the most effective ways to create space in a small bedroom or apartment is to add storage in attractive and efficient ways. Like this storage added under a loft bed. See how to make your own loft bed and immediately have more space.

This bedroom has been given an airy feel by adding curtains around the bed to create a sense of privacy. The curtains, though thin, give the feeling of separate rooms. See it here along with 37 other small bedroom ideas.

Small Kitchens
Check out Architectural Digest for an amazing tour of small kitchens. These are my favorites.
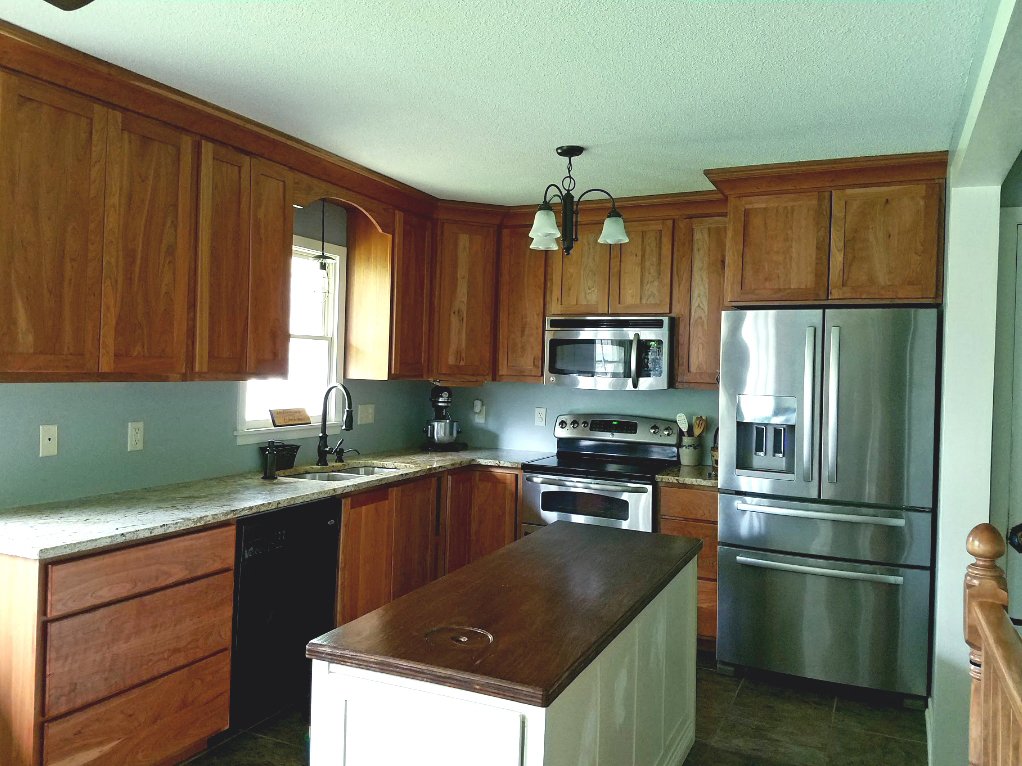
Many kitchens (and homes for that matter) are going all white. With the right decore and texture through fabric, wall covering etc. An all white space can be pulled off well. It also increases the effect of space and is wonderful in small rooms, but check out this kitchen!
I love it so much. Using a light grey paint, they created height and still kept the spacial feeling by painting the walls and cabinets the same color. While this wouldn’t work in all situations it works here because there is a good balance of smooth and lined texture. The shiplap helps break up the monotony and the smooth cabinets help separate them from the wall.
The bright window is set high on the wall which pulls your eyes upward and increases the spacial feeling.
The live plants add interest and also pull your eyes upward, creating an inviting and calm space. Imagine this room without plants – it would feel kind of blah and the grey would likely become overpowering.
And of course these amazing counters and floor. They are the highlight. The final touch. They would easily be “too much” in an otherwise busy kitchen with alot of texture and color, but with the grey throughout and the green plants up high, they have nothing to compete with – they just get to shine.

Beautiful light coming in from a window that can’t even be seen. Technically you could add lighting to mimic natural light and get the same effect. The cabinets go to the ceiling creating both storage and bringing attention to the height of the ceiling. They were even able to squeeze in room for a mini breakfast bar.
The all white kitchen helps it feel larger than it is while the wood counters bring in warmth. White subway tile add to the brightness of the room while also adding subtle texture. Though it doesn’t seem to stick out, this kitchen would look much different if it had plain painted walls.

Small Homes
At designertrapped.Com you’ll find 7 tips for making a room seem larger than it is using furniture and decorating tips.
Among her designer tips – adding curtains that go to the ceiling to make the window feel larger than it is.

Try thishomemadehome.com tips on using paint, color, texture and mirrors to trick the eye. Creating a spatial feeling without knocking down any walls.

That is my quick and simple guide to making a room feel larger. If you have other ideas that have worked for you, please share in the comments below.
If you liked what you read and want to keep up on the latest posts from This Homemade Home, please subscribe.
Best wishes,
Natalie

by Natalie | Feb 22, 2019 | Furniture, Home Decor, Home Renovation
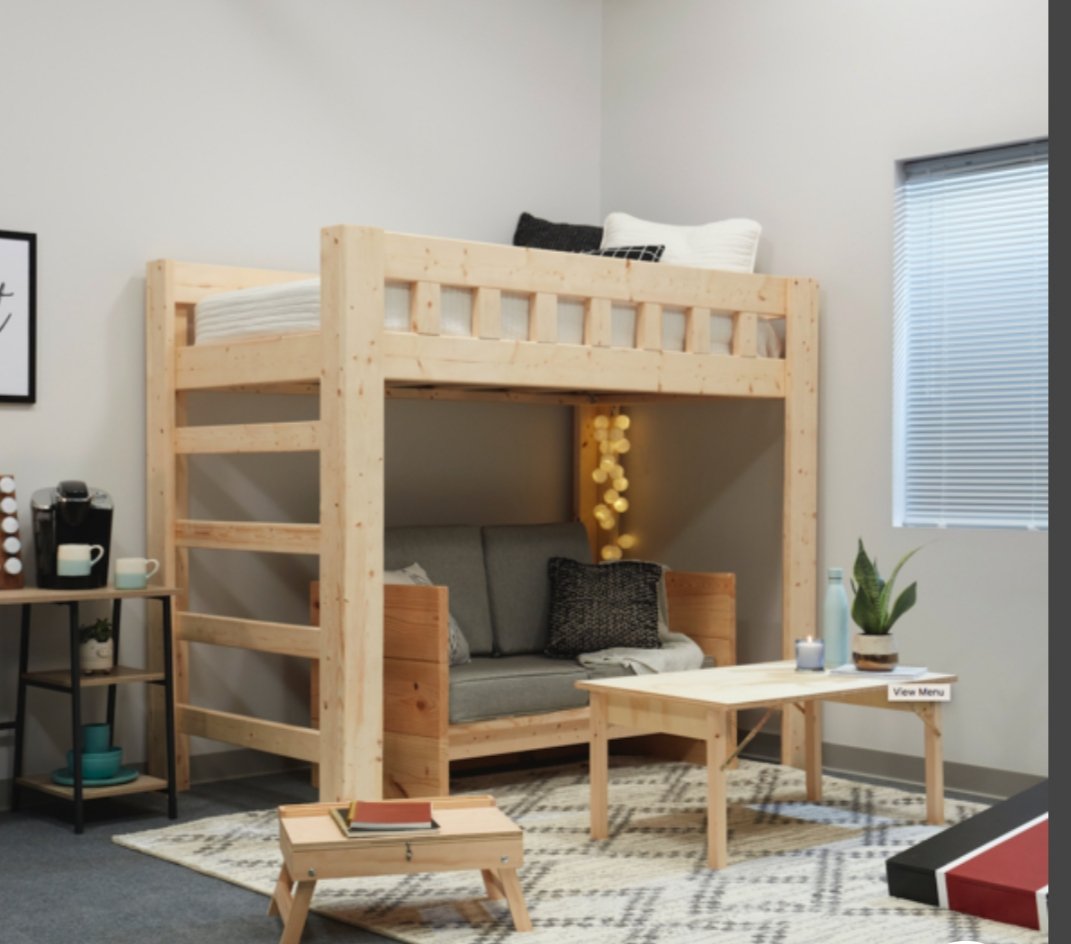
There are several situations where a loft bed becomes a great alternative to traditional beds.
Small Apartment Living
This style is simple and looks great for small apartment spaces. Built in a deck like fashion.
You will find free plans here.
College Dorm
This style is simple and can be removed when you leave.
Creating Study or Play Space
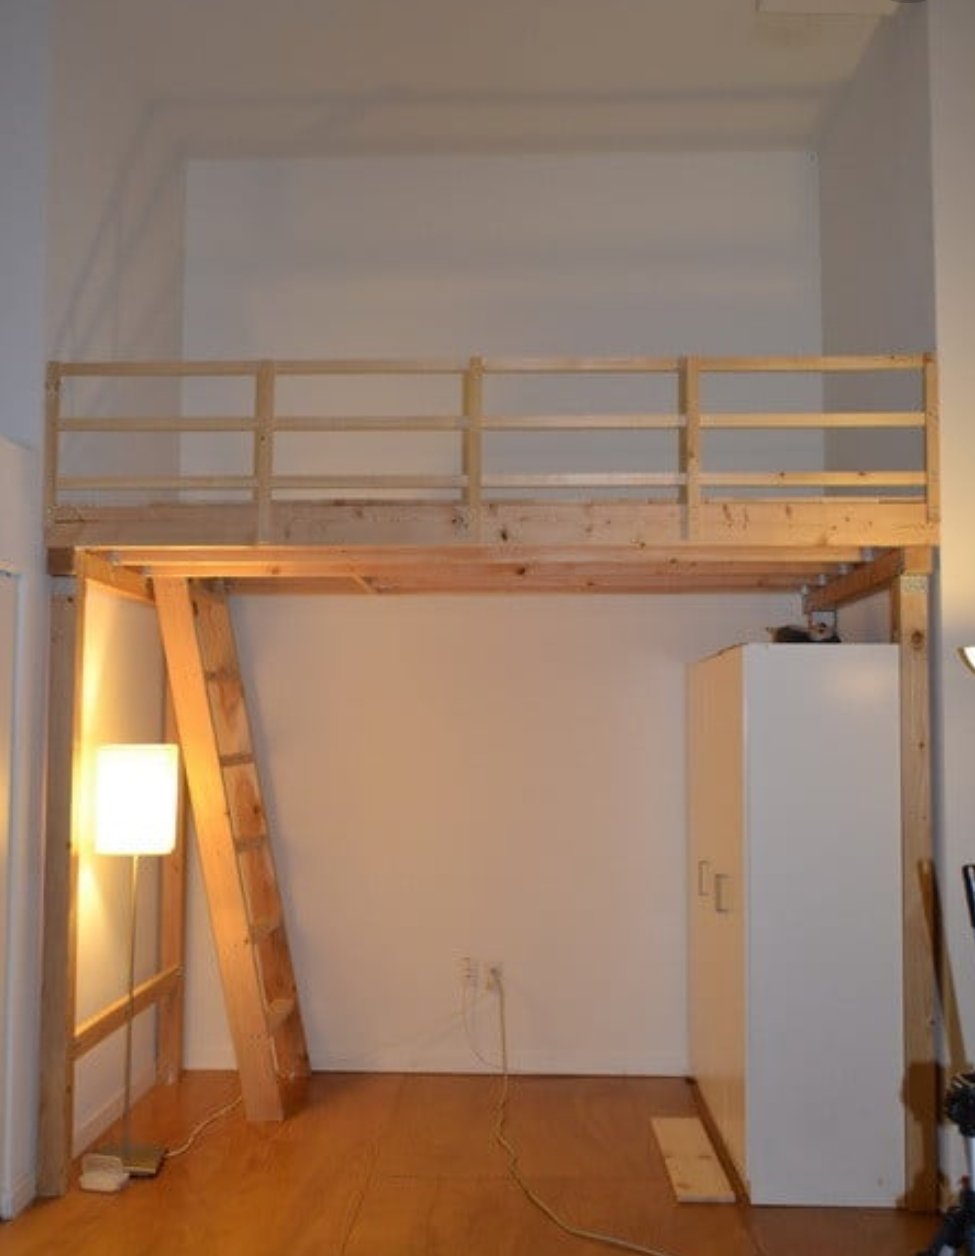
We found ourselves trying to build a bedroom in a narrow portion of the basement. With the placement of the hot water heater and window it was impossible to avoid a narrow space.
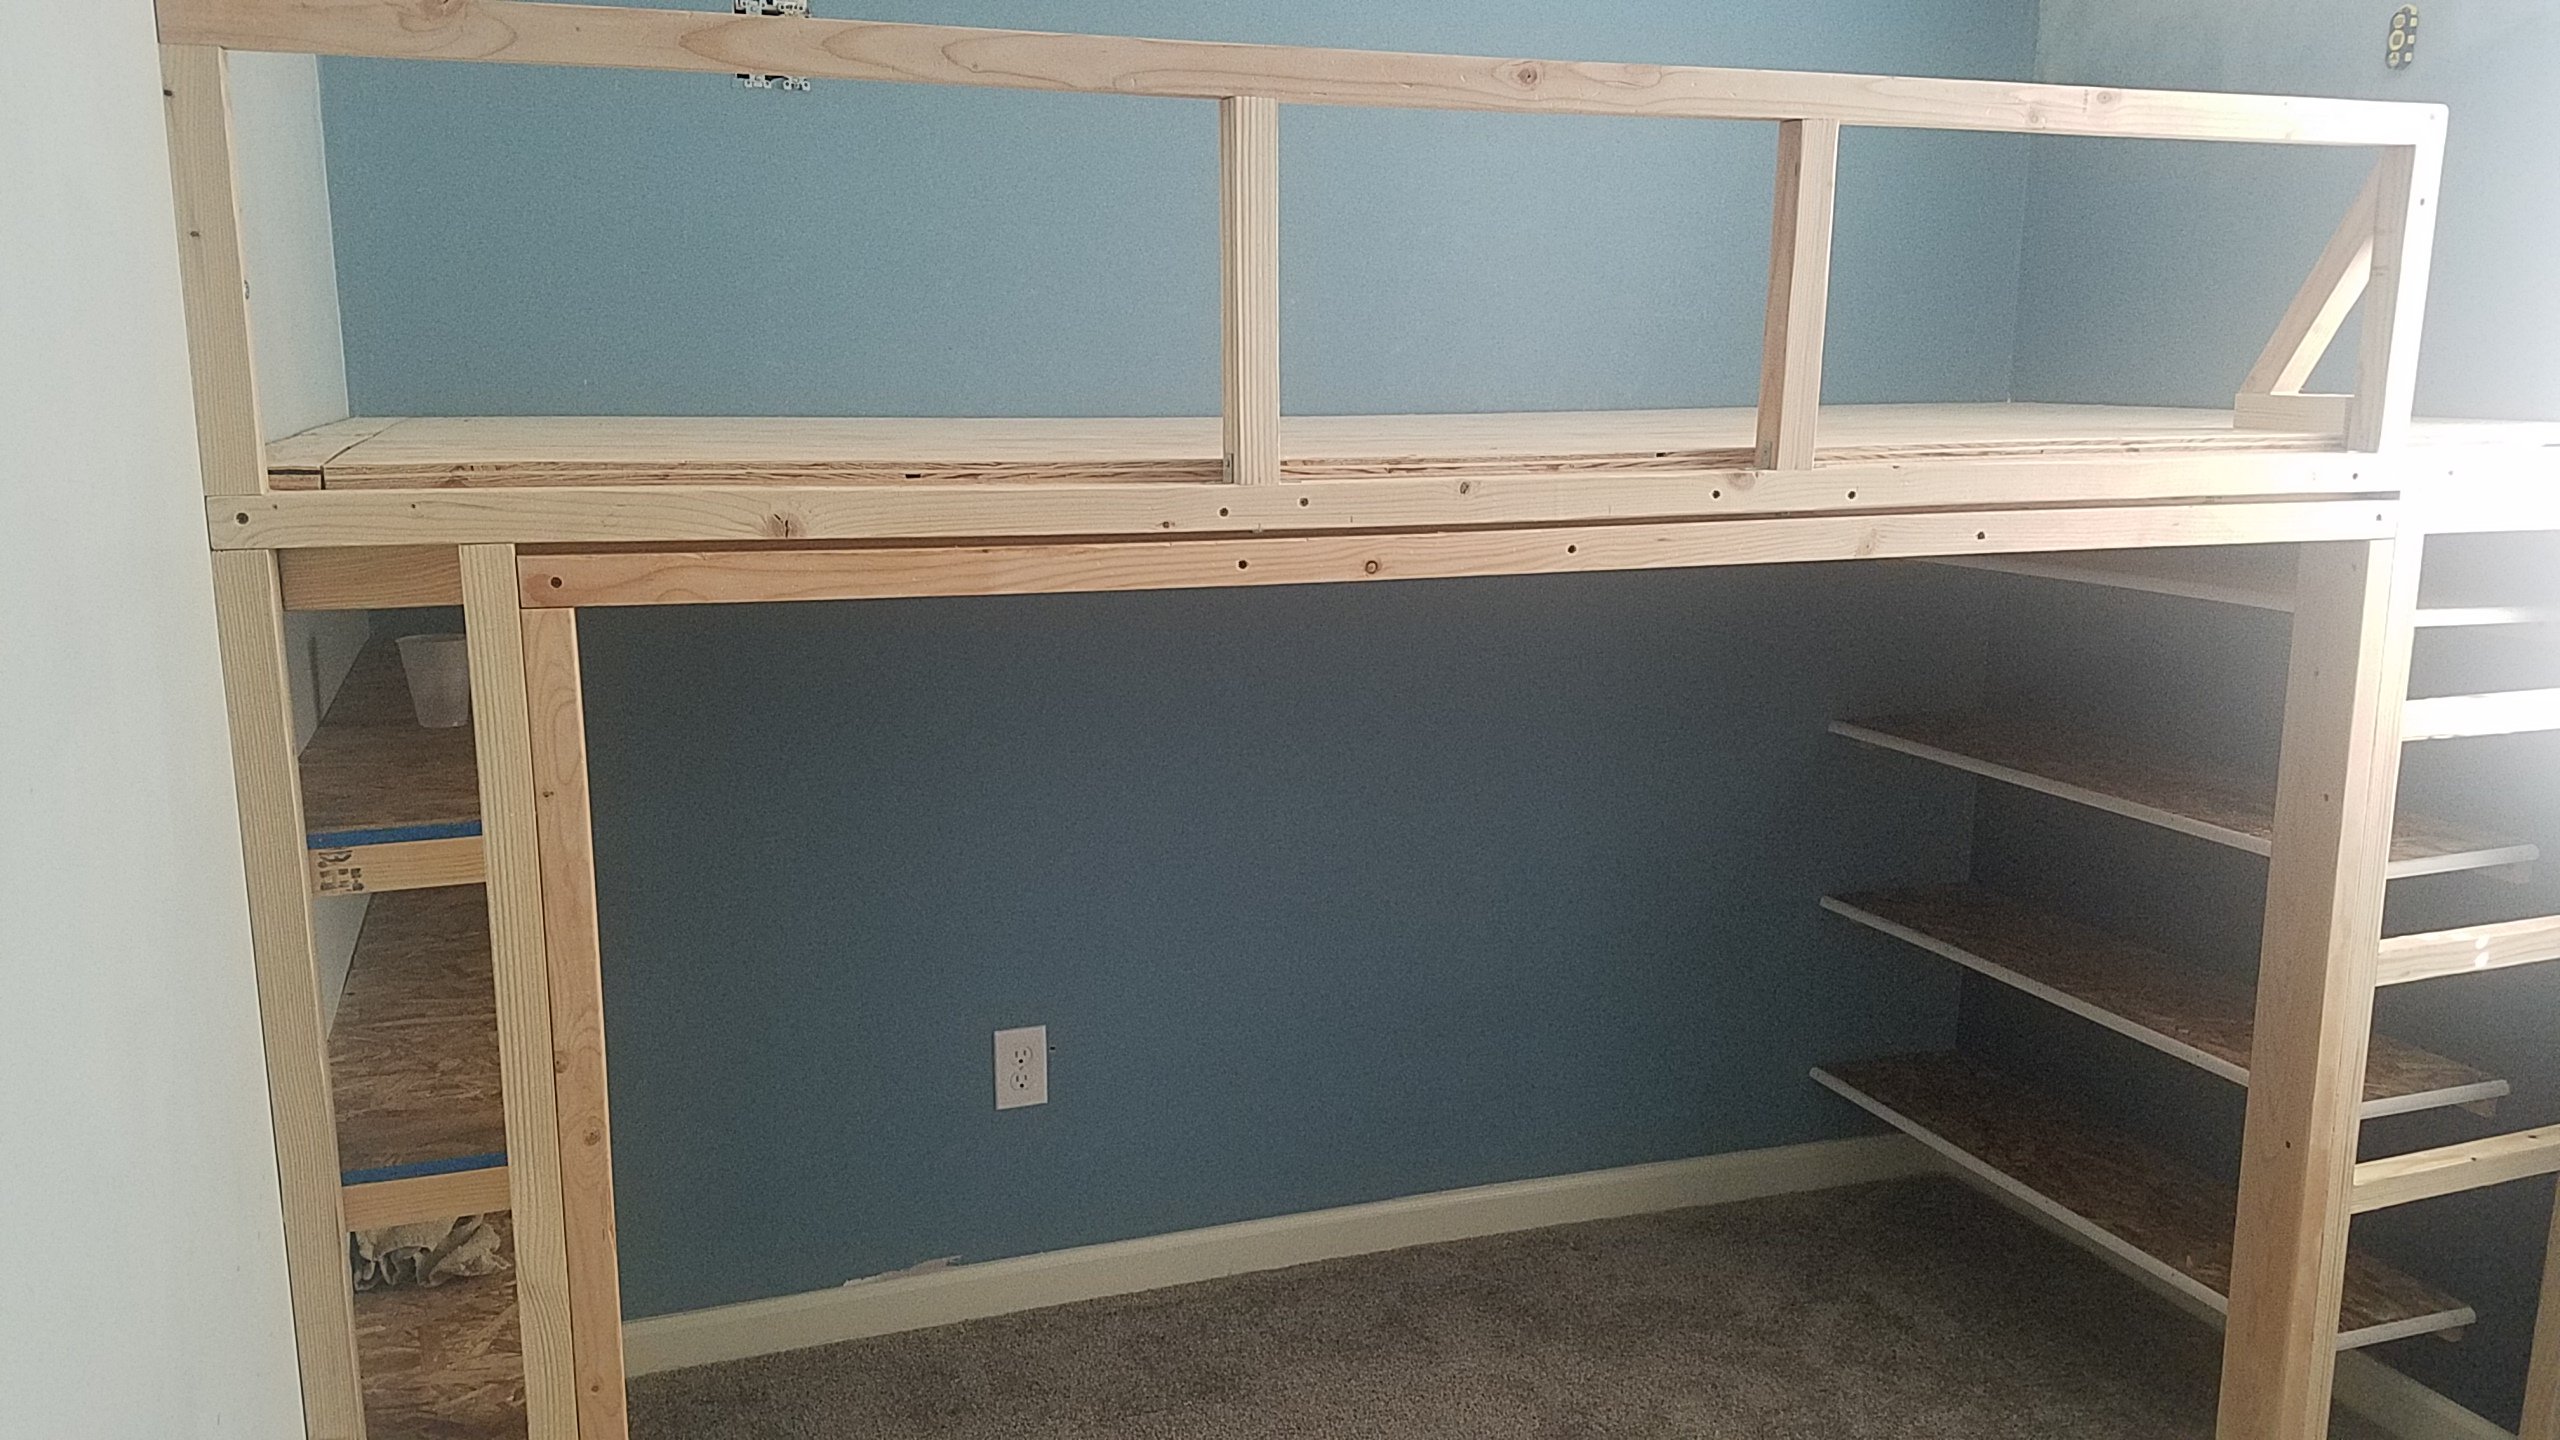
Building a Wall to Wall Loft Bed
We made up for it with a large walk in closet and a loft bed. Now our daughter is in 7th Heaven and has loved organizing all her stuff on the book shelf and cubby wall.
Bolt Supports Into the Wall
Create a firm bed that won’t creak or move by first building a good support system. I used 1/4″ diameter bolts and ratcheted a bolt into each stud in the wall. With this being a wall-to-wall loft I was able to bolt into the walls on three sides.
Mark where each wall stud is on the wall. Hold a 2×4 up on the wall and mark on the 2×4 where each stud is located. Drill 1/4″ pilot holes where you have marked for the bolt to fit.
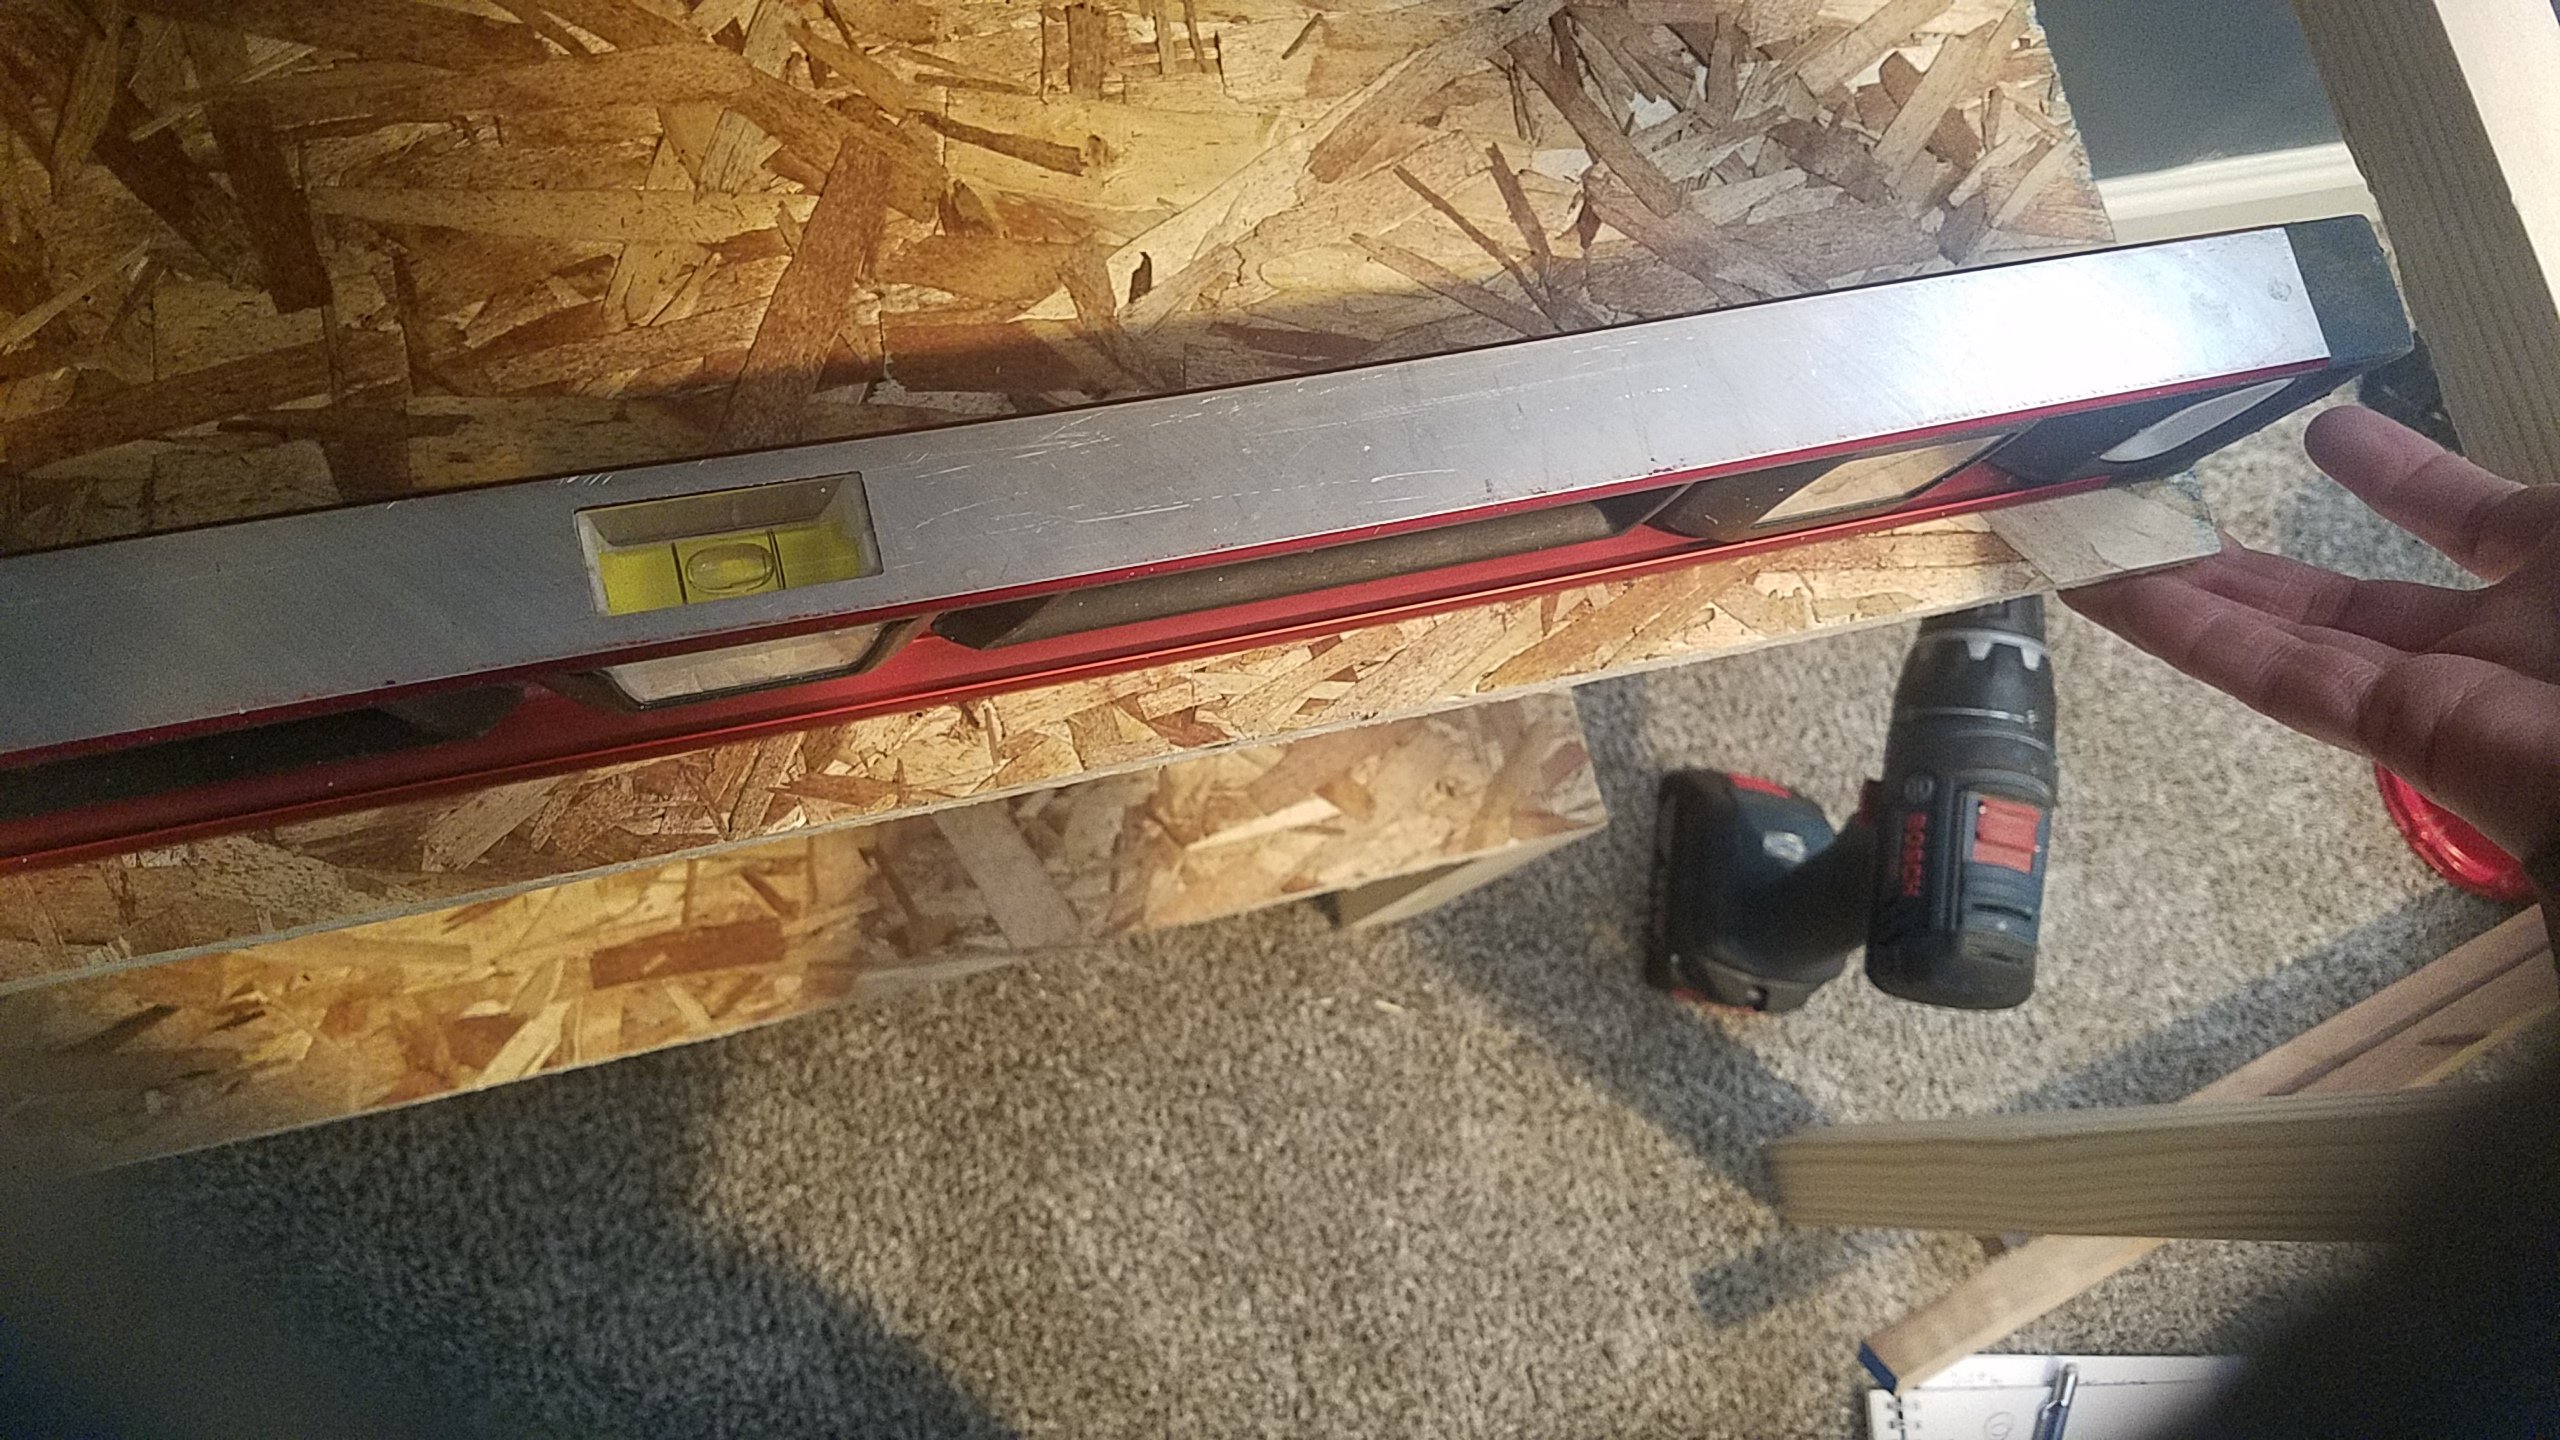
To get an truly flat bed, use a level when attaching 2x4s to ensure the support is horizontal.
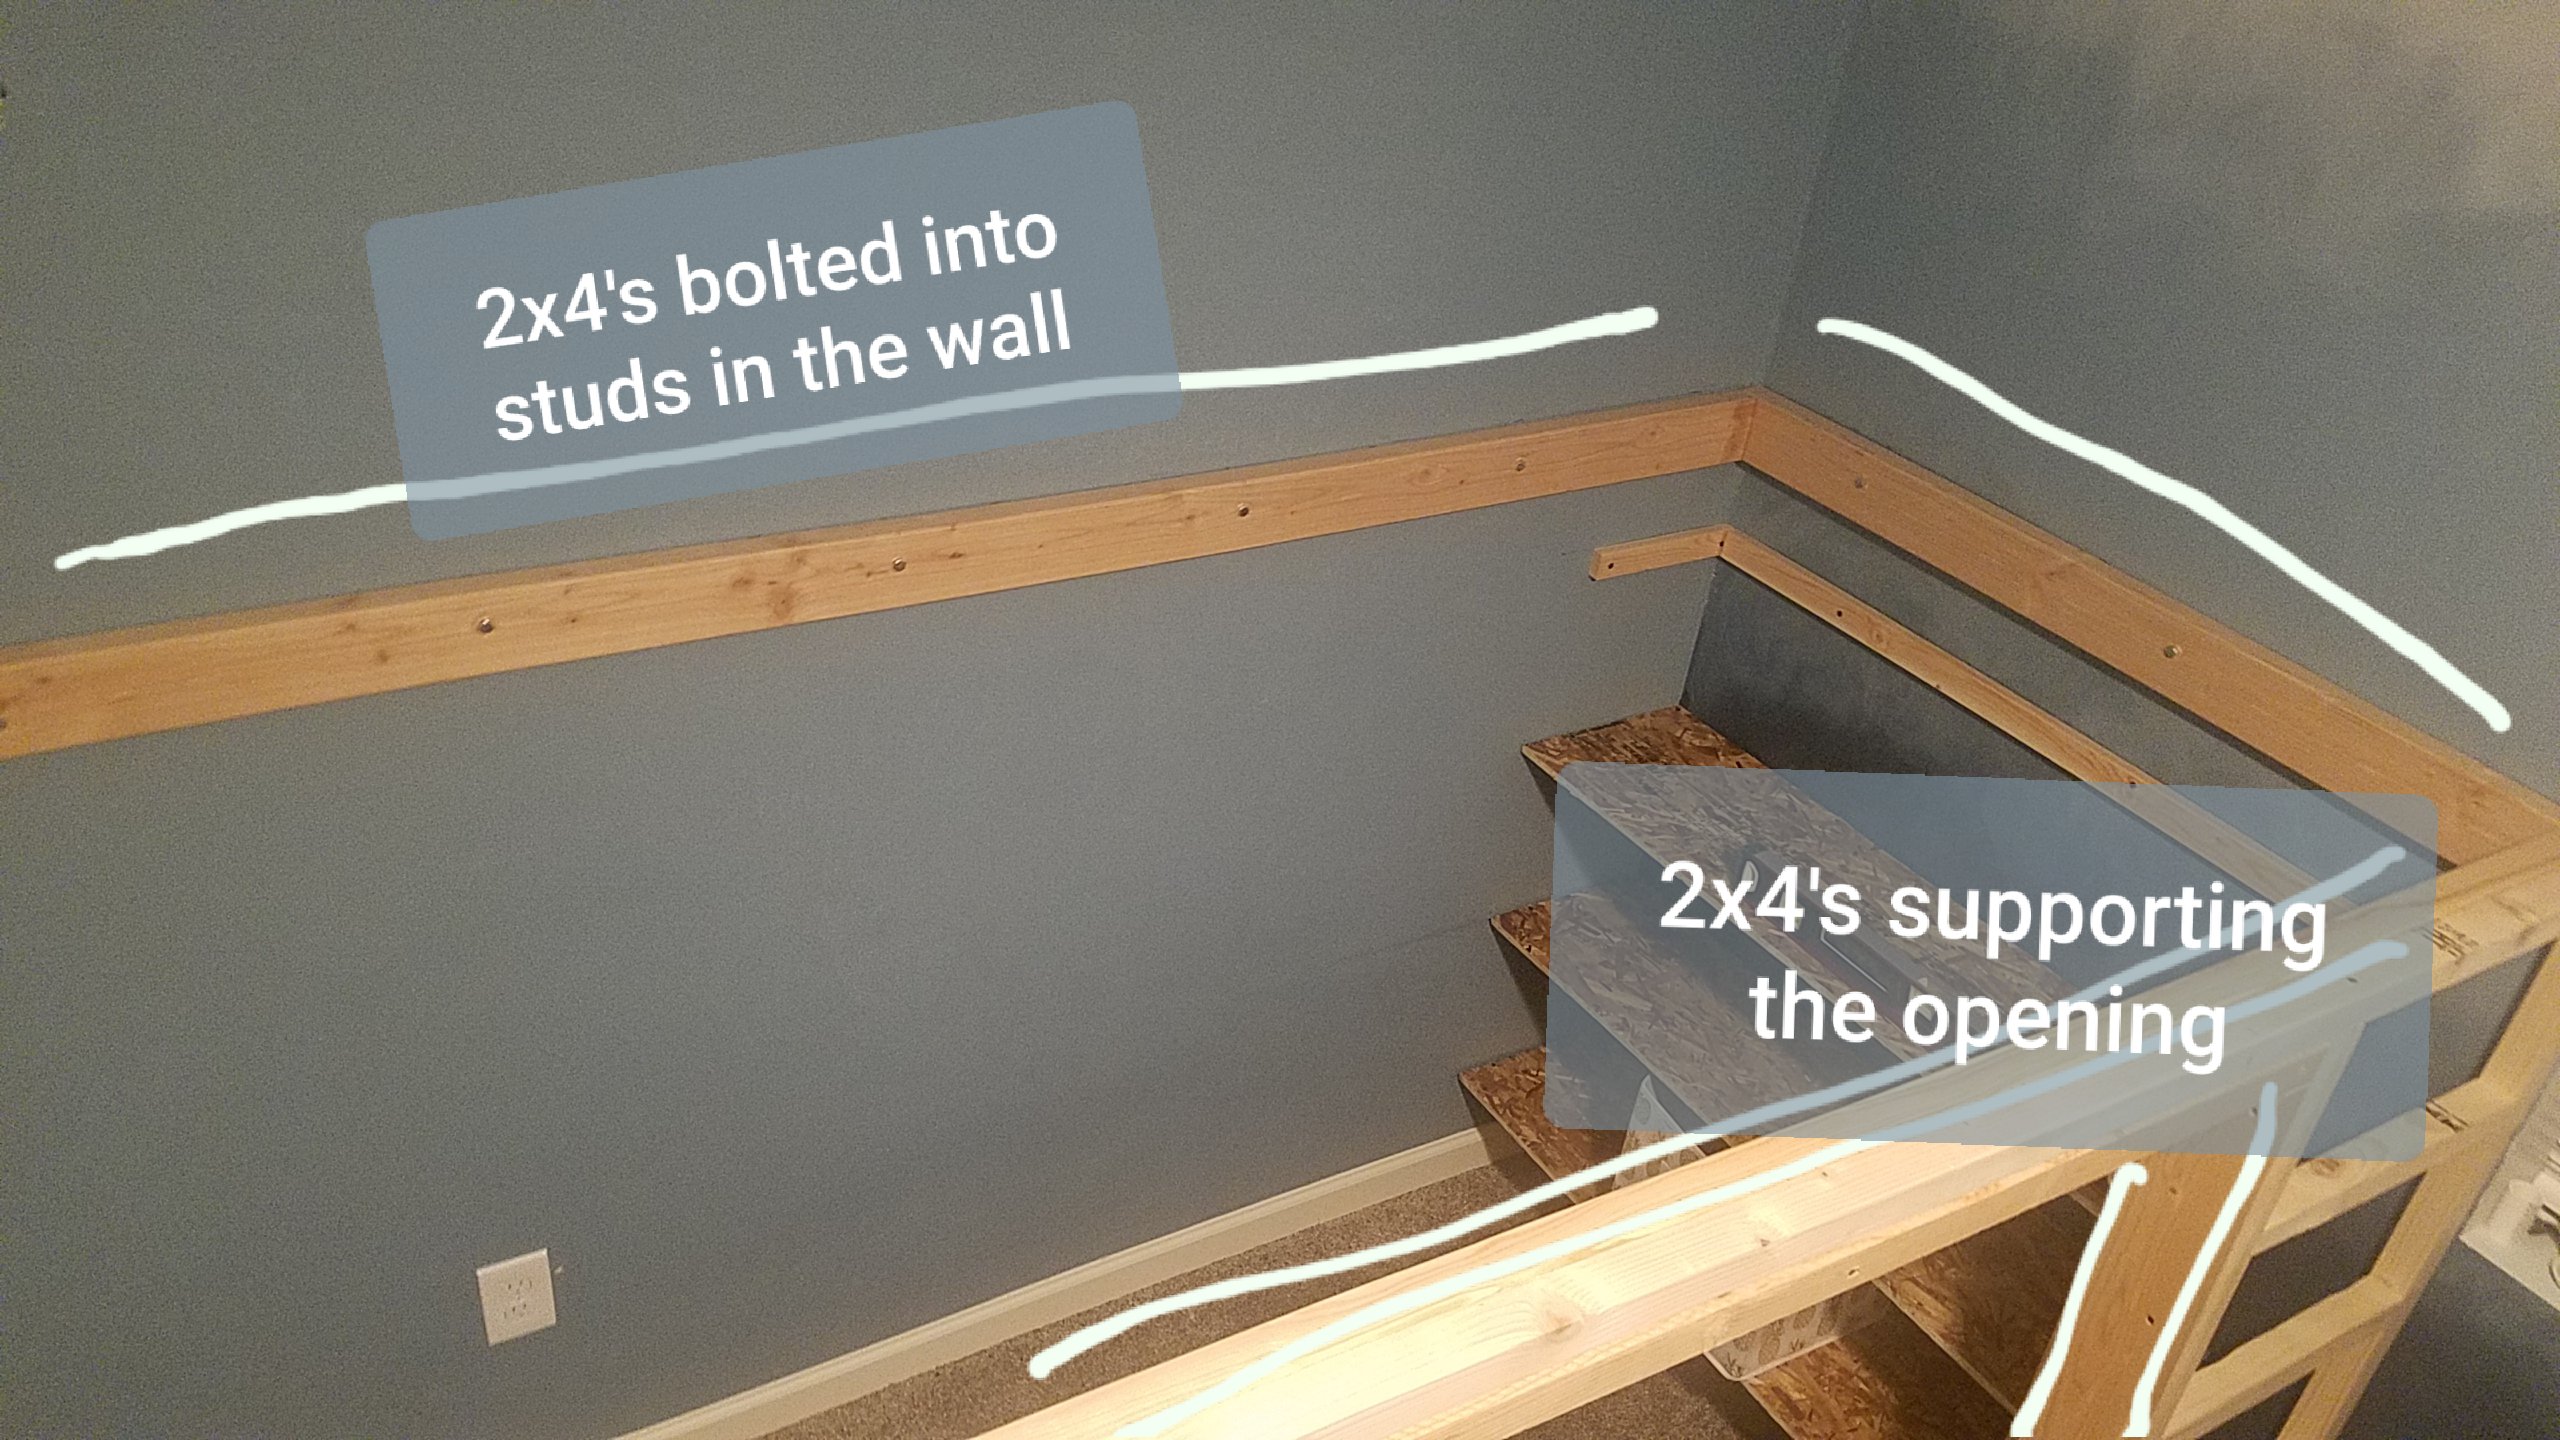
For the large “doorway” under the bed use 2x4s as shown in the picture below, resting on vertical 2x4s.
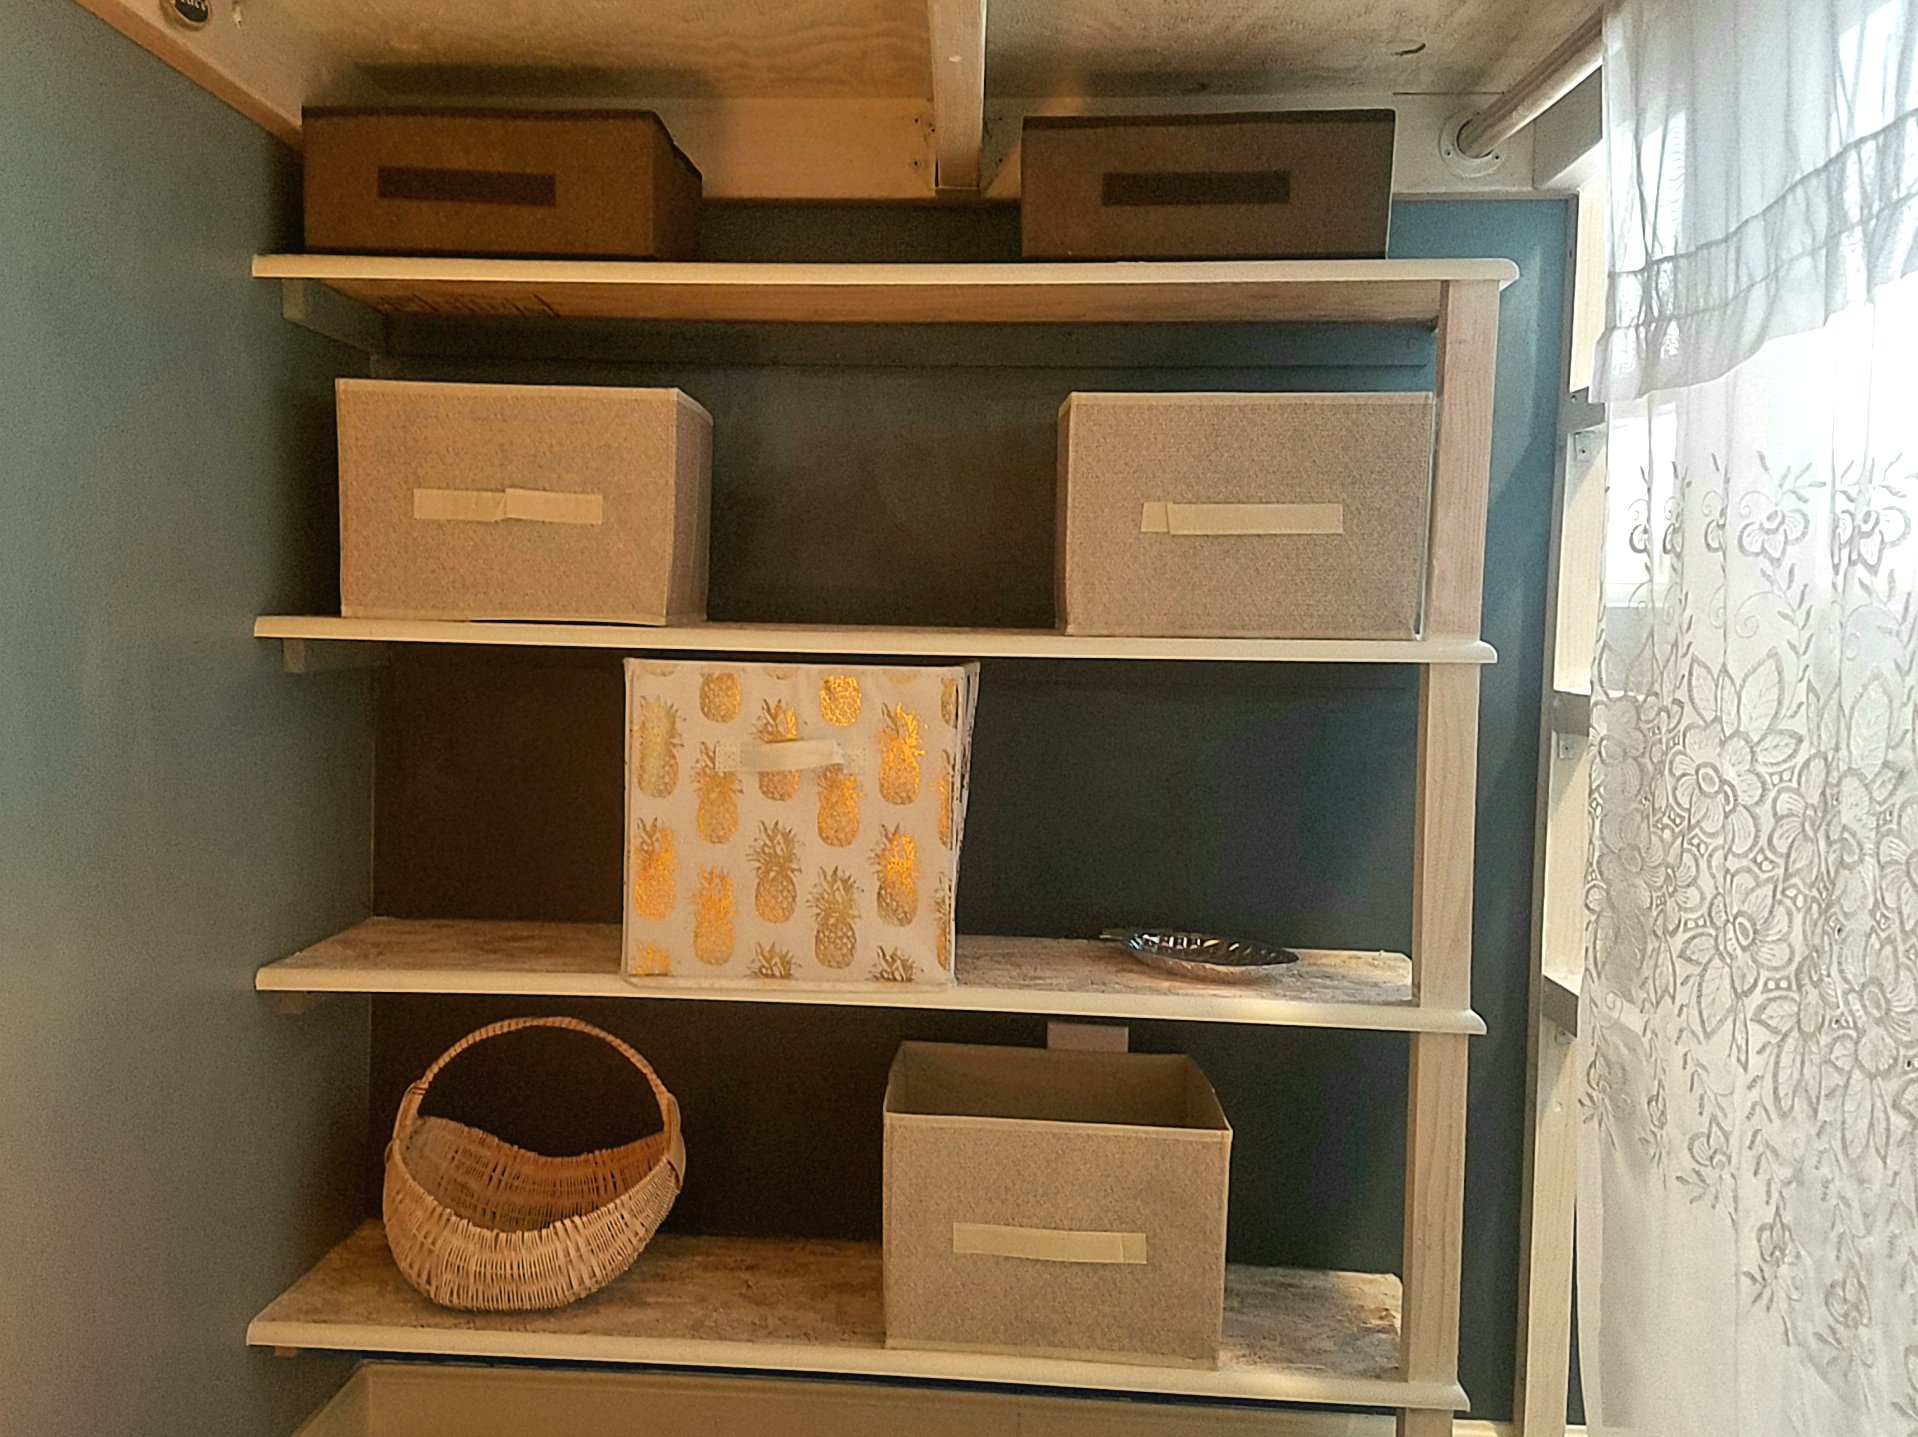
Build Shelves Under the Loft Bed
To make the most of the space under the bed you can create deep shelves for cubbies and a book shelf.
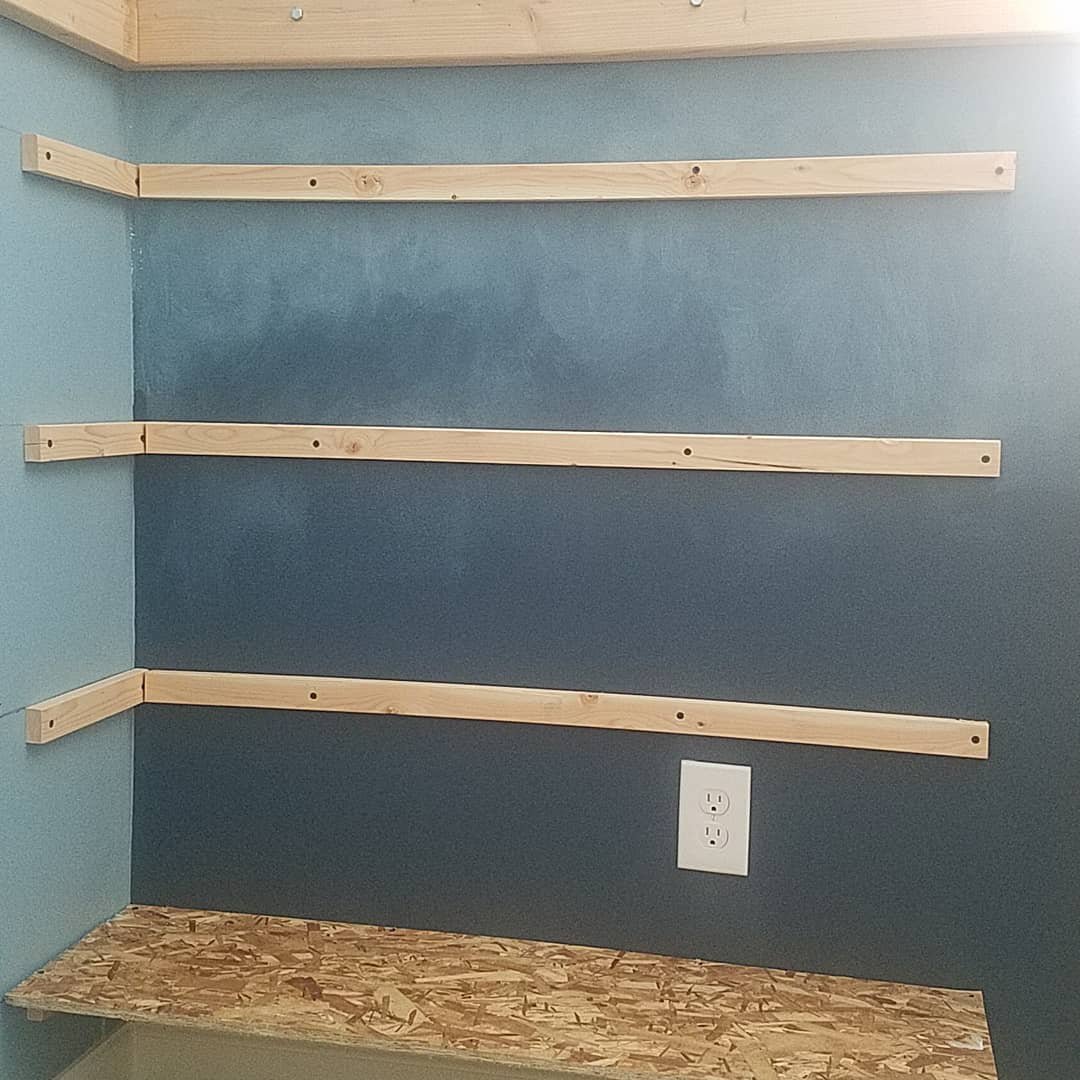
Use a level here as well to ensure the shelves are straight. I would hold the shelf level, then measure the vertical support beam.
When finishing the shelves, paint the support boards to match the wall color. As you can see here the supports almost blend into the wall.
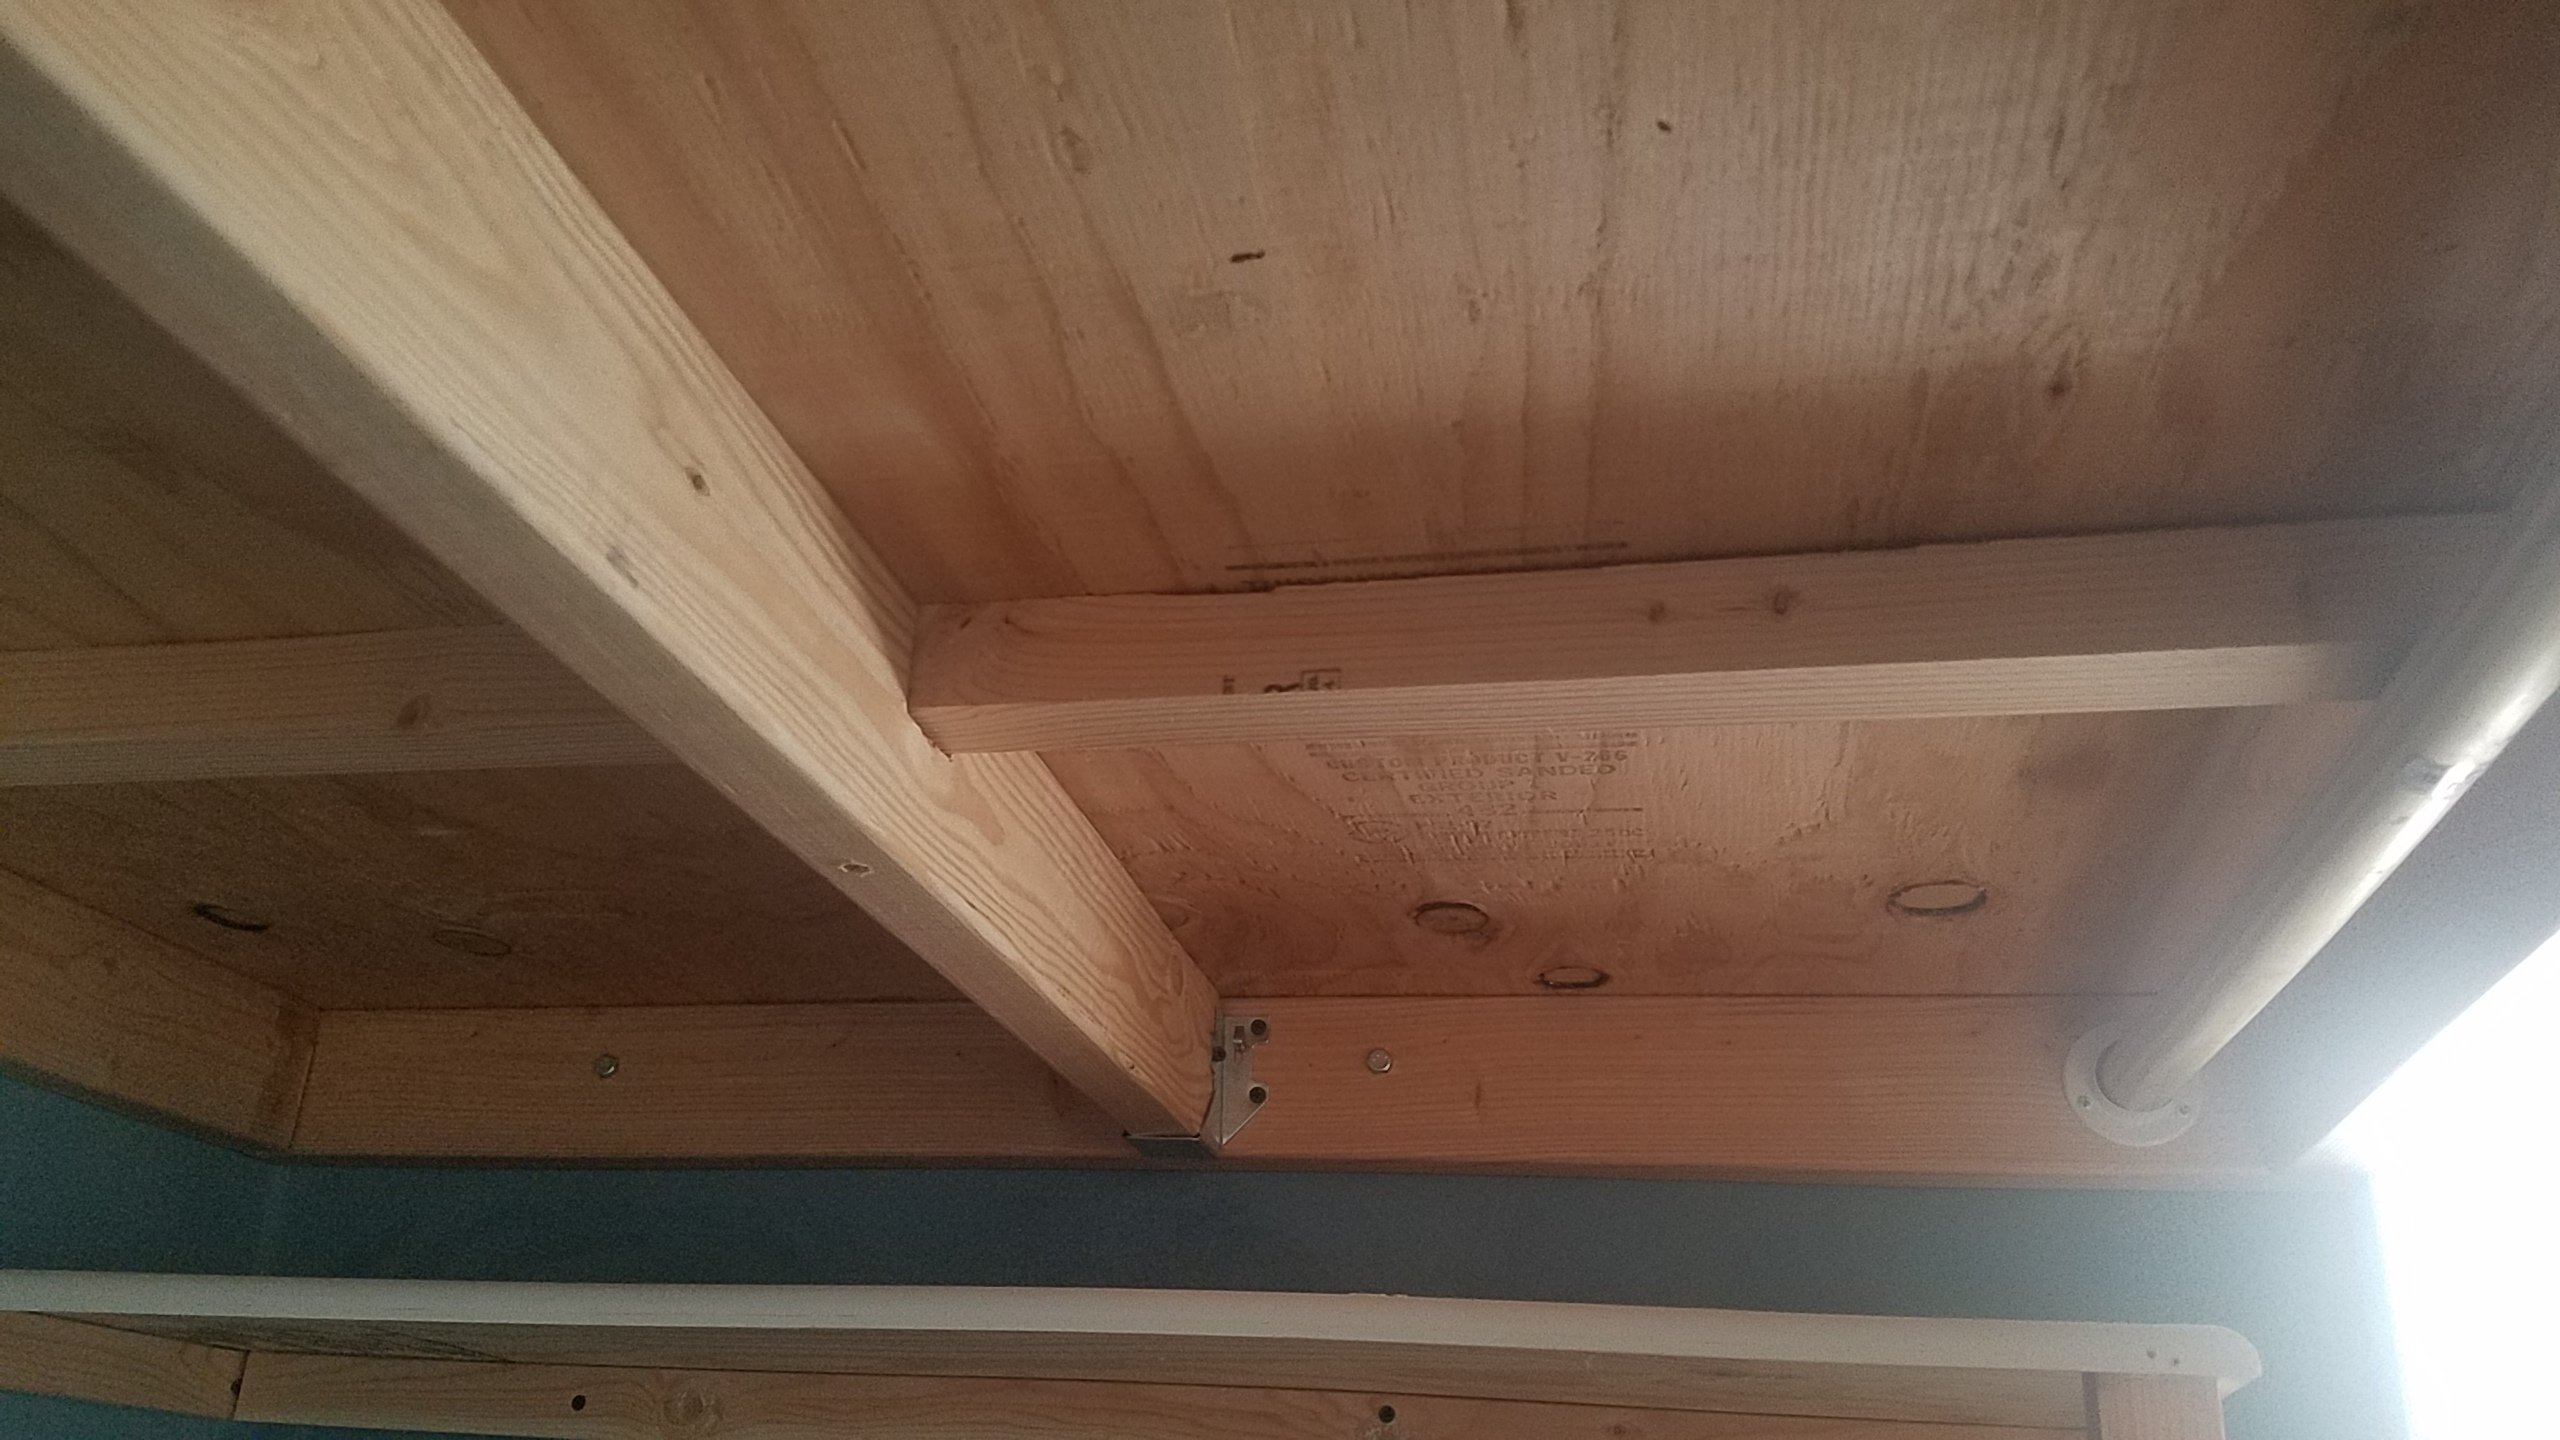
Place Supports Under the Bed
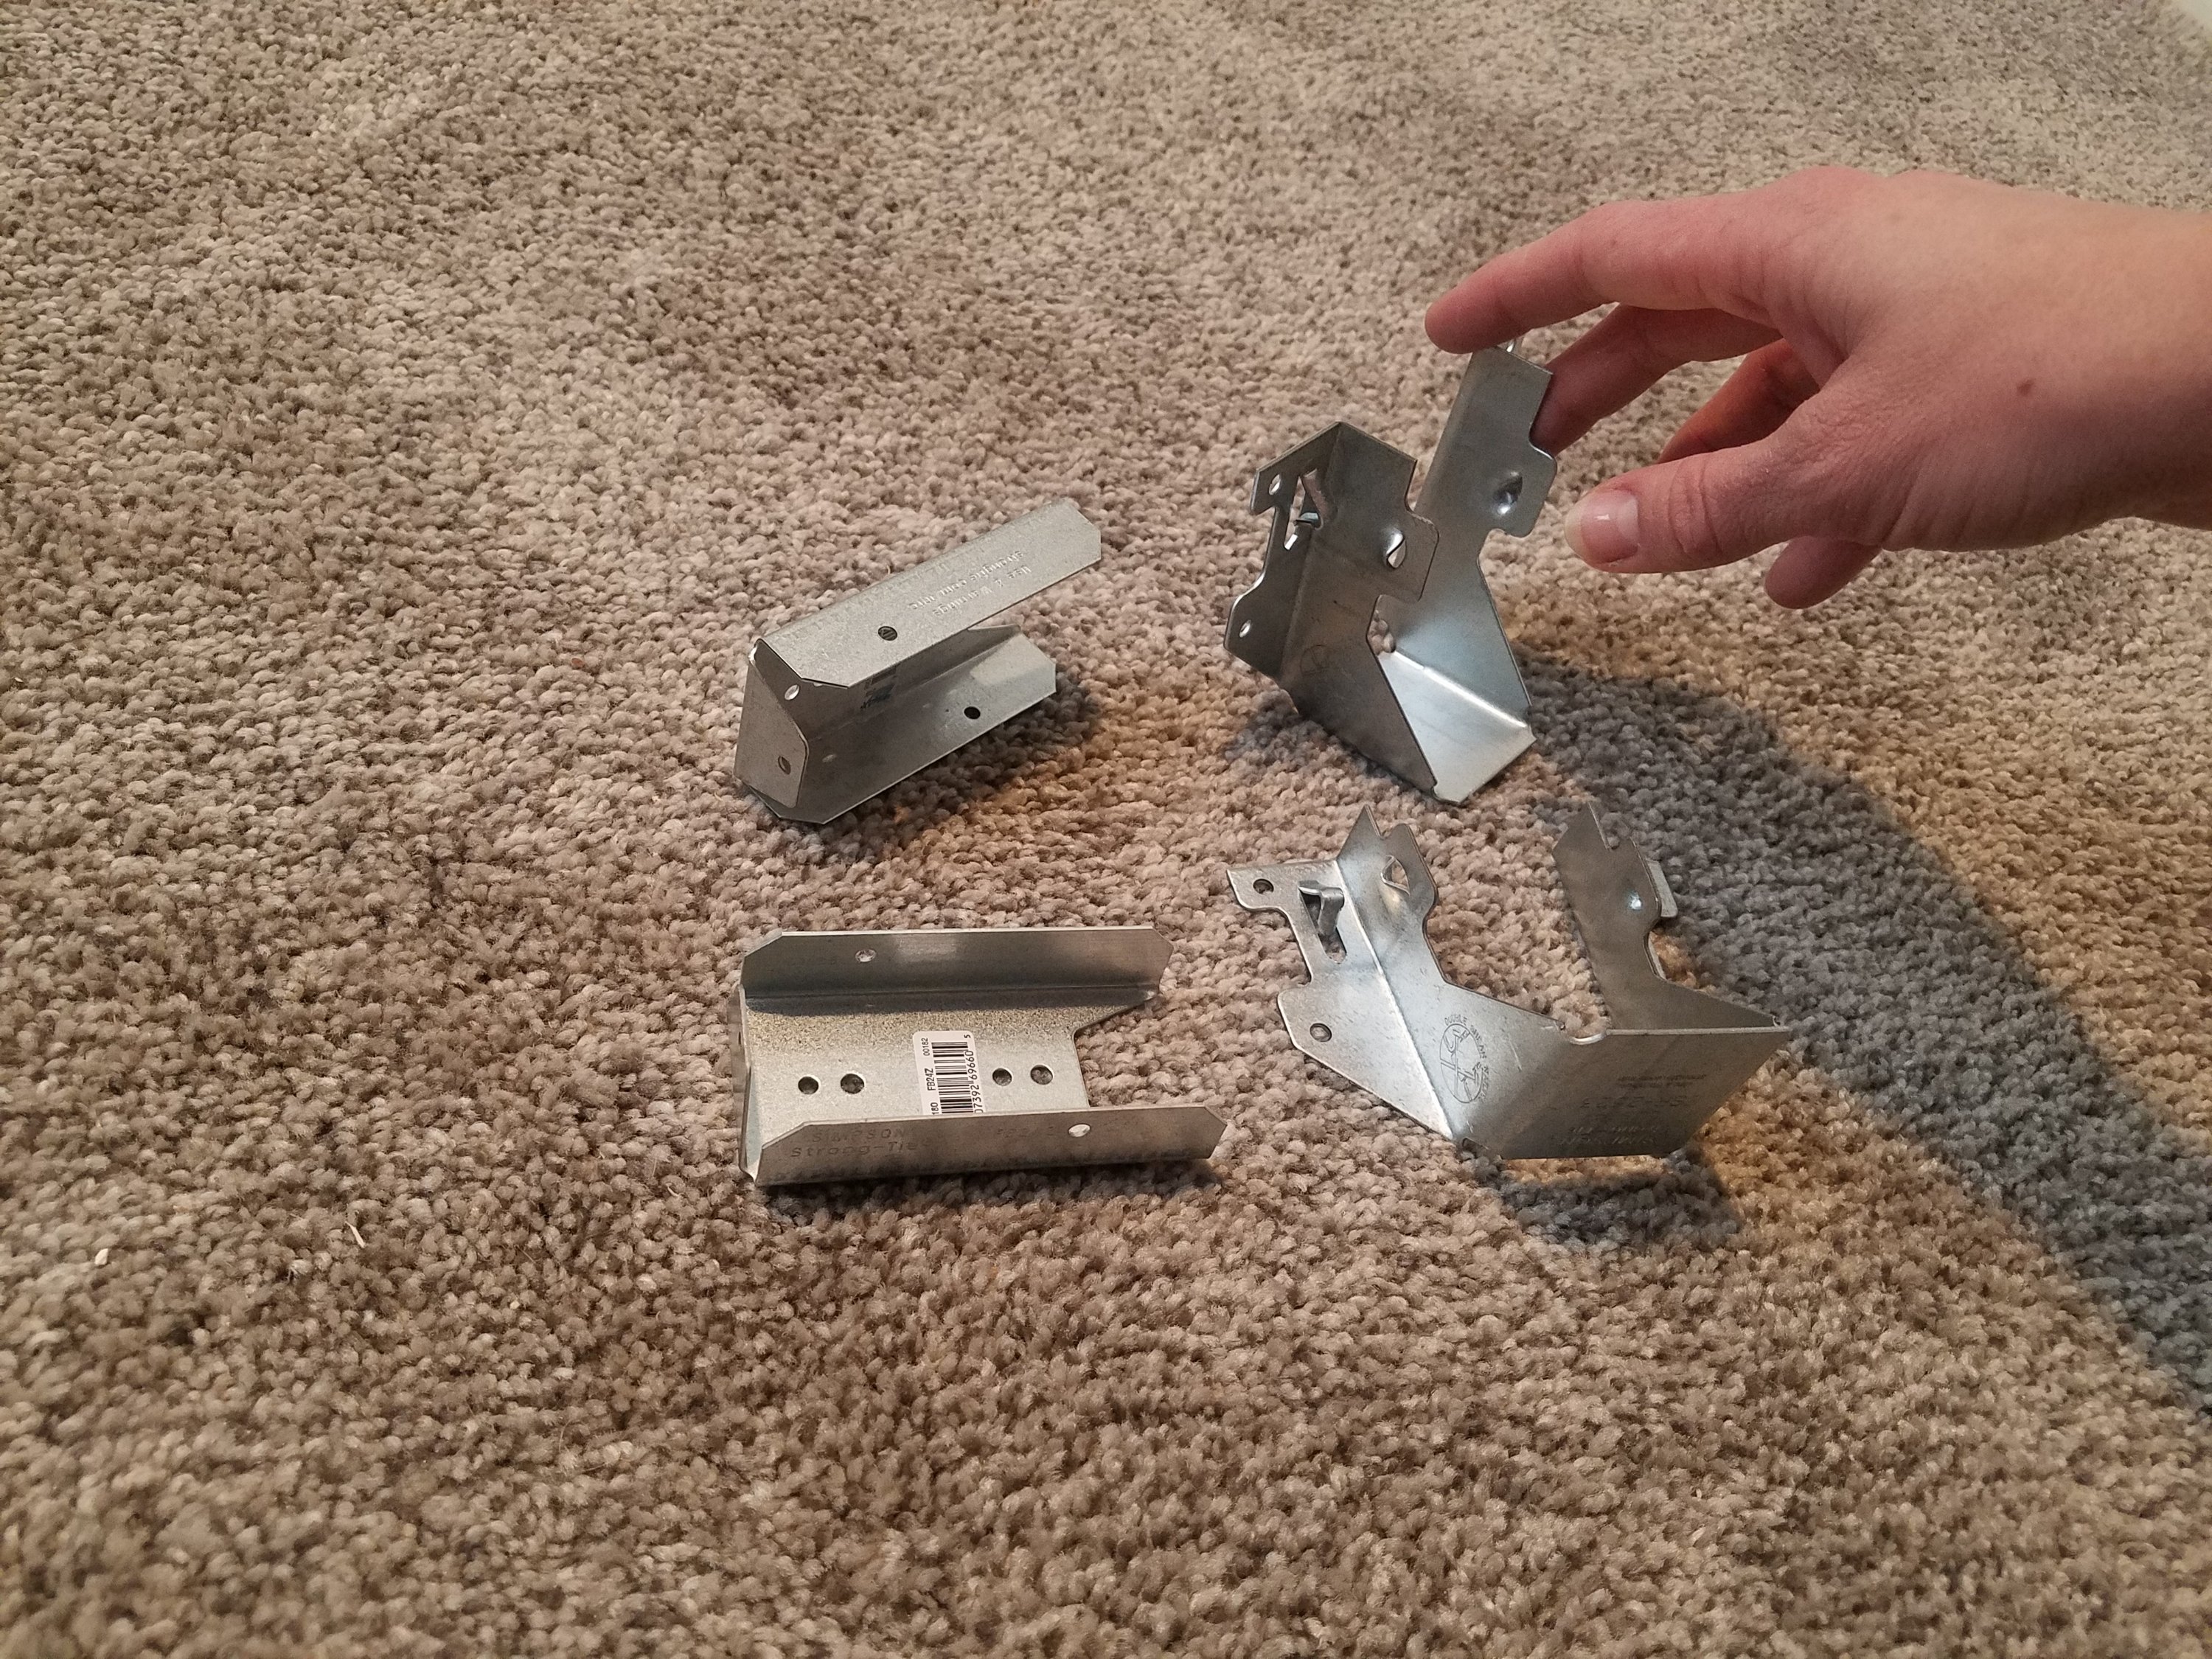
Putting supports under the bed also help with making a solid immovable bed. I used one 2×4 length wise and cut notches out for two 2x2s then reinforced each board with metal brackets.
The floor of the bed was made using 3/4 inch plywood.
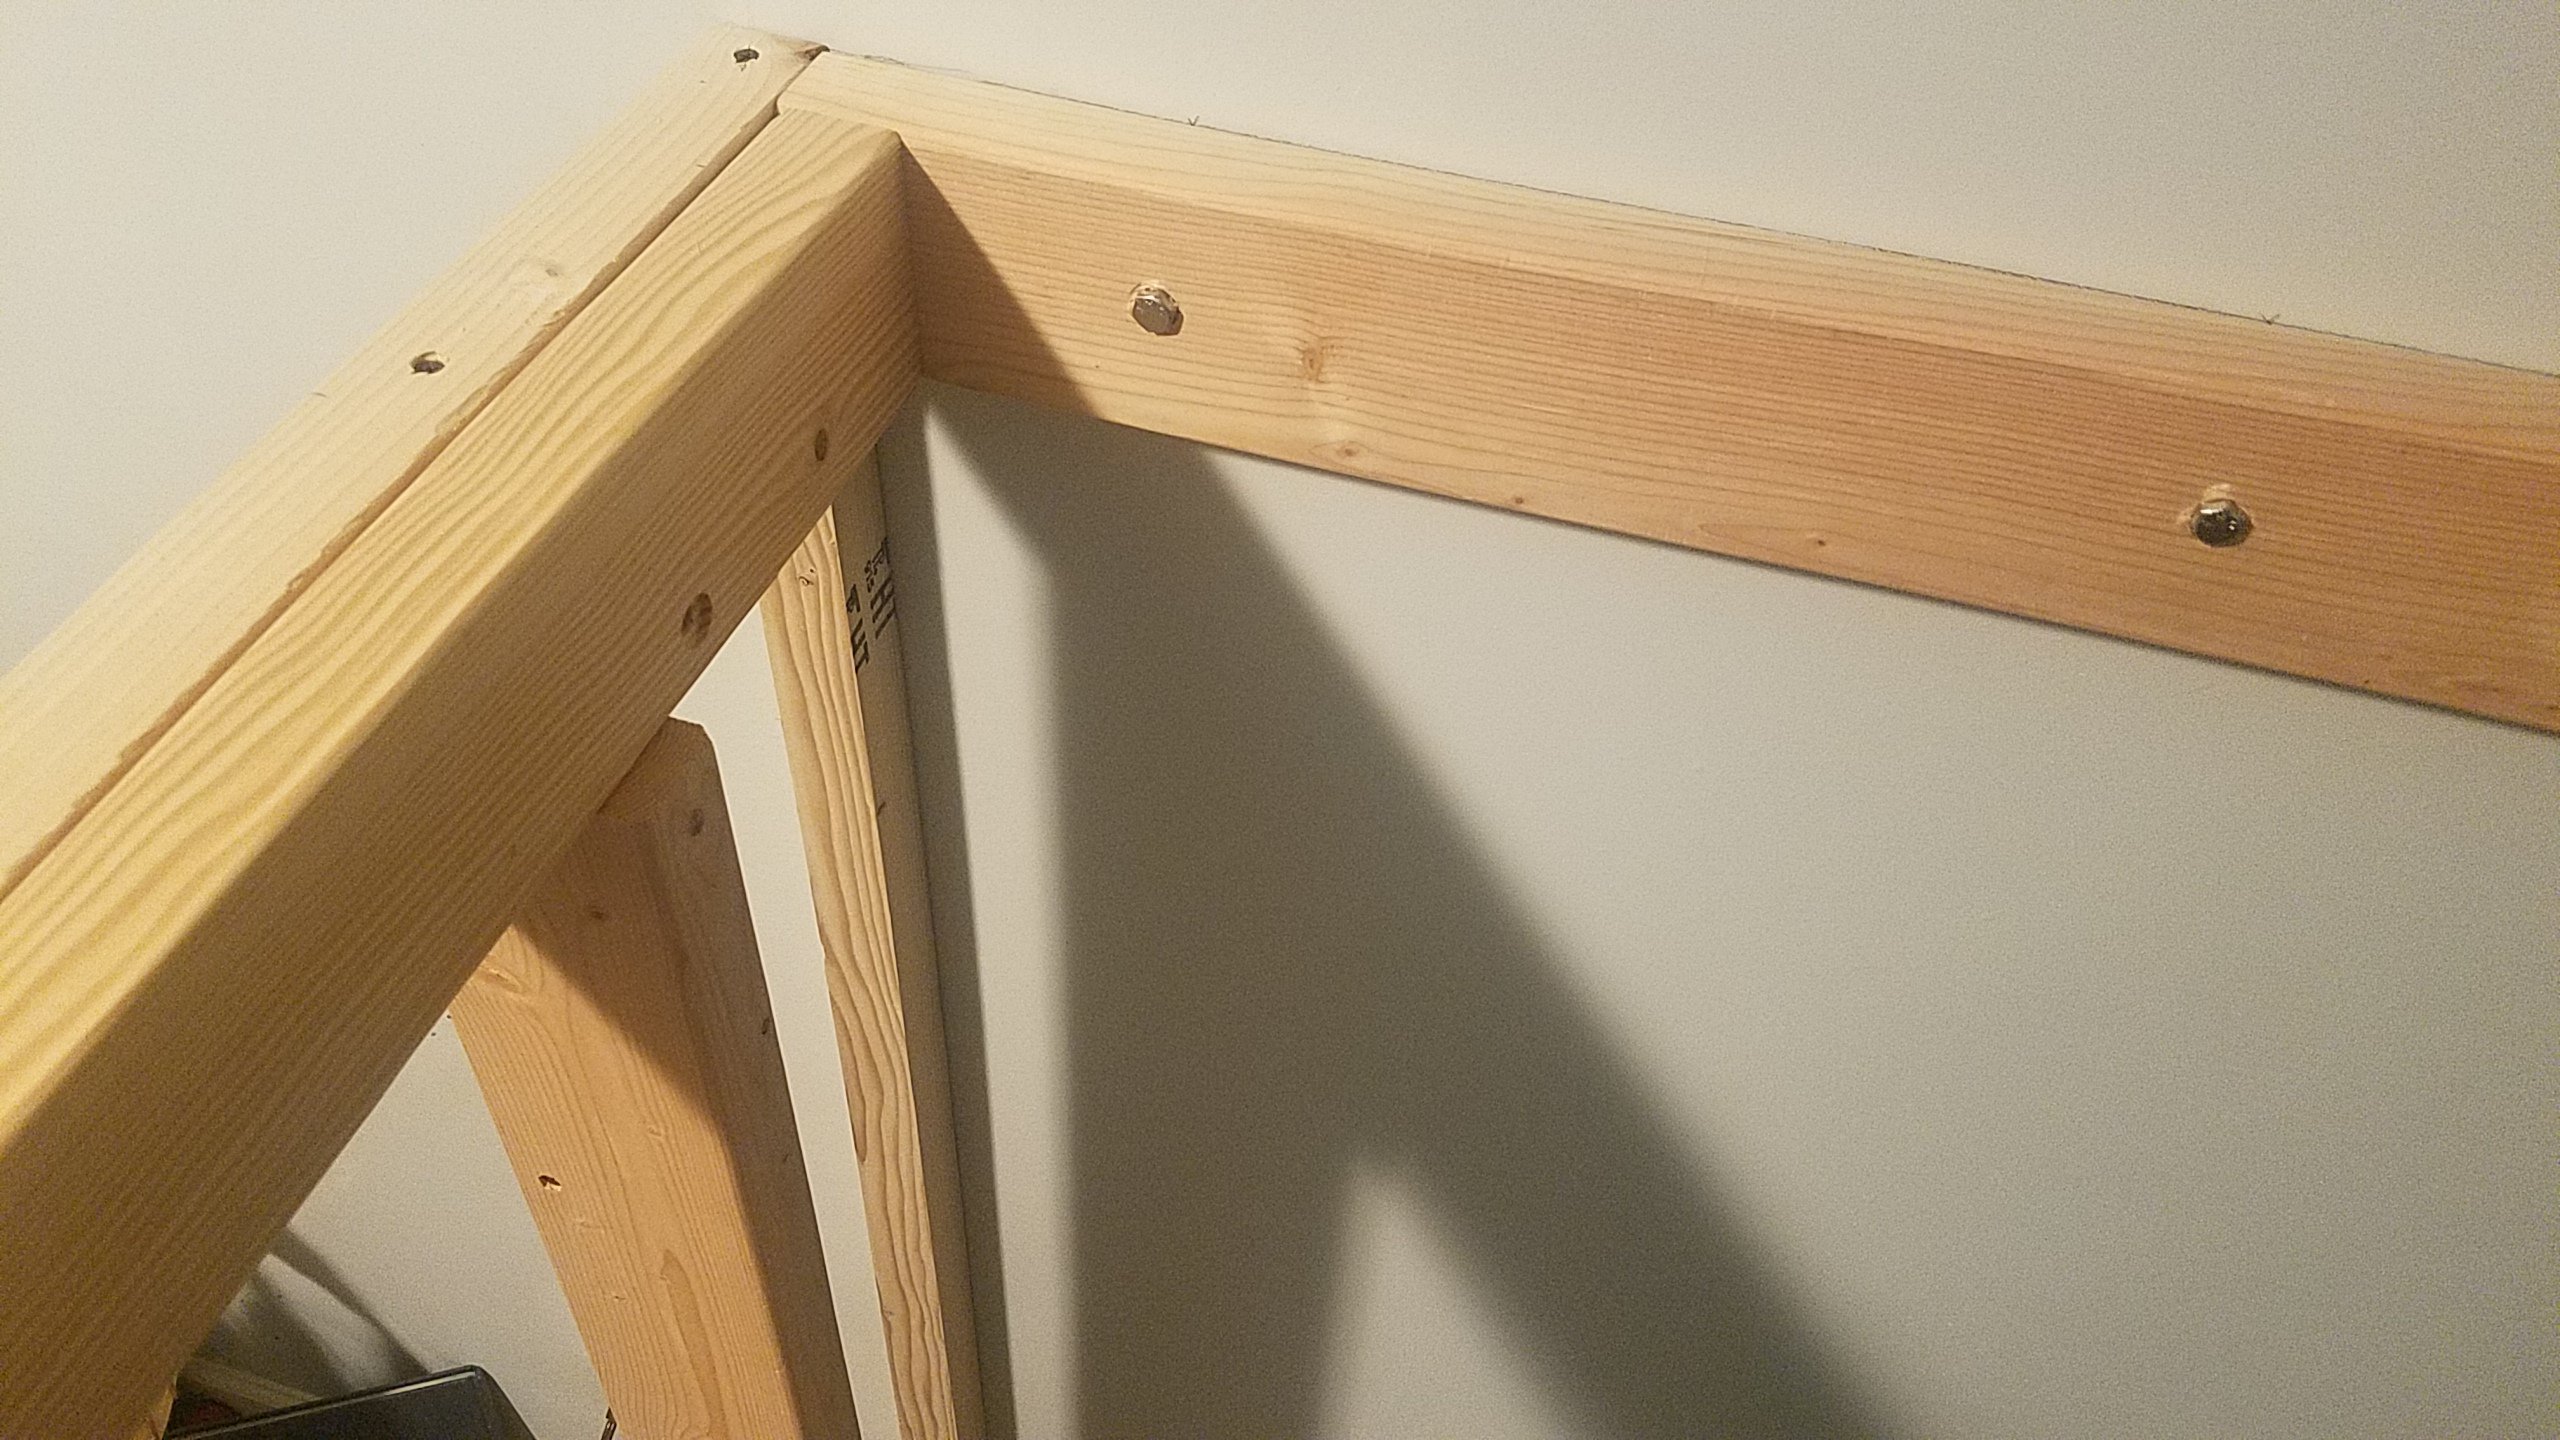
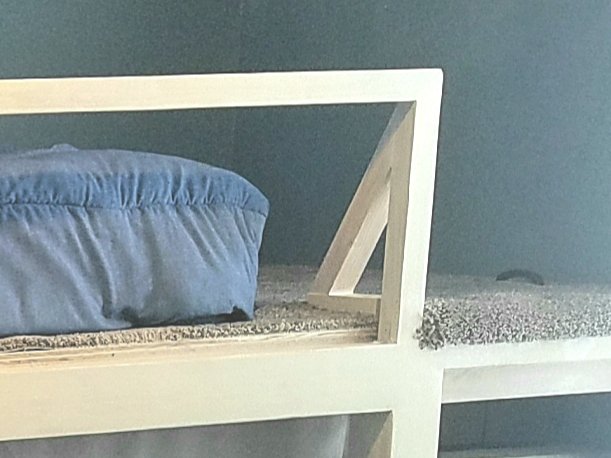
Build Loft Railing
The railing was a little difficult since the bed was longer. I wanted it to be sturdy and withstand heavy use. First I put a bolt in each rung. I screwed the top railing in place and found it still shook a bit.
I then installed an A frame support on the end of the railing. This worked beautifully and took care of any slight movement.
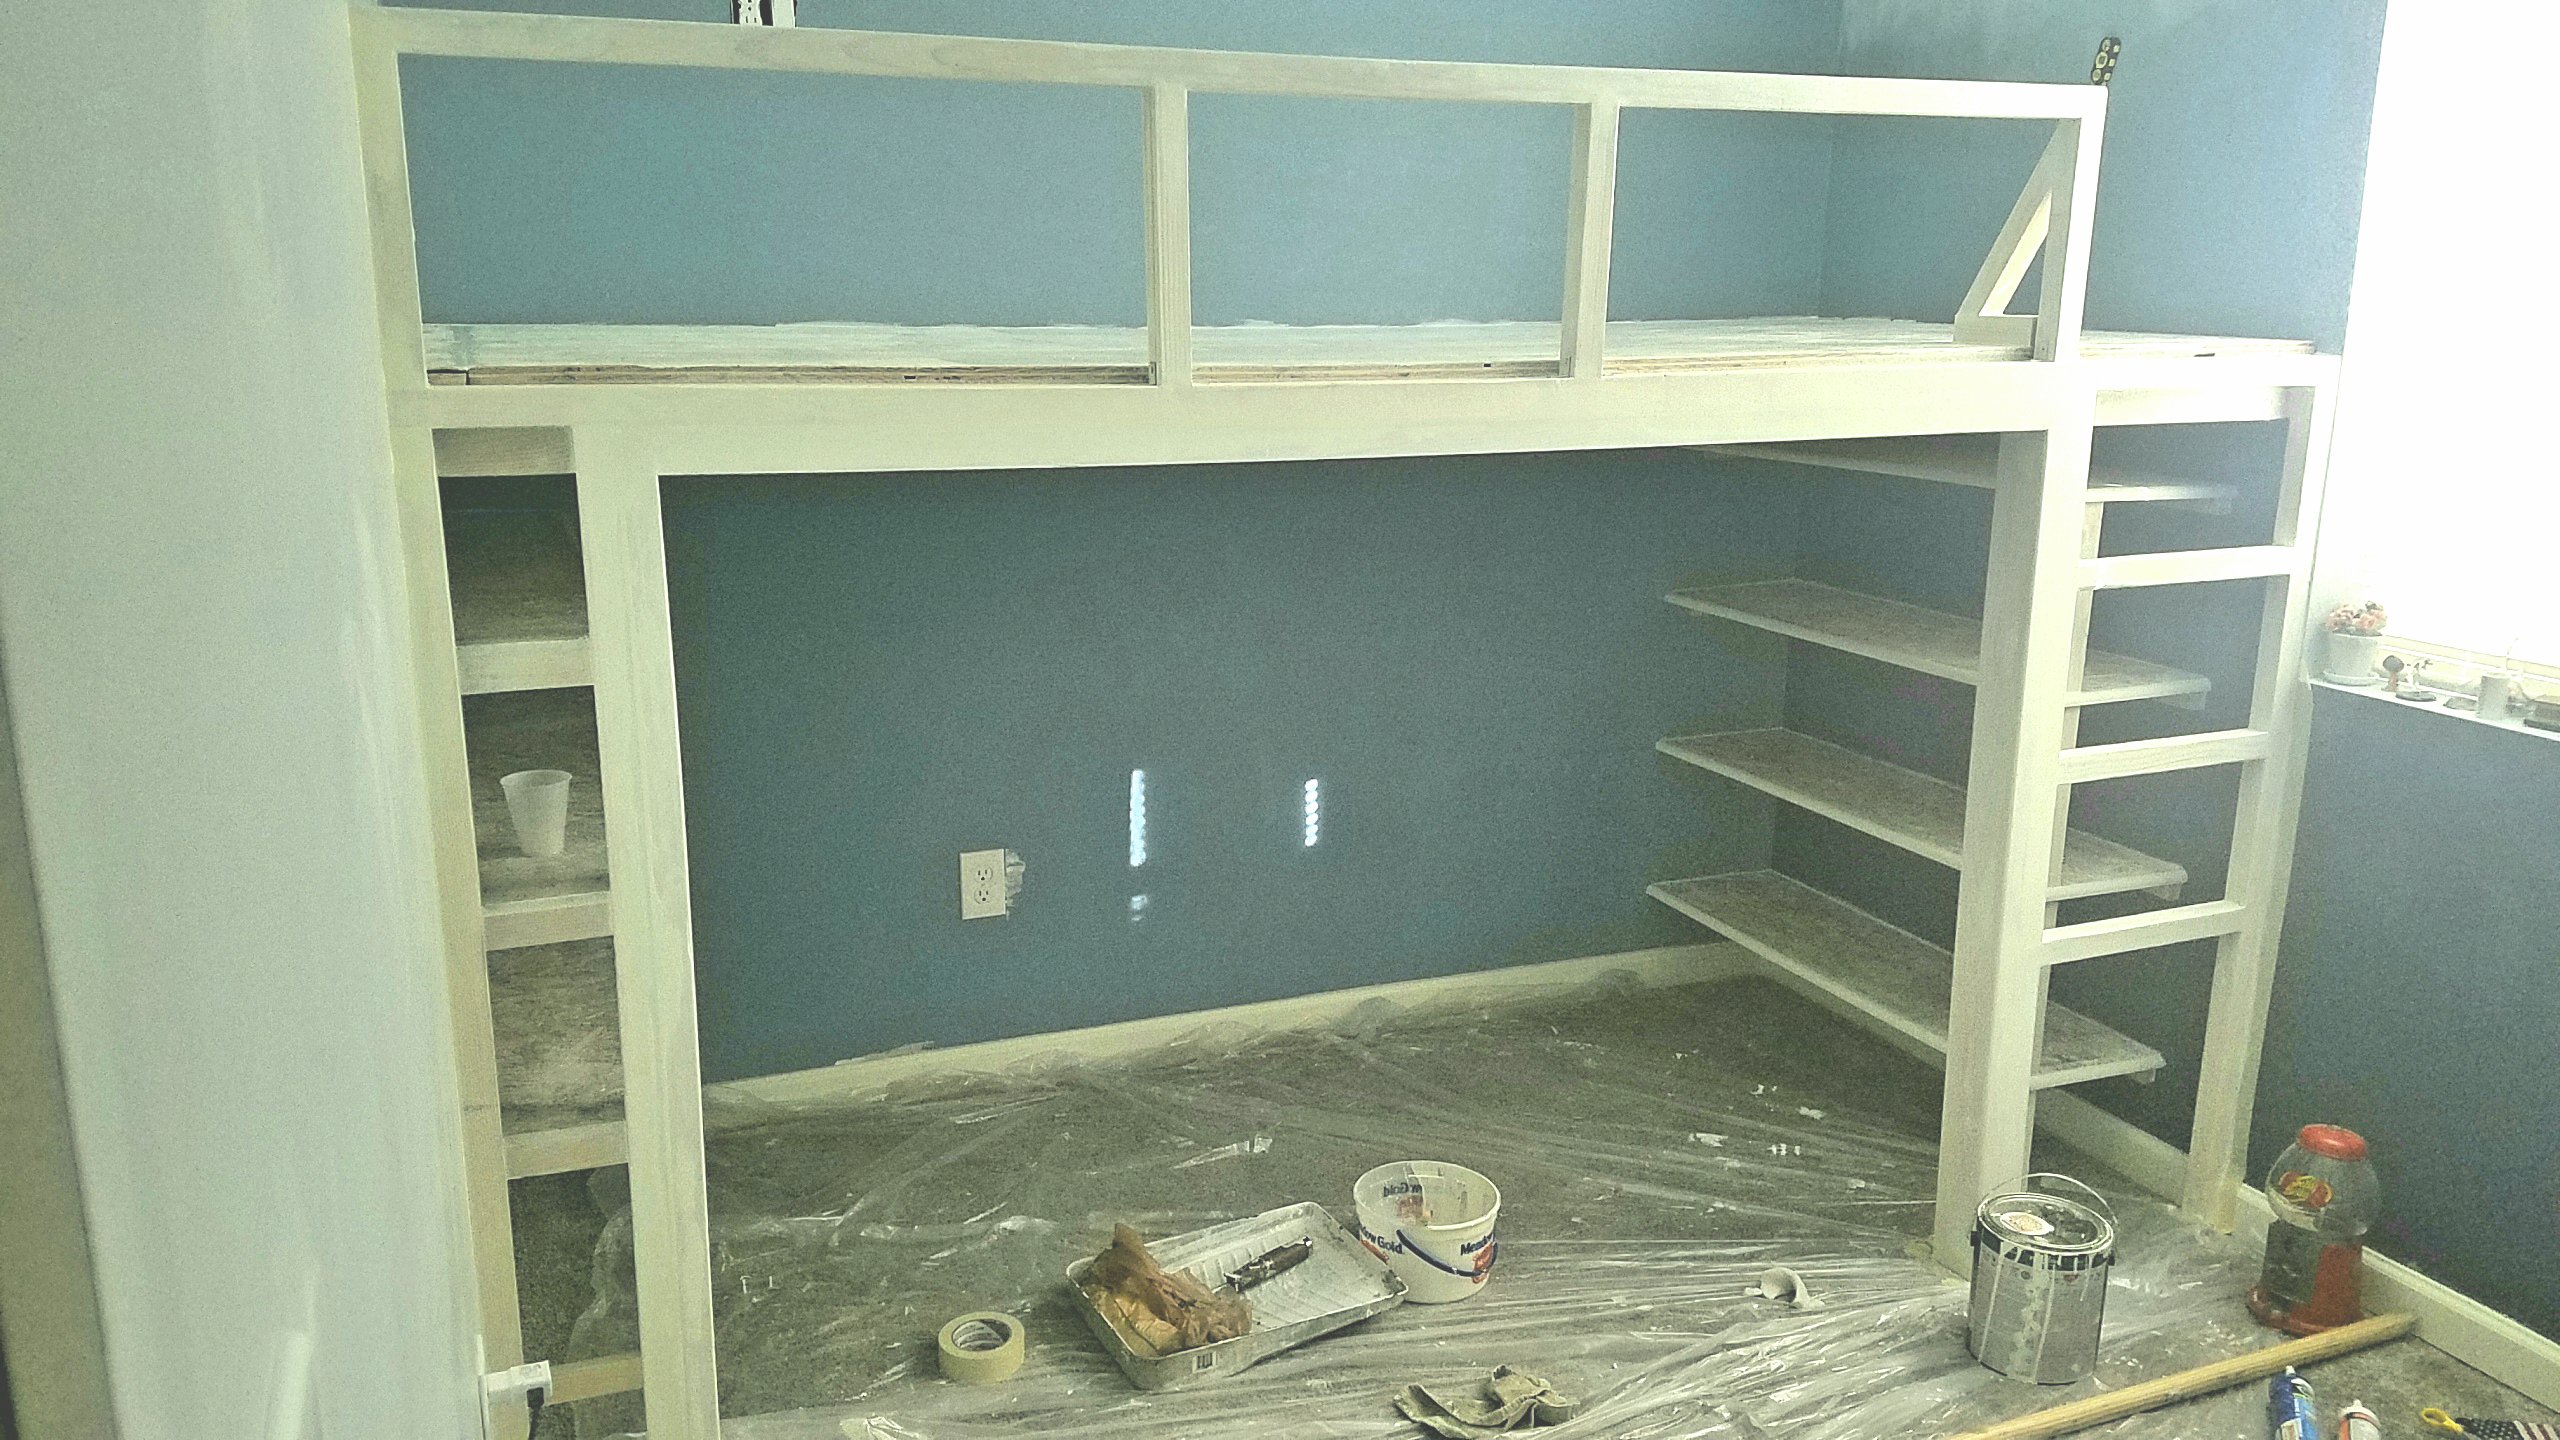
Smooth Out the Finish
Next I sanded down all the joints. Then I caulked in all the screws, joints and imperfections in the wood. There were still a few problem areas so I mixed up a batch of drywall mud and applied it to the wood, let dry and sanded smooth.
Paint or Stain Loft Bed
My daughter and I decided to use white wash on the bed since the room already had some deep blues and we wanted the bed to stand out.
You can buy whitewash stain or you can make your own whitewash. I used 2 parts water to 1 part paint. The nice thing about making your own is you can use paint you already have on hand. It also made it easy to match our trim since it was the same shade.
At first it looks pretty opaque, but the paint soaks into the wood and quickly gets that beach wood look. You can also wipe part of it away with a rag if you want a lighter effect.
Add a Carpet Landing
We had left over carpet scraps that I used for a comfy loft landing. First put down the padding and secure in place with staples. Then screw the carpet into place on the underside onto the landing. Once you flip the carpet over it gives a nice carpeted edge.
Enjoy Your New Space
You’ve arrived, pull out your organization skills and use those cubbies. I plan on installing some sort of material for privacy between the railing rung. I’m thinking corrugated metal, antique rulers or plain-boring-flat wood.
What would you put in between rungs for more privacy and still have it look nice?
Well until next time, have a great day and keep creating!
Natalie


by Natalie | Feb 1, 2019 | Home Renovation
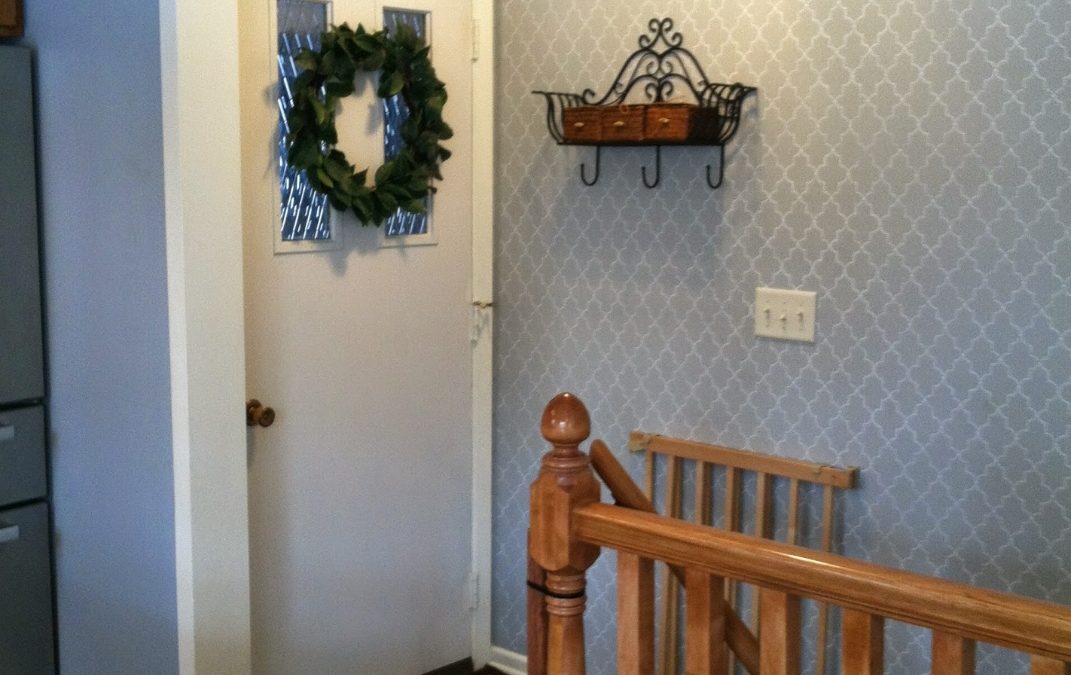
When we bought our first home, we had a lot of dreams. One thing that I couldn’t really change though was the entrance size. It was narrow and tight and the previous owners had painted it a tan color which seemed to magnify the smallness of the space.

Here’s a poorly taken picture to magnify the awfulness of the space. 😉
Because of the floor layout, we couldn’t knock down walls and open up the entrance. One because there was a bedroom on the right and on the left a small weird partial wall which would then create a gap in the beautiful hardwood. I decided I needed to trick the eye and convince people they were seeing a larger area.
Choose the Right Paint Color and Sheen for the Space
The first plan was to lighten the room with paint. The colors you pick can make a dramatic impact on the look of a home. Warm colors do make a room feel – well warm, but they can also make it feel small. If you don’t have a lot of room to start with, warm and/or dark colors might not be the choice for you.
Dark colors, can add a dramatic effect. Add pops of contrasting color, like a large painting or wide trim in a light color, can still trick the eye into not noticing a small space. In general though, lighter colors and natural light help increase the feeling of openness.
Play with different paint sheens. Flat paint absorbes light and is good for theater or bedrooms. Eggshell, satin, semi gloss and, gloss reflect light at a range of levels and hold up to washing better the glossier it gets. Usually people use a higher sheen on trim, like satin or semigloss and a lower sheen on walls like eggshell.
For more paint sheen information click here.
Use Texture to Create Height
I threw in some texture to lift the eyes and create a feeling of height. To accomplish this I created faux wainscoting that came slightly above 5 feet.
When you entered the home the height of the trim made you feel like there was alot of head room.
It also made the perfect height for a small hook rack for purses, jackets etc.

Use Texture to Keep the Eye Focused
I trimmed out my flat, boring accordion closet doors to create interest and pull attention away from the narrow entrance.
The trim was cut to span more than one door, creating the effect of two larger doors instead of four small ones.

Then I painted the trim, doors and walls of my new fake 🙂 wainscoting up to the top rail in a nice creamy Apple Core from Behr in a satin sheen. Above the wainscoting I picked a gray blue paint in eggshell.
Use Contrast to Pull the Eye Upward
You’ll notice I put the darker color above the light color. You would think this creates a heavy feeling making it seem small, but actually it’s the opposite.
By creating something eye catching up high, it causes you to look up and makes the room seem larger than it is.

Create a Focal Area that Might Otherwise be Ignored
Another trick is to pull your gaze through the room with a focal point.
Our home also came with a narrow kitchen surprise, surprise. We were able to knock out a partial wall to open up the kitchen a bit over the stairway, but it still needed help. I decided to add texture to my trouble wall and make it the focal point.

This was accomplished by stenciling the wall with a light gray semi-gloss over a misty darker blue/gray in eggshell.
This wall became my favorite and went above and beyond what I was hoping. Friends always commented on the wall and with it being right at the entrance from our garage it was a nice welcome home after a long day.

Use Reflection to Imitate Space
Another trick is to add a large mirror in a prominent location, over the fireplace or as a focal point of a room. It’s a great way to elongate a small space and create the effect of a larger space.
In this case the mirror looks like a window and reflects what looks like another room. Though logically we know it’s a mirror it still create a larger, spacial feeling.
A well placed mirror can also reflect natural light creating the feeling of several windows when the room may only have one.
What have you done to make a room seem larger?
Which room in your house do you want to use these tricks on?

by Natalie | Jan 25, 2019 | Energy Efficiency, Home Renovation
Few things motivate me more than comfort and saving money. When we bought our 40 year old home we didn’t realize how important those two things would become.
Why We Bought an Old House
We bought an old house because we were fresh out of school and had a very small down payment. But, the home had good bones and was free of musty smells. I had checked out the utility bills of the previous owners and found the electric bill was $300 in August…
$300!!

And.. we still bought the house, we just knew we had to hit energy efficiency quick. Which the previous owners had made easy because the water heater was broken and they had stolen the fridge – did I mention it was a foreclosure?
That my friends, is how I became nuts about saving energy.
Saving energy became my ultimate challenge. Within three years we had lowered the high utility bill dramatically. It was now half, not just our original bill, half of the average home our size. We were also more comfortable because the heated or cooled air wasn’t streaming out of our house.
How We Cut the Energy Bill
First, we did all the little things found here in my Saving Energy for $10 or less. Do these first. It will help you get comfortable faster and it doesn’t cost a lot.
We Took Advantage of Energy Rebates
Here are the 5 biggest energy company rebate programs.
Duke Energy
Southern Company
Dominion Energy
Exelon
Rocky Mountain Power
To find your particular rebate program ever your energy company name and “rebate program” into the search bar.
Refrigerator
We love our Whirlpool refrigerator and it’s an Energy Star. The old units use so much energy. If you have a fridge going out, upgrade to an Energy Star model. It will work better and save energy.
Thermostat
The Nest thermostats are all the rage right now and many times there is a rebate for them. So far we haven’t made the plunge because they are still pretty expensive.
However a regular programmable thermostat can still save you a good amount of money. Allowing you to automatically turn down the thermostat during hours you aren’t at home.
Energy Home Audit –
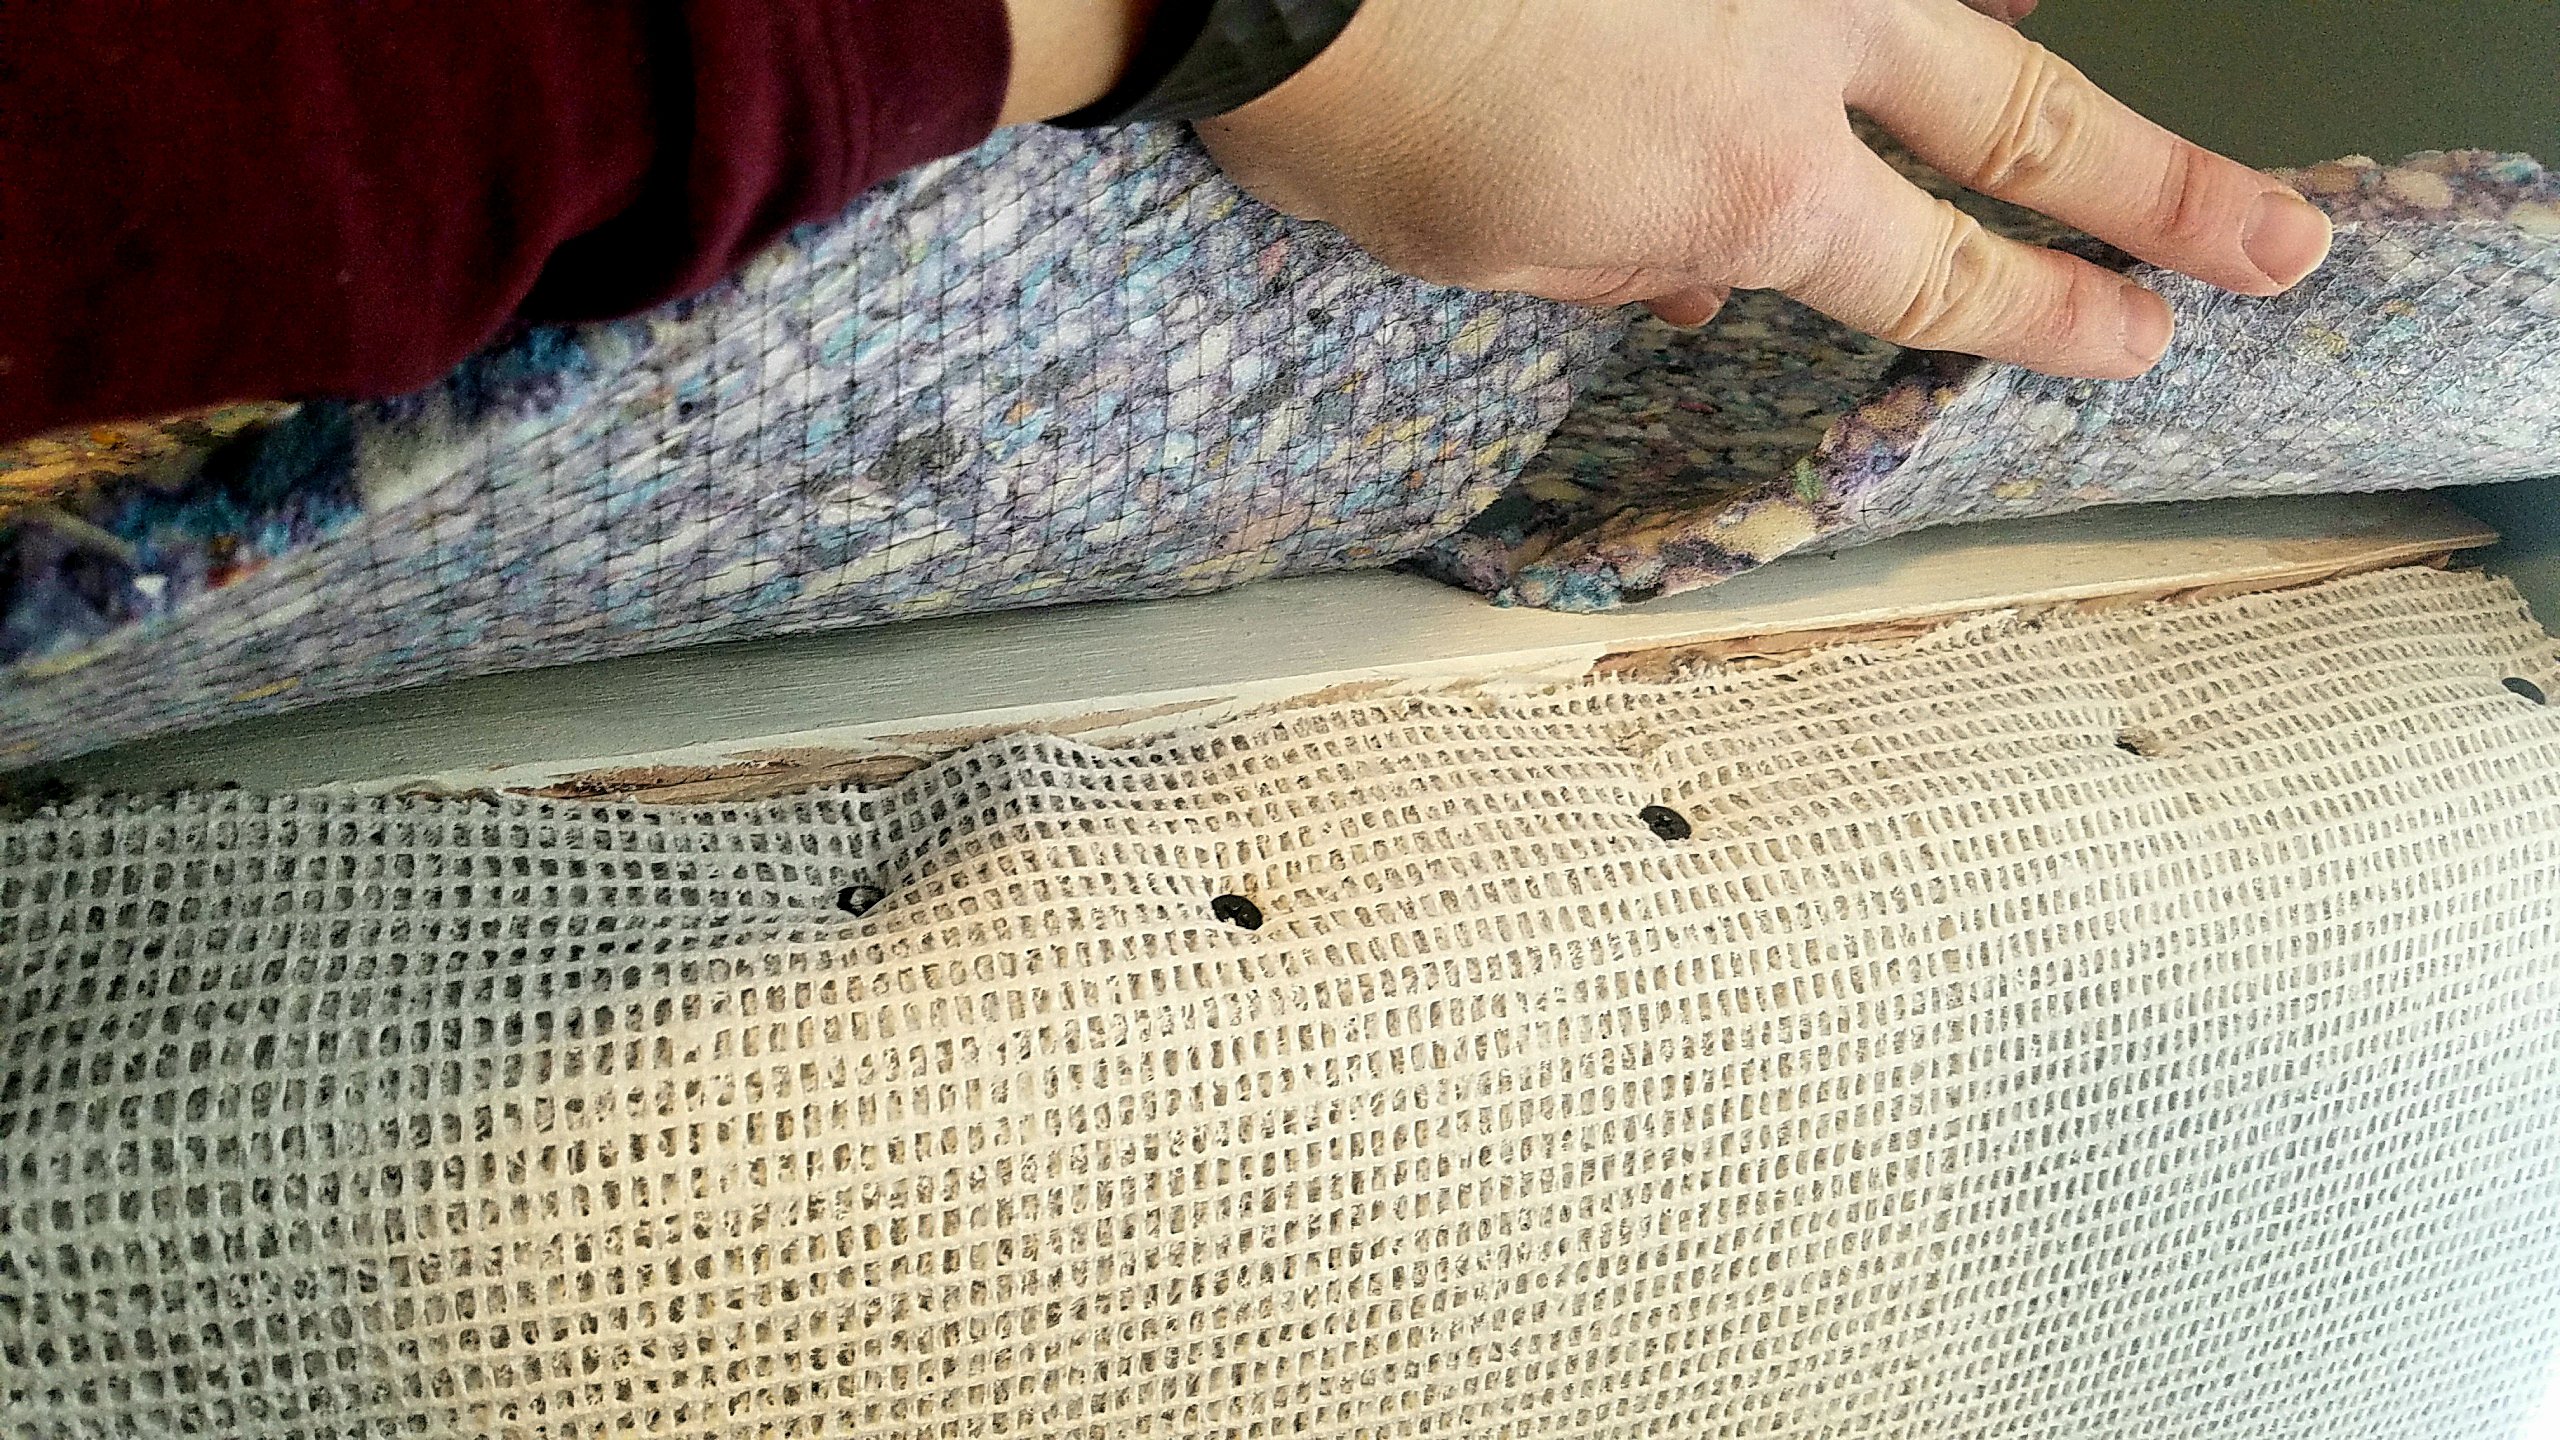
This is where I found out how much heat we were losing through our floor joists in the unfinished basement and ceiling joists in the attic. We were also reminded of how much heat we were losing through our windows. Again check out my previous post for inexpensive fixes that paid off big time.
If your energy company offers an energy audit rebate I would highly recommend them.
We Bought a High Rated Energy Star Water Heater
This made a big difference in saving us energy it was also awesome for our 6 member family. We never ran out of hot water, it was able to heat water so fast. When family was in town one summer we had 6 adults and 4 kids shower or bath back – to – back and no one had a cold shower. It was amazing. I would suggest shopping around, but this water heater is close to what we installed.
We Invested in Water Conservation
Low Flow faucets aerators and shower heads, may not look fancy, but they feel just as great. They help you get the feel of more water by aerating and spreading the water over a larger surface. They use much less water and are definitely worth investing in sooner than later.
Water Conserving toilets, I hate to admit, I didn’t even know these existed until we were forced to buy a new toilet. They are amazing and use so much less water than the original designs.
We installed a Rain Barrel (which was also a rebate) and used it for watering our garden when the summer rains had dried up.

Plant native foliage that work well with the natural water flow of the area.

Did Energy and Water Conservation Pay off financially?
Well yes. Actually a big yes.
We were careful to get quotes and decide how much time it would take us to actually save money after it had paid for its self. There were things we didn’t end up doing because we wouldn’t benefit from the investment.
We didn’t get new windows. We didn’t blow more insulation into the roof. But we did find things we could do to still improve the windows and attic without spending a fortune – refer to the previous post.
The bulk of the money we made, which ultimately paid for everything, was advertising our energy savings report when we sold. We had people coming out of the woodwork, writing us letters, begging us to chose them. We ultimately accepted an offer above asking price and well above what we paid for it.
The home also sold well because of the cosmetic updates we carefully chose. Which will have to be for another post.
I am still an avid energy and water conservationist. I’ve personally experienced the financial gain and physical comfort from a conserving home and I’ll keep doing it all my life.

What are things you have done to conserve? What would you recommend for big ticket improvements versus doing a cheaper repair?

by Natalie | Jan 4, 2019 | Home Renovation
There were so many things that happened, these are the projects and posts that made the most impact in our personal comfort.
So here it is the beginning of a new year and while we don’t have to set our goals here, many of us do. It seems like a natural time to decide how we want the new year to go. It’s good, but it doesn’t have to be the only time we think about what we want to do.
I have found that I am most successful when I set goals I know I can accomplish. Adding one (maybe two) that will be hard, but I know should be accomplished.
I don’t plan out the whole year. I make goals as I go and once they’re done, I set more. Things do get done, though I must admit even more than my usual is accomplished when my husband is involved.
Goals of 2018
The Back Yard
Because of Tyler, within the 2018 year, we finished our back yard.
And got a dog, which was something we had put off for years. Here she is on our finished lawn. With the pretty Pavers Edge I did. 😊

Losing Some Weight
Because of my husband I finally lost the 10 pounds I’d been trying to get rid of for four years. He decided enough was enough and lost 60+ pounds this year! To be supportive I adopted the same changes and the pounds I had been fighting with for years melted away. I was shocked and grateful.
Finishing the Basement
We also finished our basement. Well, we still need a few doors and trim… and a bathroom, but we are claiming it!

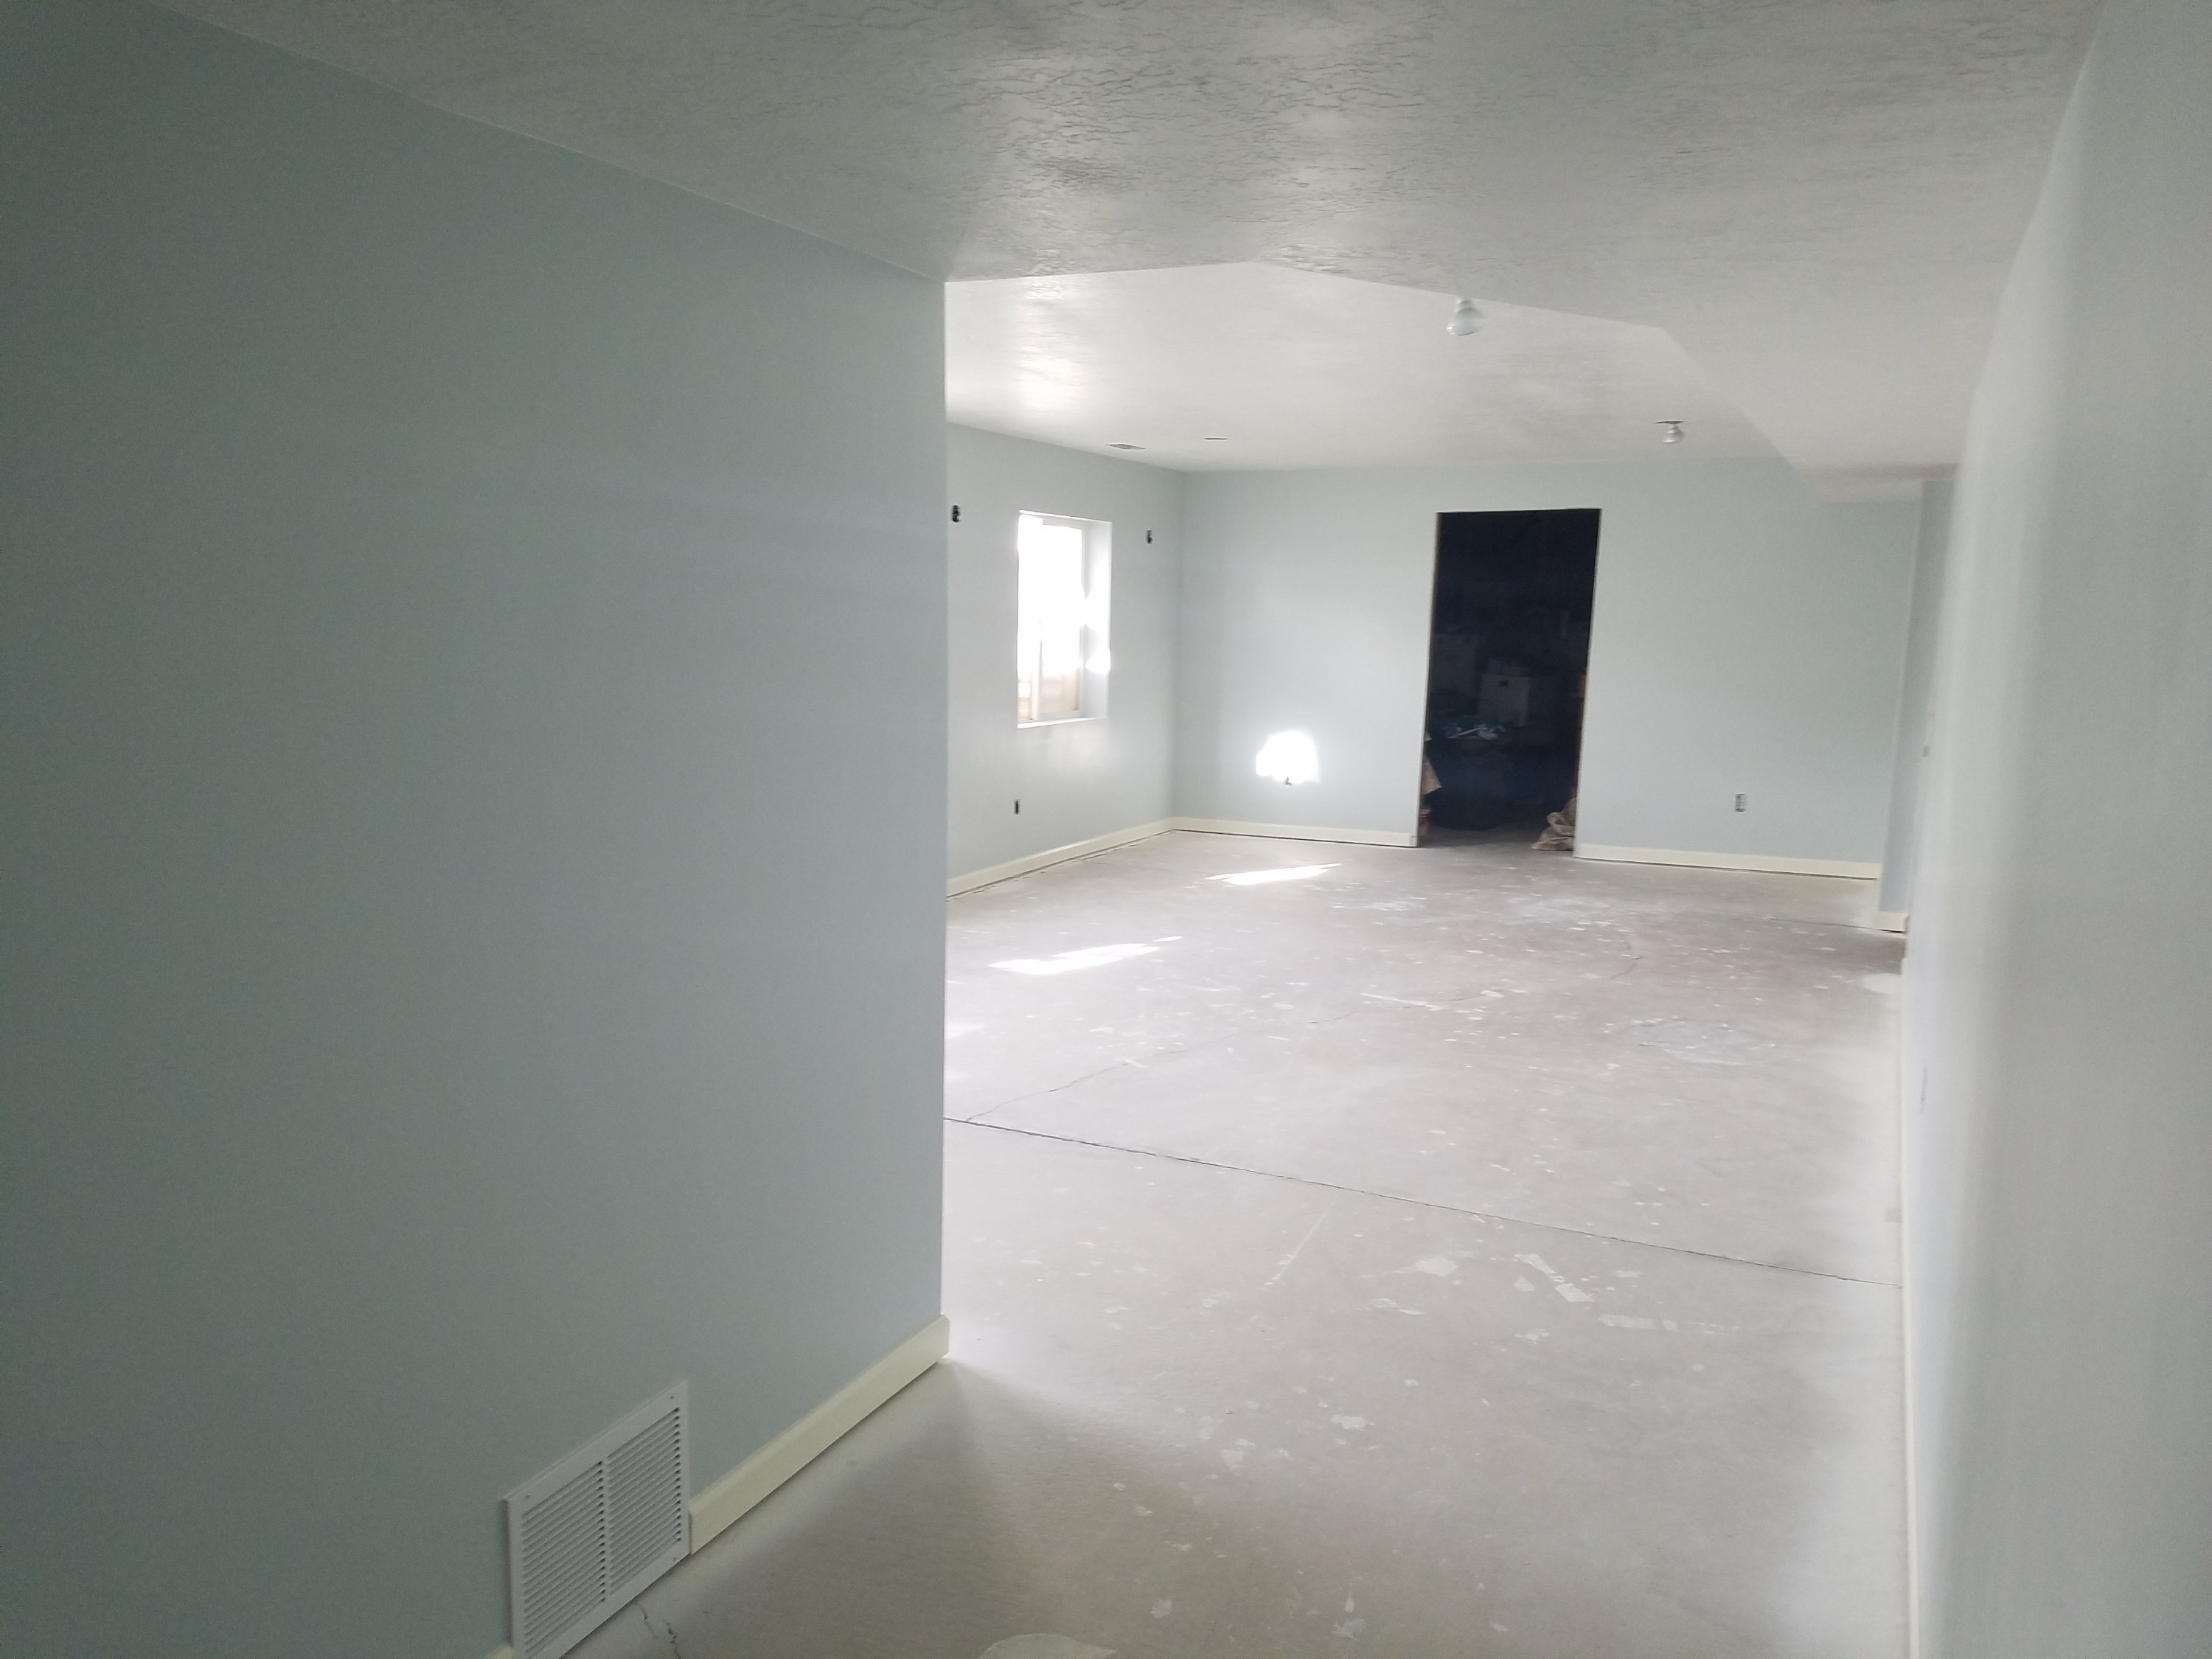
We do have carpet, but this shot is so nice and crisp. The carpet is just going to have to make its showing later.
Personal DIY
It’s strange looking back on these accomplishments. As of an hour ago, I was most proud of my personal DIY projects, but they pale in comparison to the above goals (that Tyler made happen😂😂). I’m still way happy about the following.
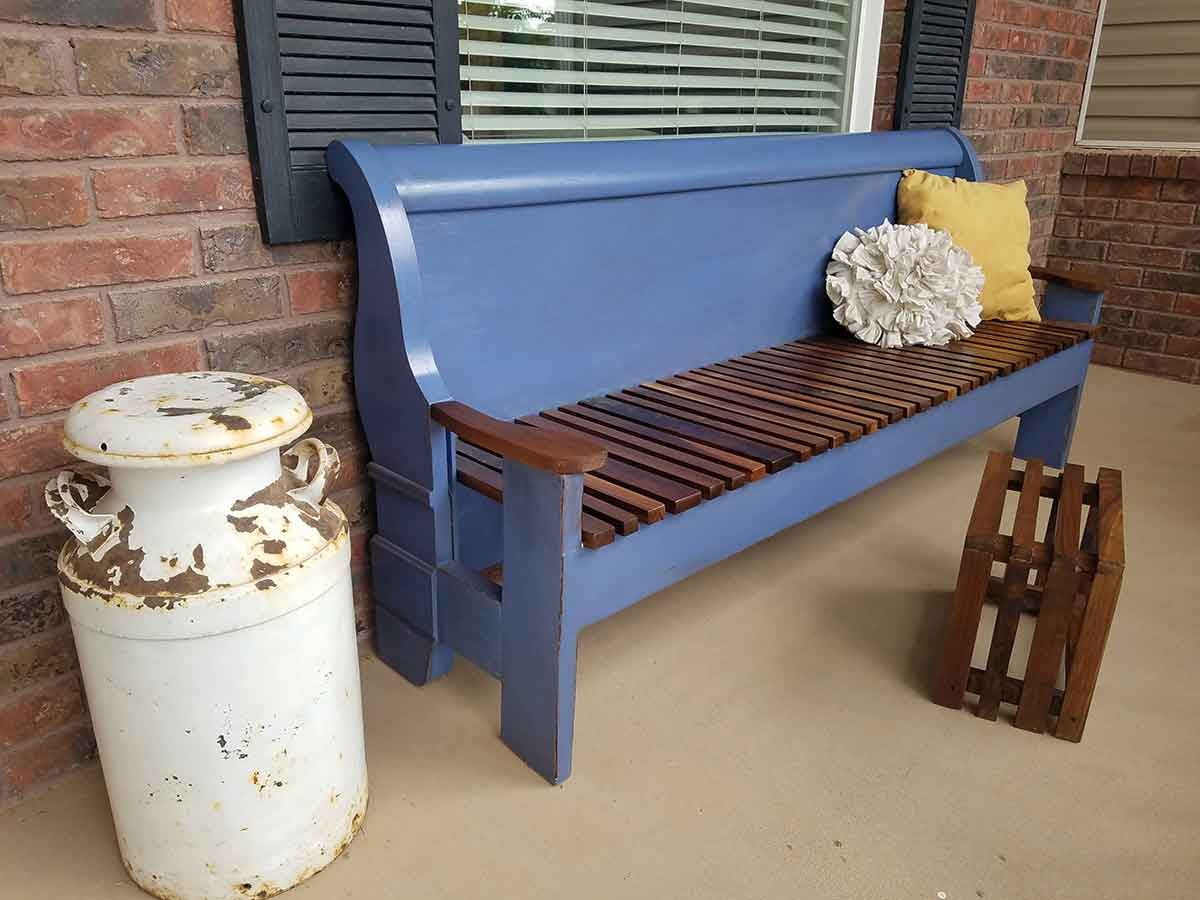
My front porch bench. Made from upcycled, reinvented parts. I’m mostly proud of this piece because I literally saved everything from being sent off to the dump or being burned. Now I have a gorgeous bench and place to sit while I watch my kids play. The time was worth it.
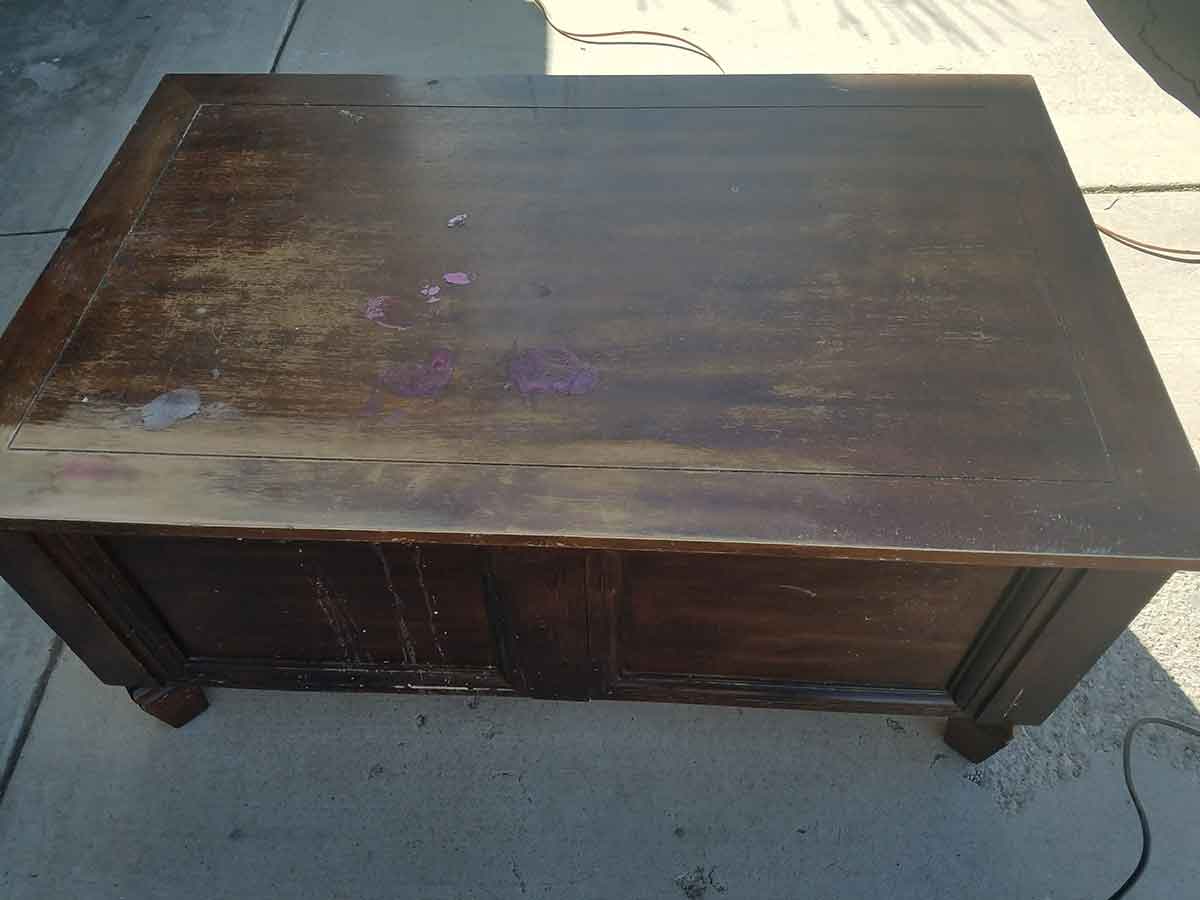
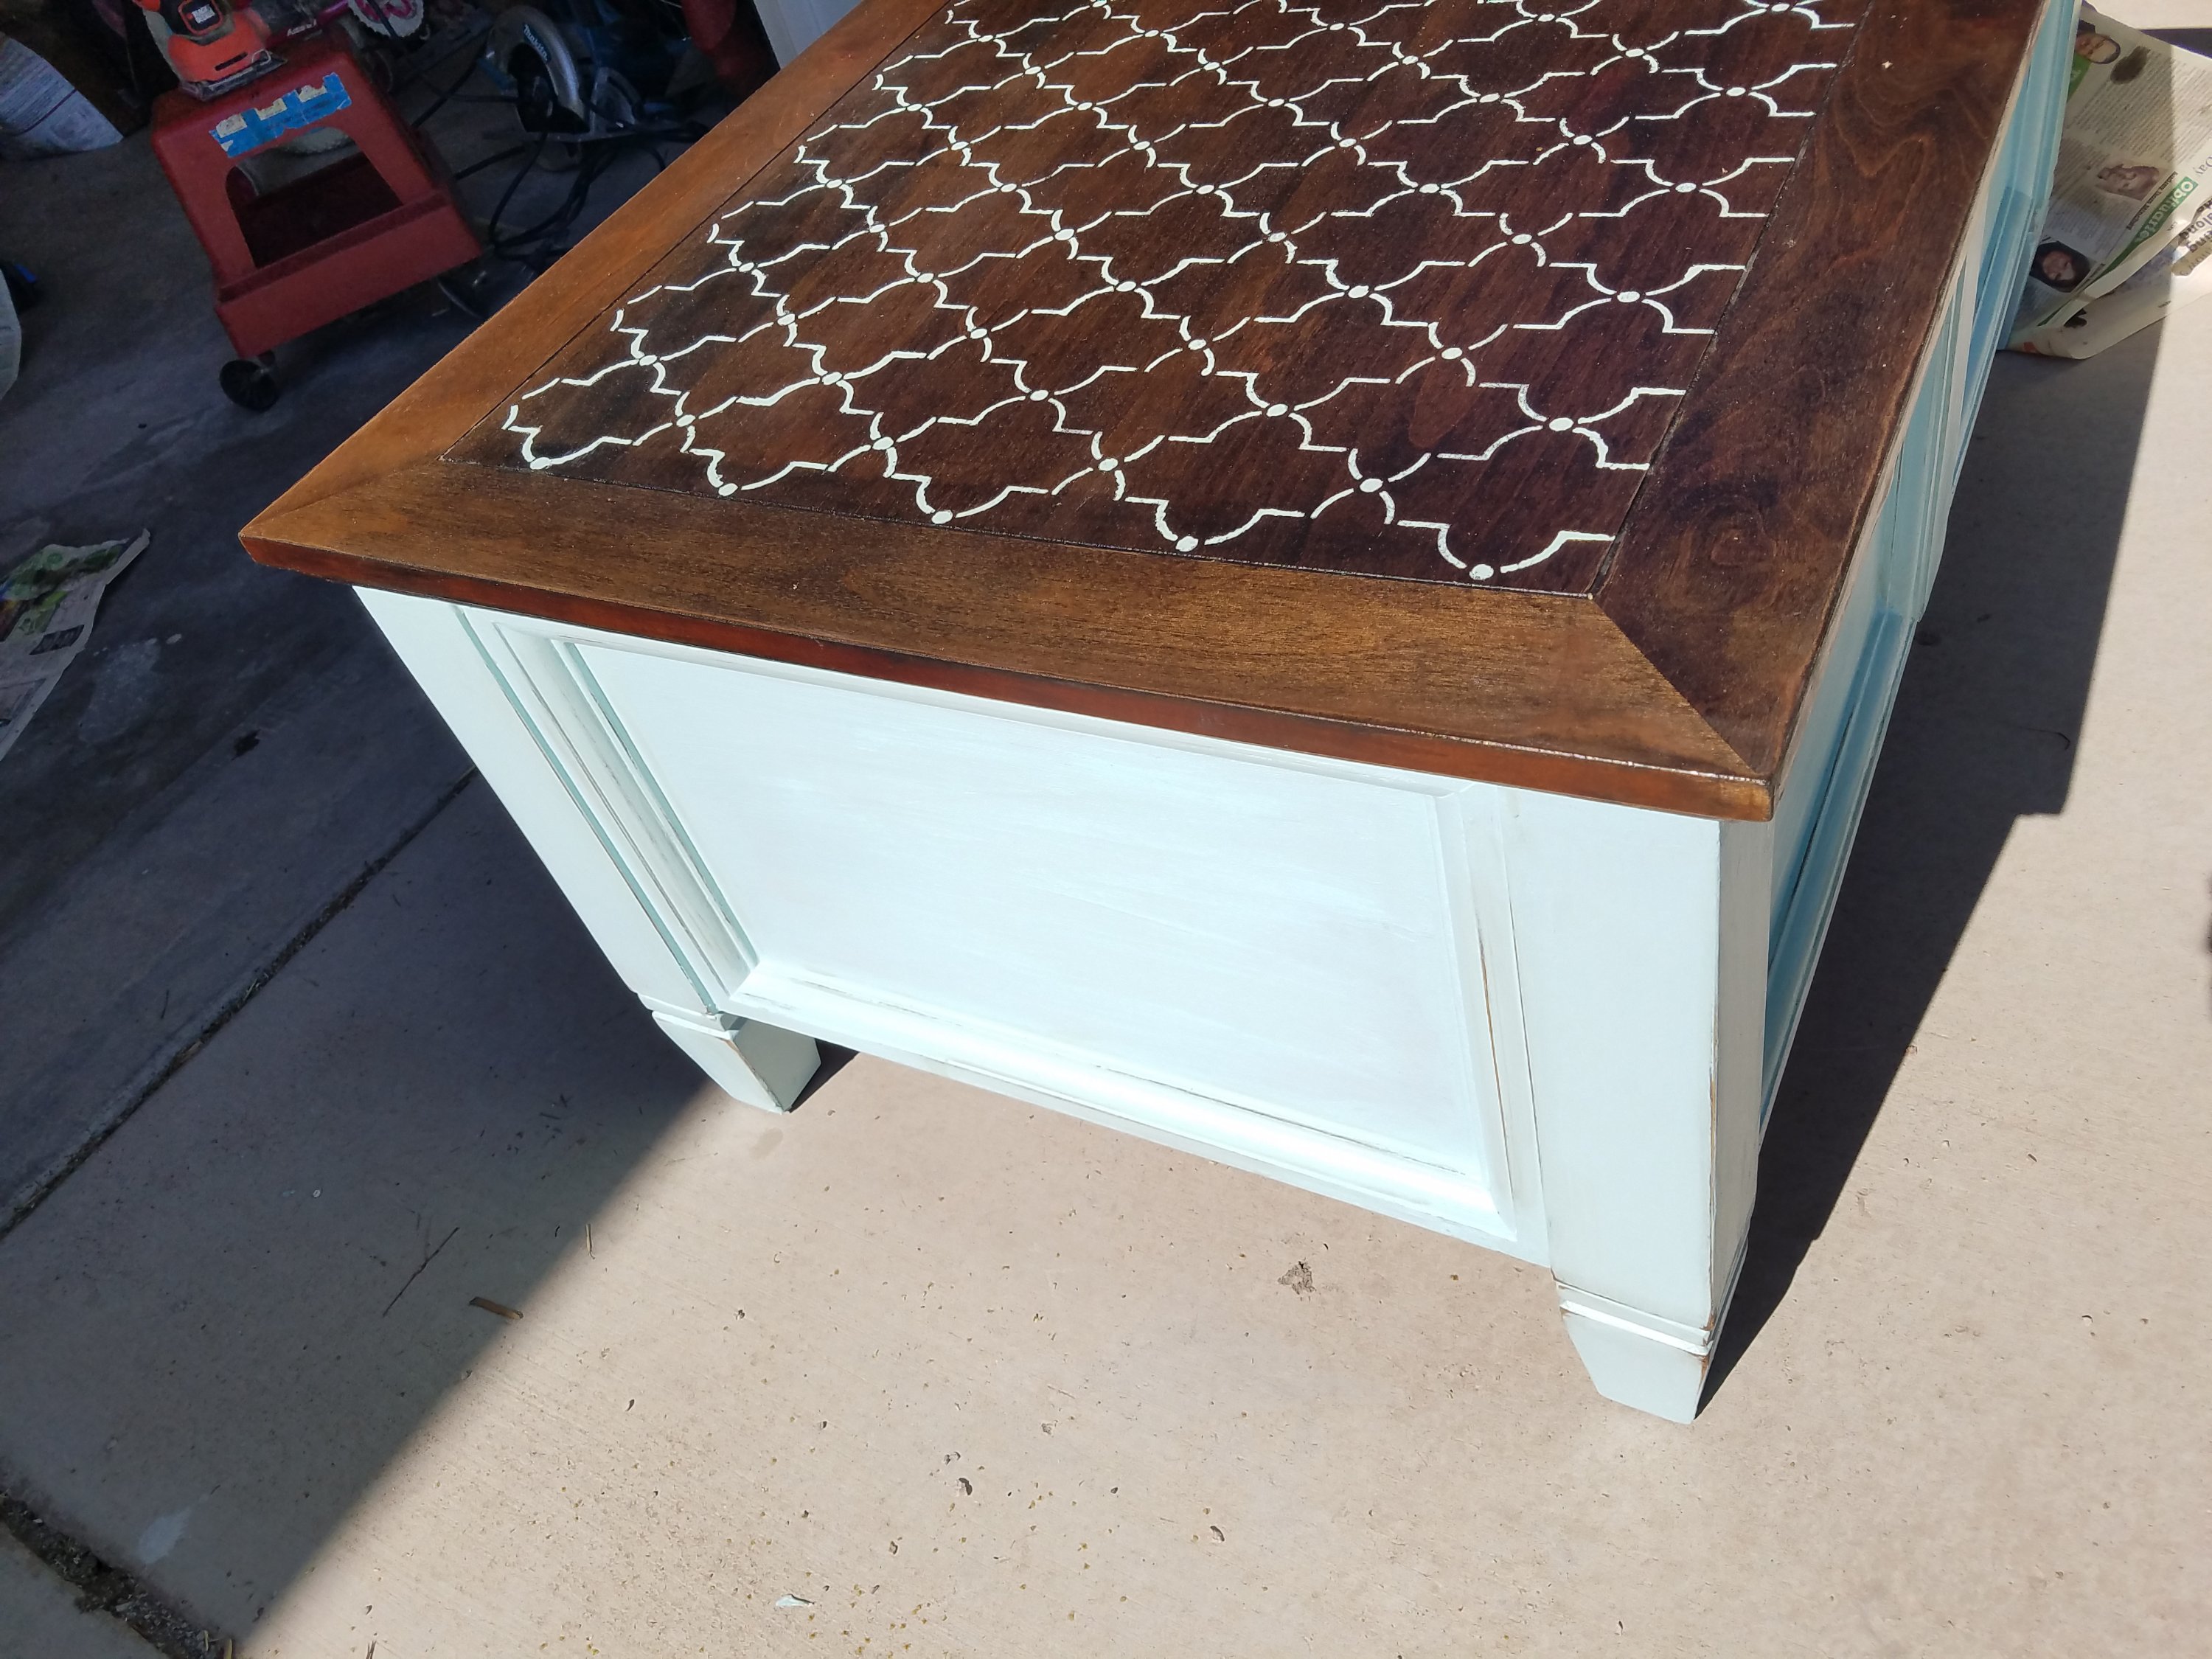
The Stenciled Storage Chest was also fun. Though it wasn’t a built piece like above, I had alot of fun giving it new life. Furniture refurbishing is a rush. I love to see how much I can improve upon the worst case scenario.
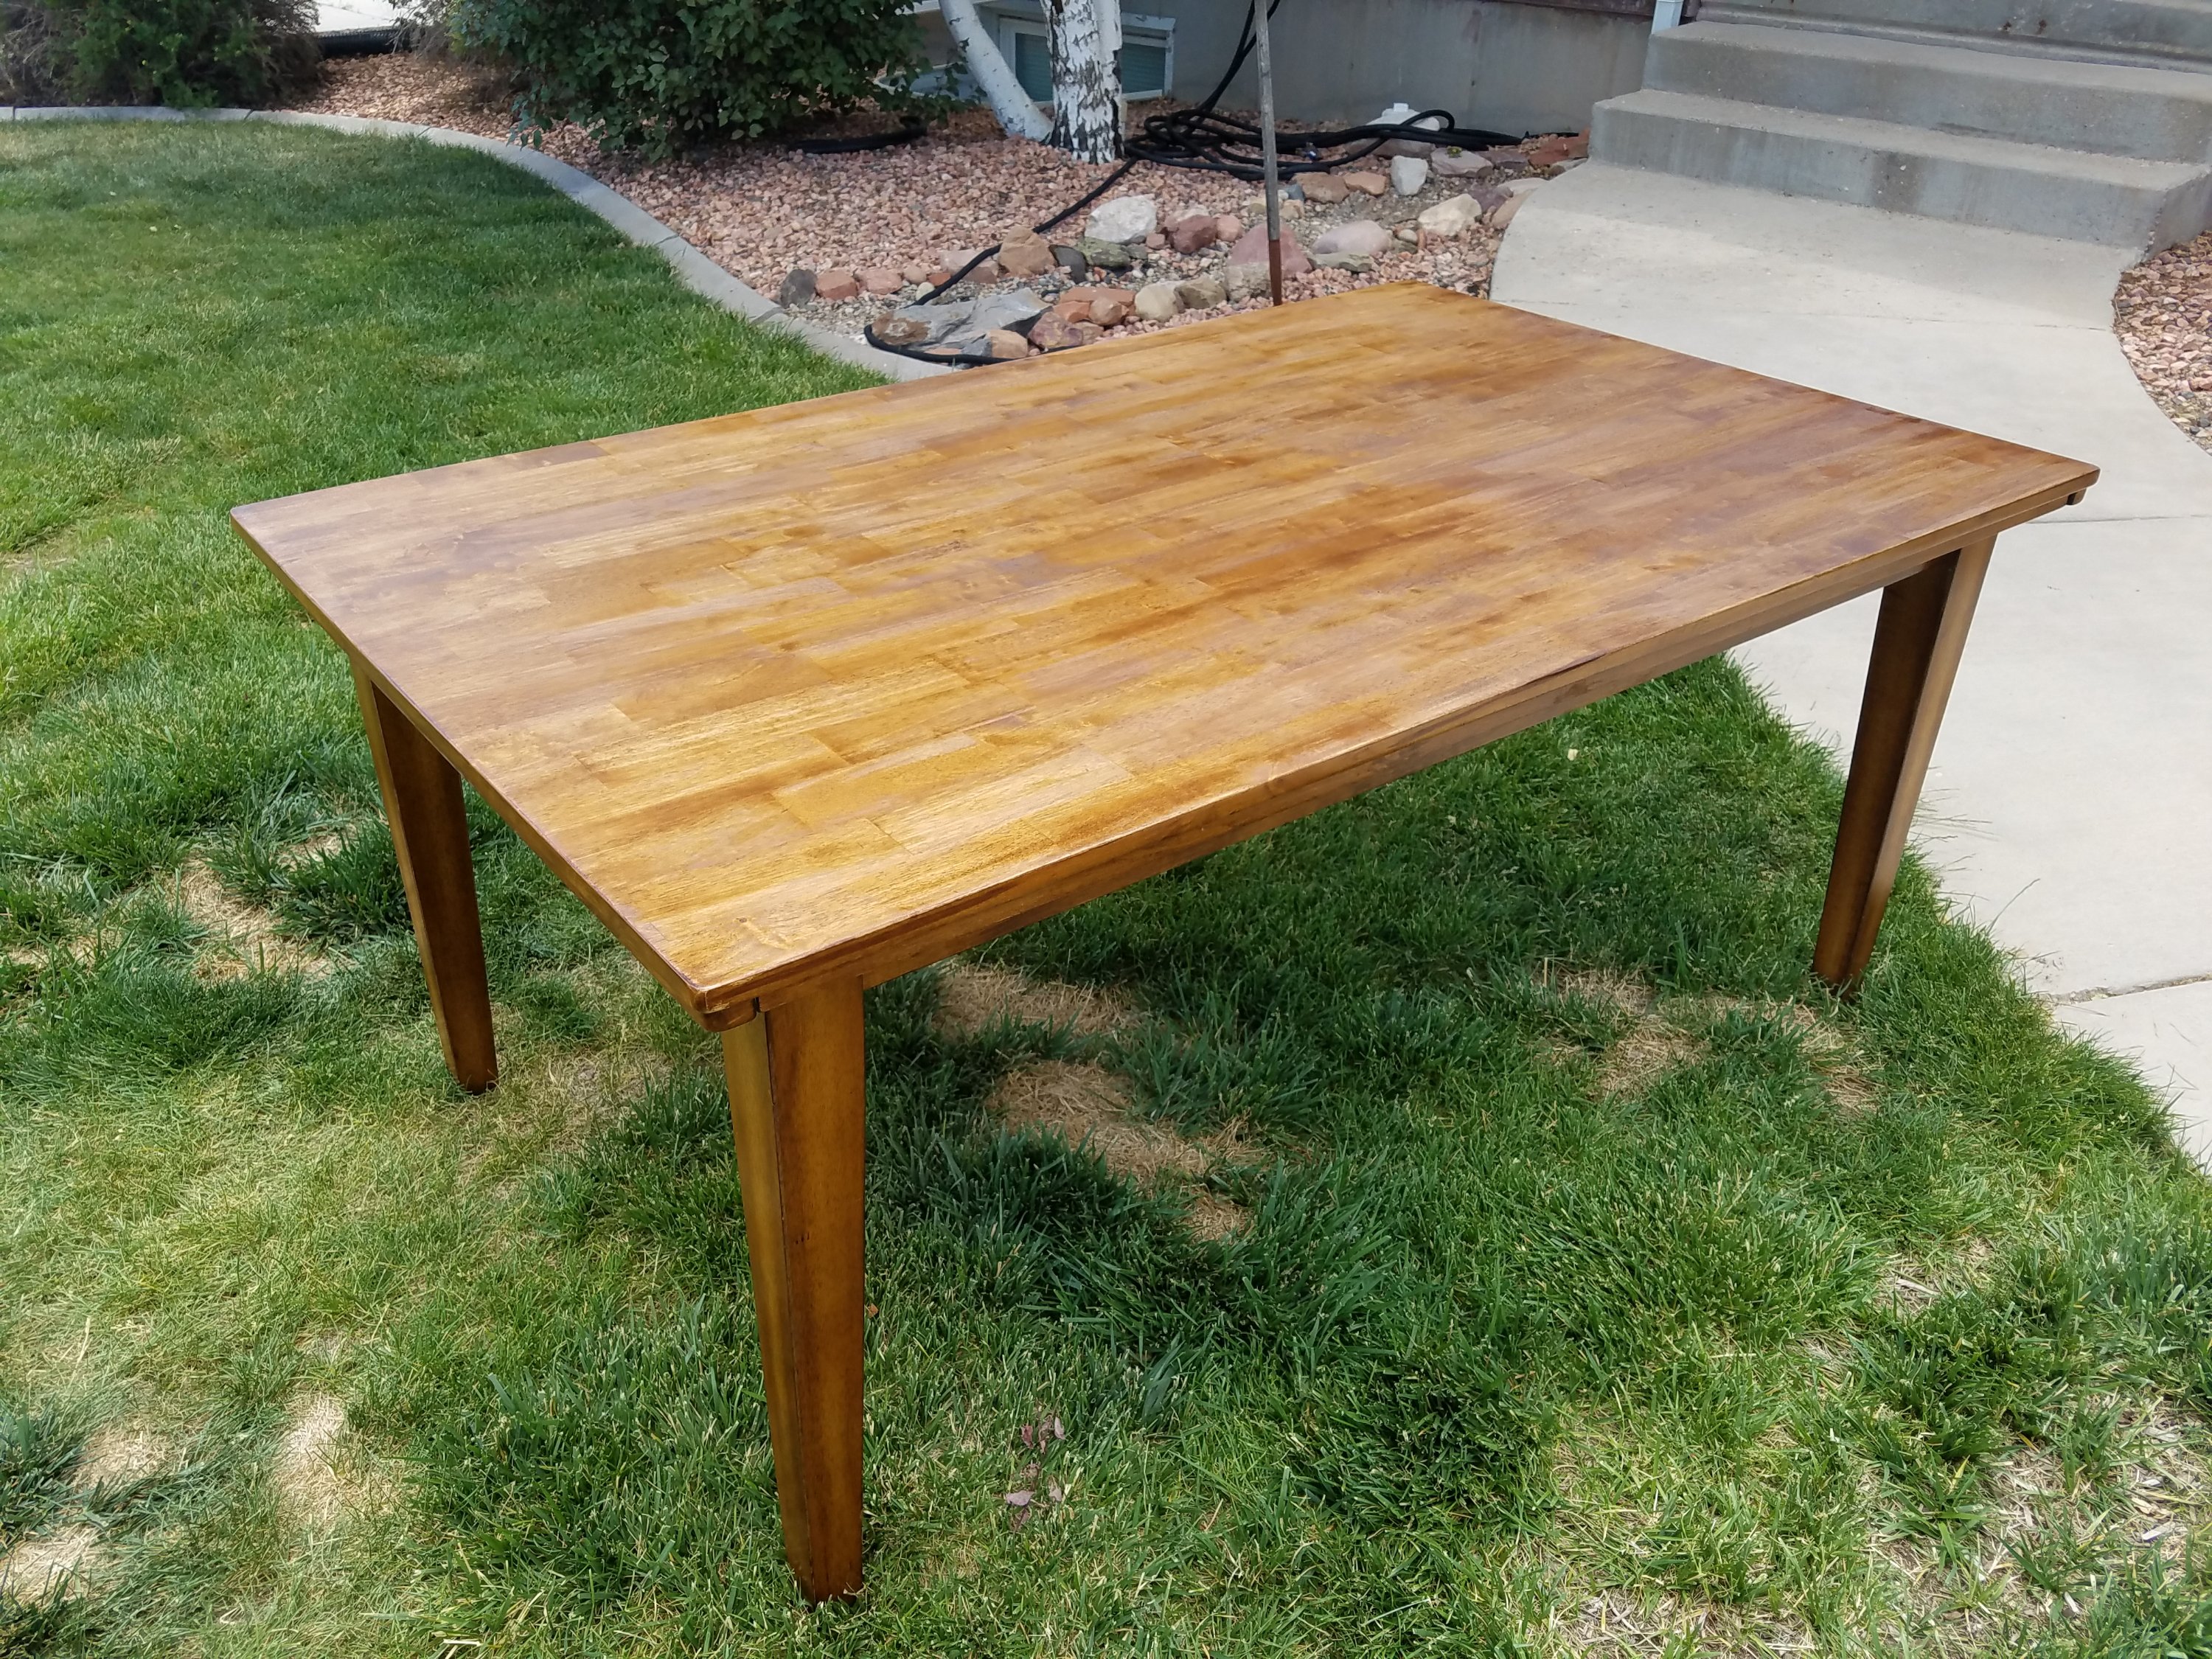
Finally! A refinished table. This poor thing sat for years with a scratched top. I finally drug it outside and sanded it down. I also used a heavy duty, outdoors, polyurethane so it would last a little longer this time.
(please excuse our lawn, it got a little too much fertilizer😒)
The Fourth Generation Dresser – this one was special. I had the opportunity to refinish the dresser my grandmother, mother and I had used as children. I then passed it on to my daughter who gets to use it.
In the process of fixing up this piece, I thought of my grandmother’s life and wondered what stories this little dresser would tell if it could speak.

Personal Improvement
I wrote a few personal improvement articles. Which were some of my favorite posts to write and I have a few more in the works. For now, Overcoming Obstacles and The Art of Saying Yes.


Goals for 2019
Being logical, I really just want goals I want to do, with a few things I don’t want to do, but know need to be done.
Build a Loft Bed
My daughter has been waiting years for a loft bed. Since her room is long and narrow that was our plan early on. Several other projects crowded the loft bed out. This is the year. I’m writing it down, so it’s an official goal now.
Refinish the entertainment consol
This piece of furniture was described by my husband as the ugliest piece of furniture in the house. Which isn’t true, the desk is much uglier. My goal this year is to make it look like a $2000 piece of furniture. Tyler knows my plan and though he can’t imagine it, he says he trusts me. 😂
Finish putting up doors
You know how I talked about realistic goals? This is one of them, the unfun, necessary part.
Finish the basement bathroom
This is a Tyler goal, which means he will find a way to make it happen and I’ll be heavily involved – can’t wait for it to be over. 😉 I’m also grateful for an awesome guy who makes things happen.

by Natalie | Oct 16, 2018 | Curb Appeal, Home Renovation
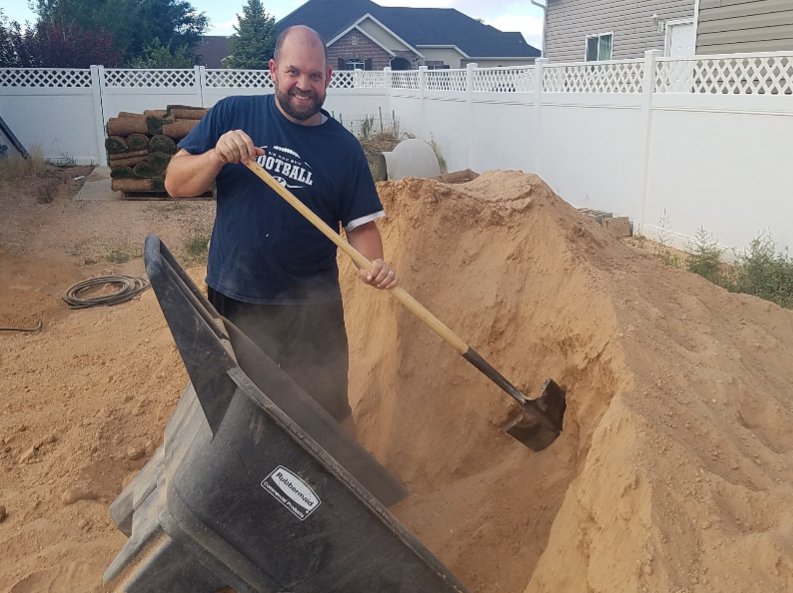
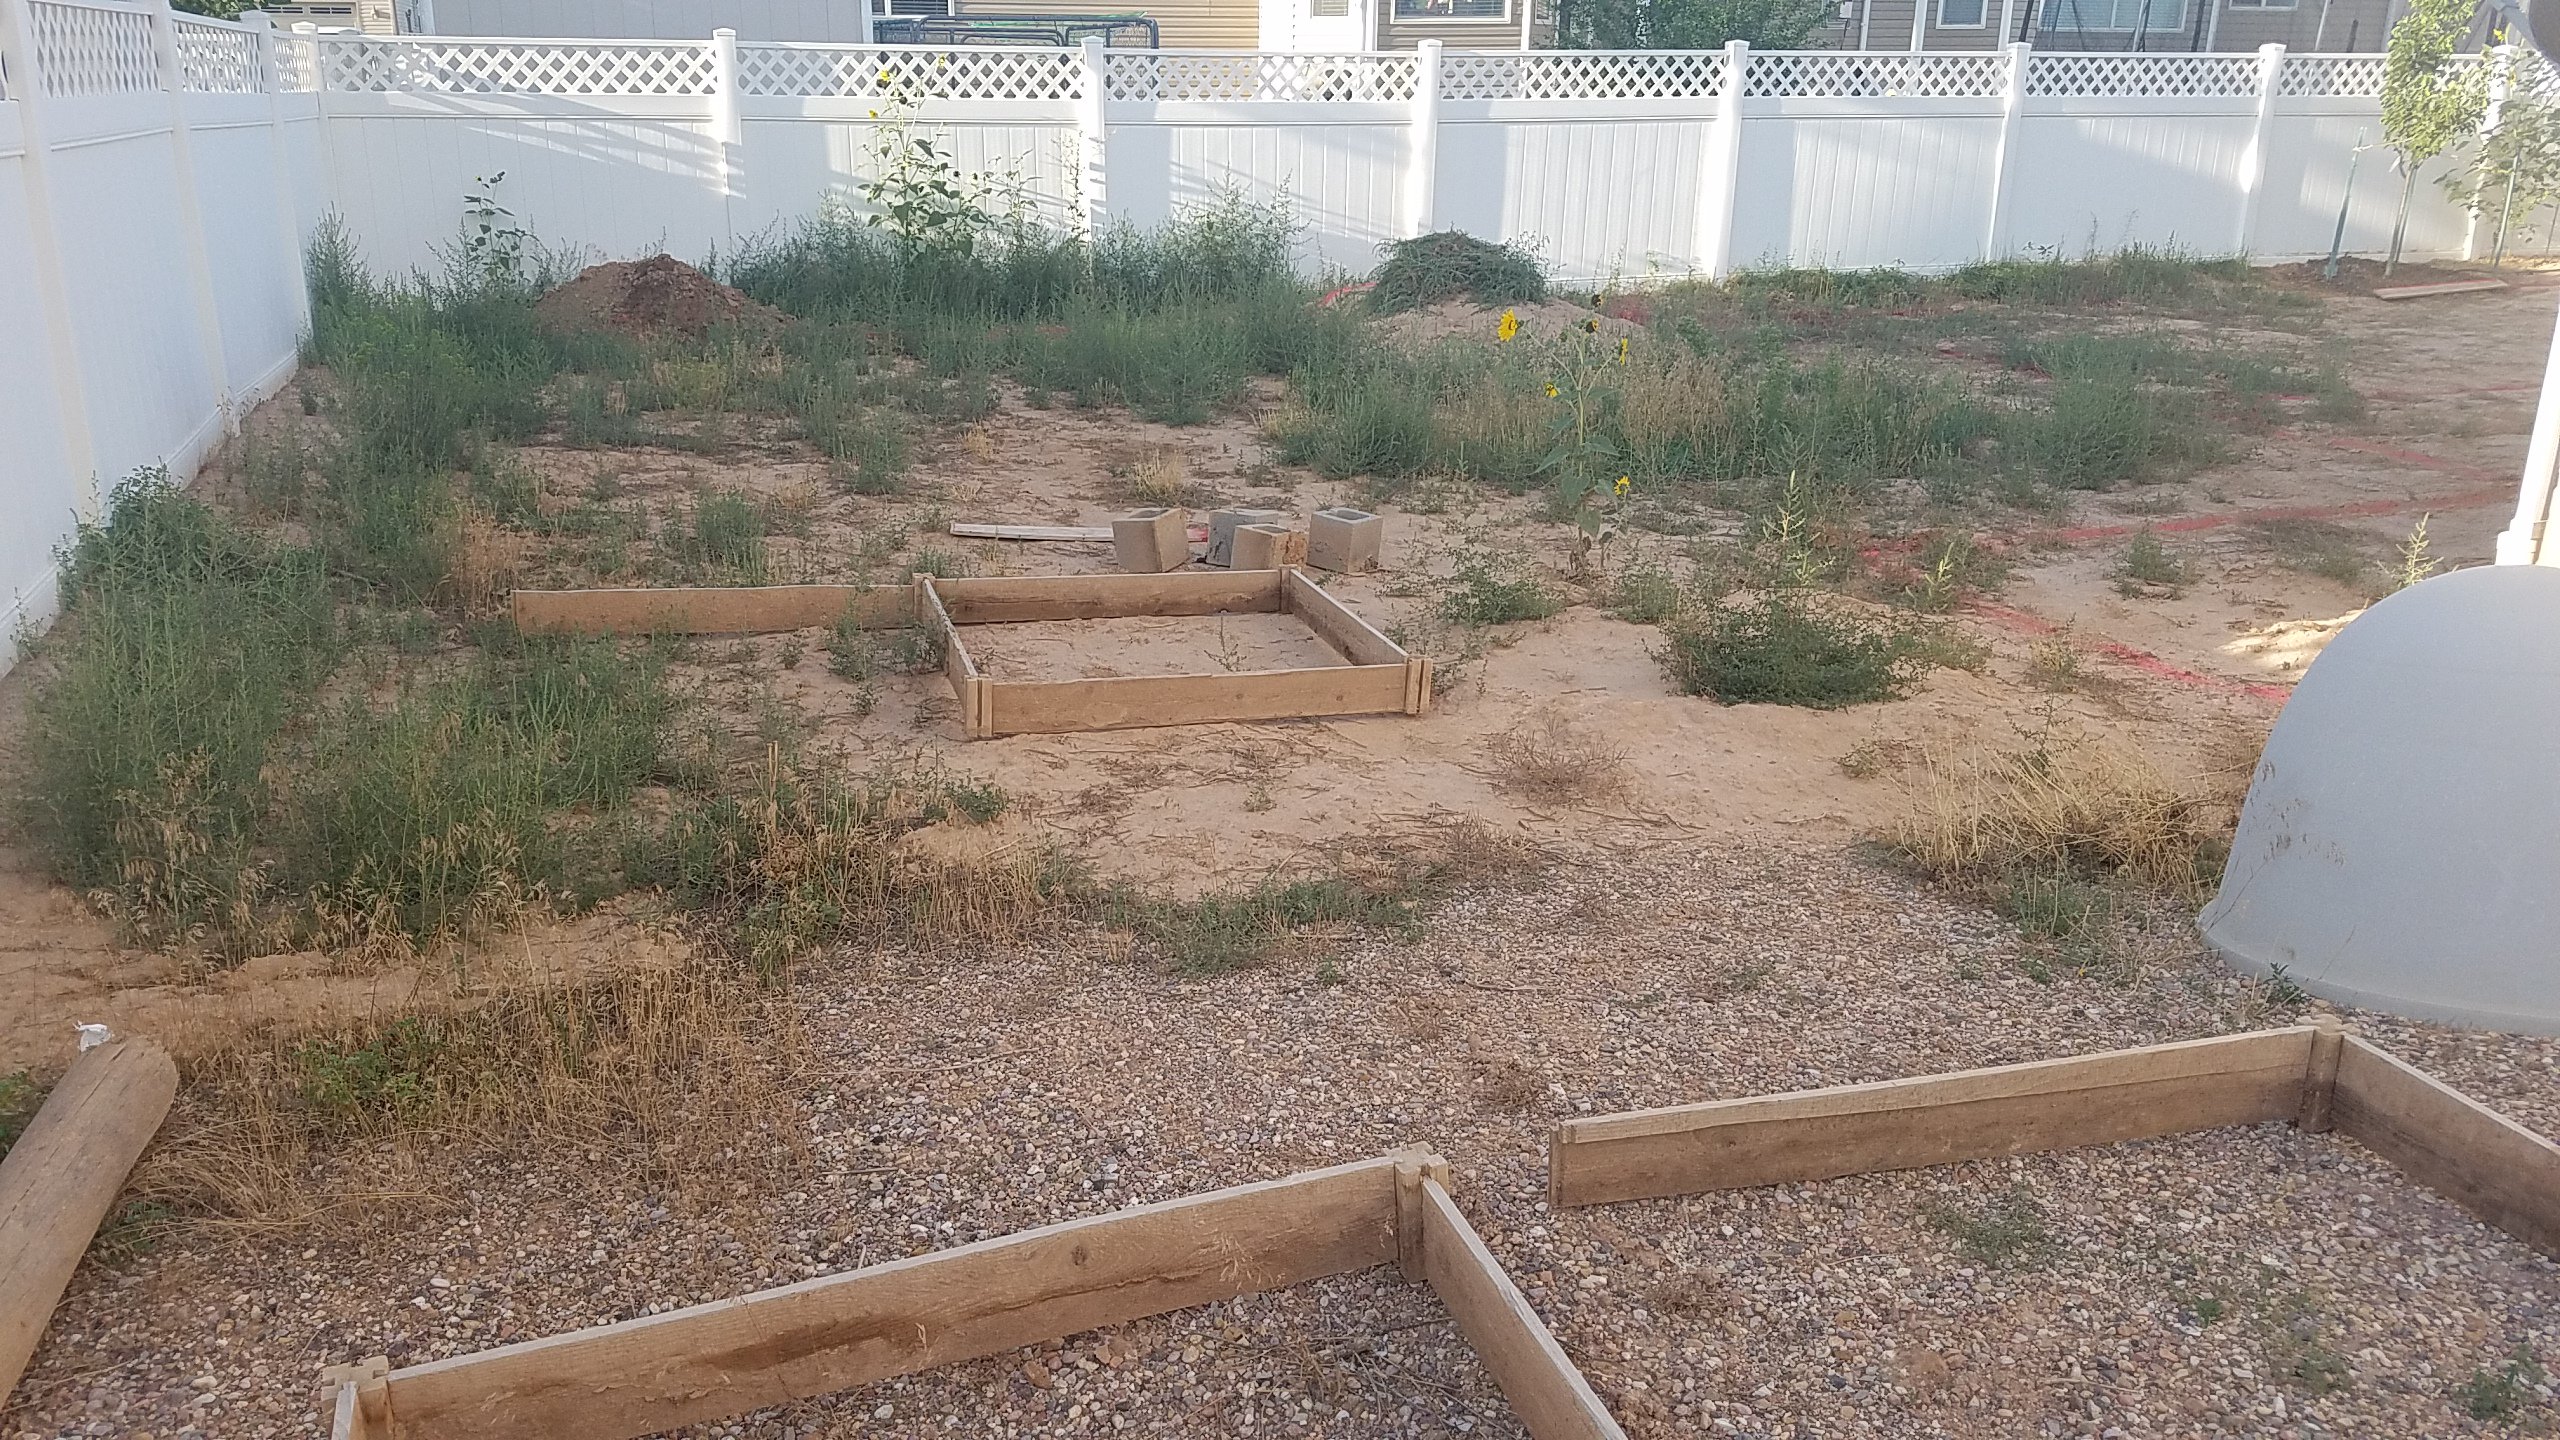
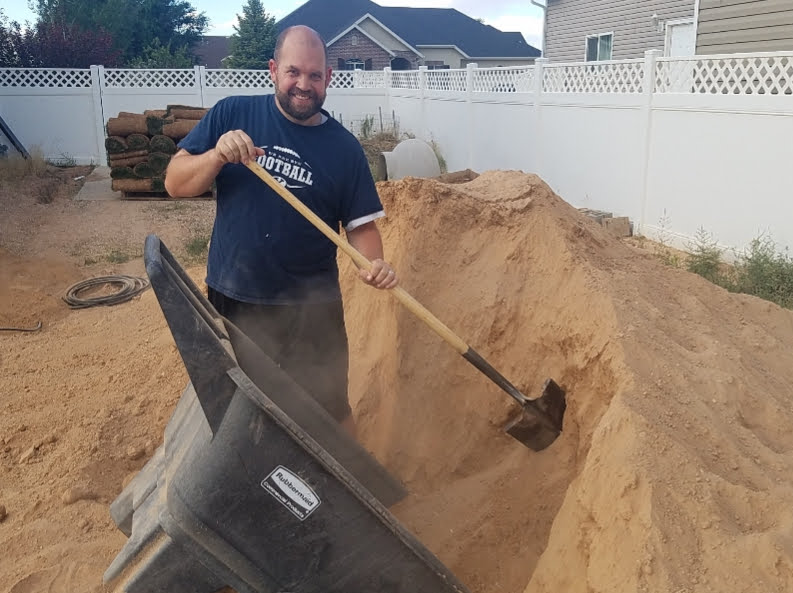
We recently landscaped our backyard and our quality of life immediately went up once the grass was in.
Since we had done a complete overhaul on our last home, we promised ourselves we wouldn’t take on any major home projects for a year. We wanted to give our lives a bit of normalcy. It also meant we planned and dreamed and changed plans and improved dreams😊.
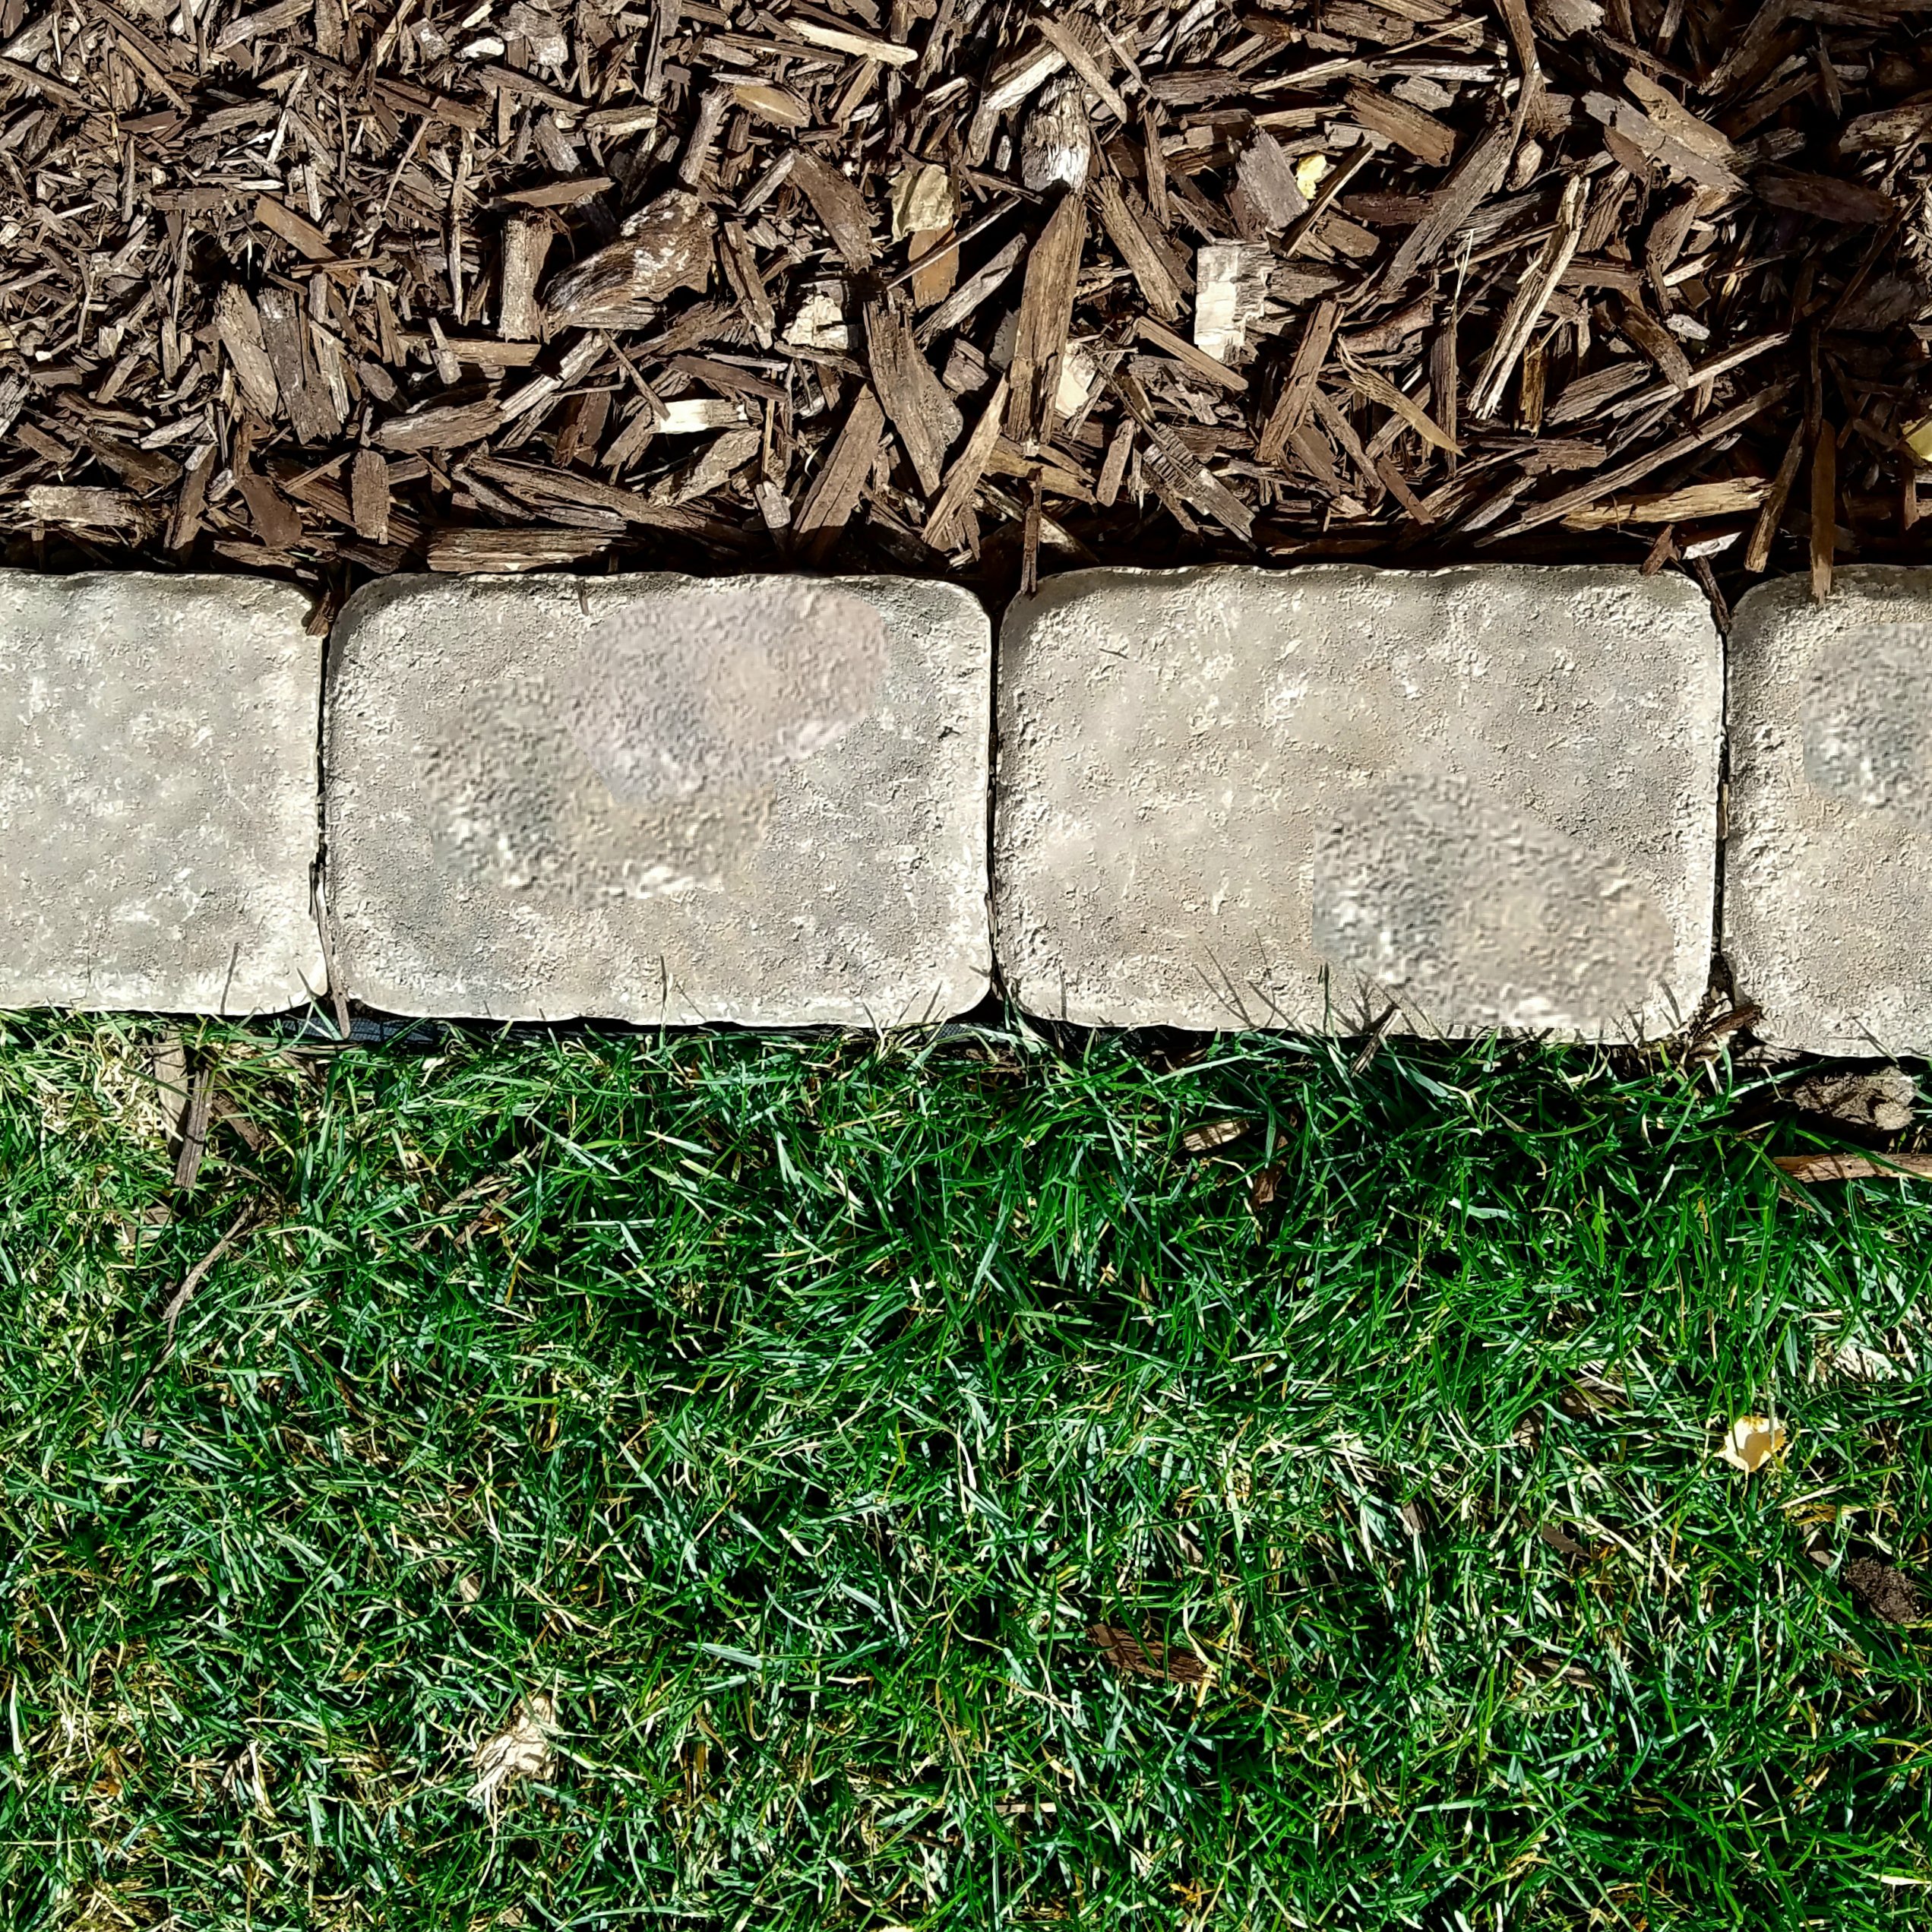
I’ll update posts as I describe each area we are implementing, but today I will show you how and why to install a paver edge along your grass. It may surprise you to find (it did me), that the work is strangely therapeutic. I have a friend who hammers jewelry and she once called it therapy. I understood once I started installing the pavers.
Pavers require a good bit of hammering with a rubber mallet and since it’s rubber it doesn’t hurt your ears. I found myself looking forward to coming home and finding time to install more pavers. For me hammering was a stress release. Something about the pressure of the mallet pounding out any built up tension from the day. I hope it works for you too. 😊 I always felt a bit calmer afterwords.
Not all projects are this rewarding while you work. I love all my projects once they are done, but there are a few of them I have had to endure.
Paver pounding? You will love it!
With the right preparation, tools and material it will be a great stress reliever and you’ll have a bonus awesome yard.
Skill level: moderate
Tools
Rubber mallet
Hammer with metal head
Materials
Pavers of your choice, ours were 99¢ each at The Home Depot
Weed barrier, landscaping material
Landscaping staples
Play sand $5 a bag, we used 3-4
Pavers sand
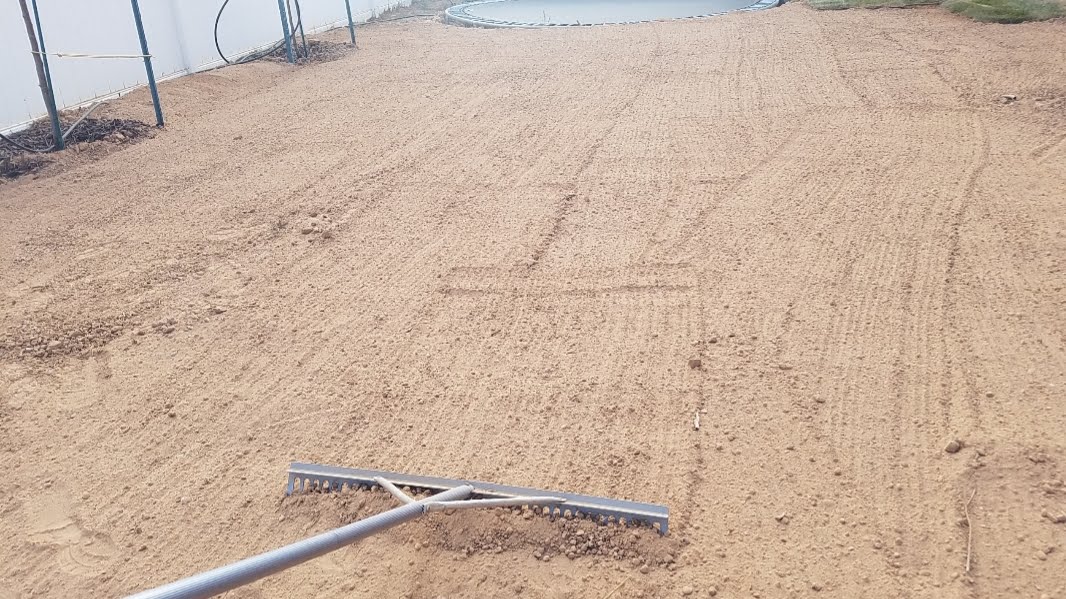
We started the paver edge once the sod was down, but there was no landscaping outside of this. So we had a nice edge to follow for the pavers.
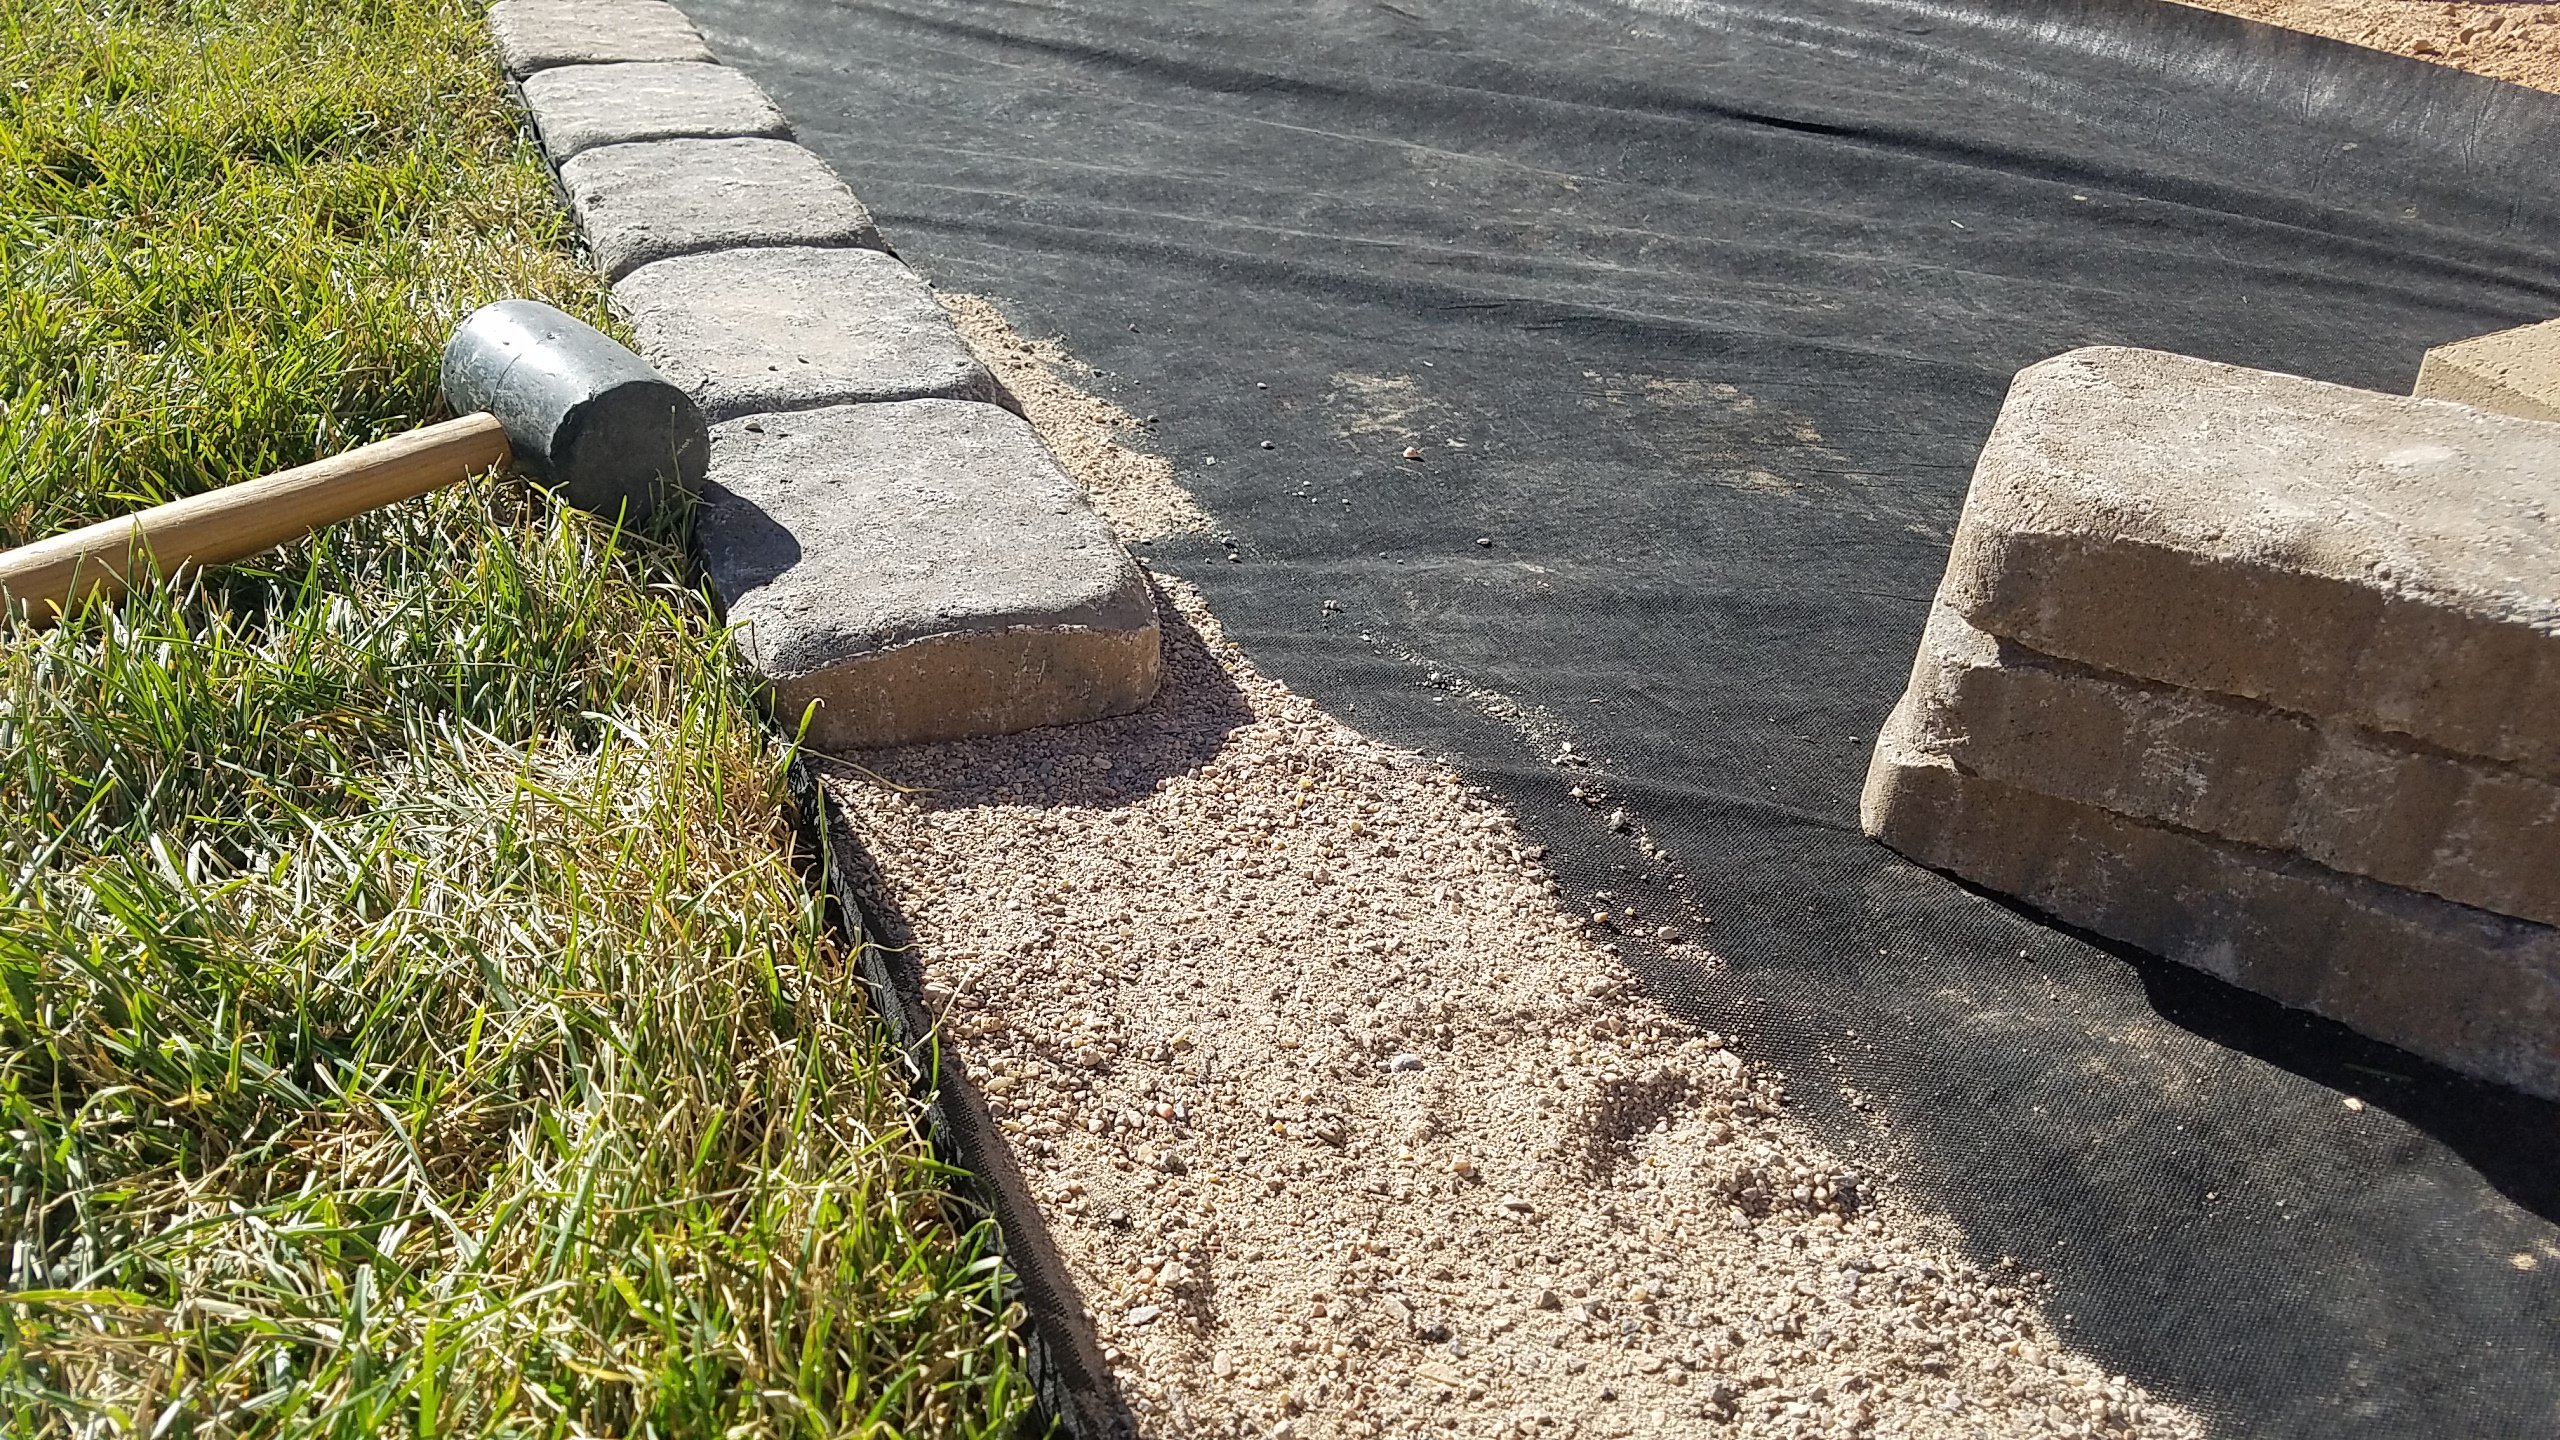
Prep the ground by running the sprinklers an hour before working, this makes the dirt softer and allows more movement while hammering your pavers into place.
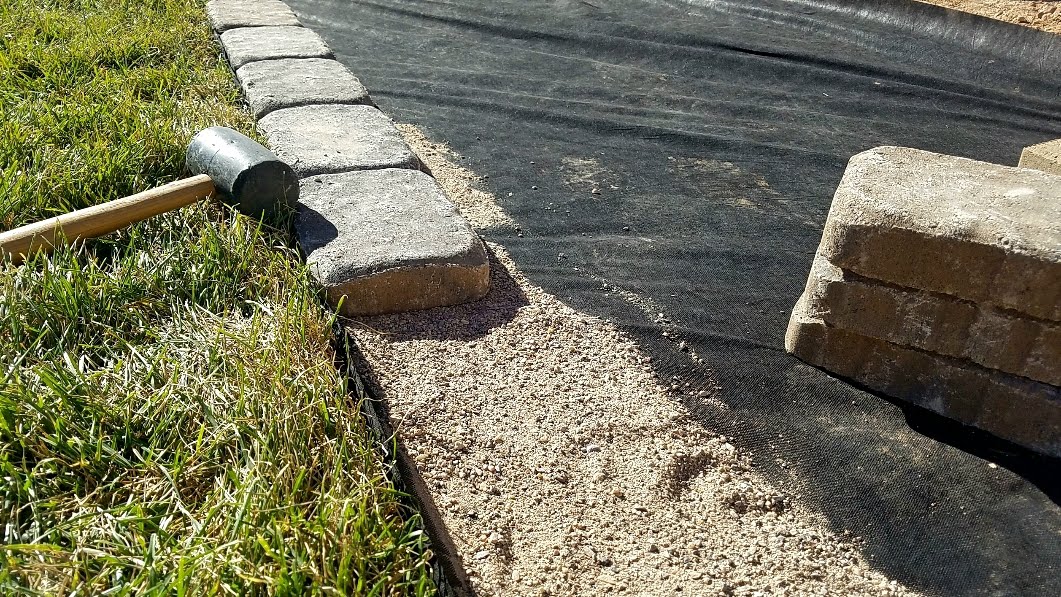
 Lay the landscaping material down first and have it come up the edge of the paver an inch or two. This is to keep grass from growing between your paver. By putting work in upfront now, we hope to avoid annoying grass problems later. Notice how I set pavers to hold large portions of landscaping material in place. I then came back and finished the edge. This method helps you easily get that 1-2 inch of material coming up the edge.
The purpose for installing pavers is to create a nice edge between the lawn and fence and other landscaping and so it creates easy mowing and less need for a weed wacker.
We had quite a bit of grass growing next to the fence from our neighbors yard. To combat this, we pulled out all the grass and sprayed the edge with grass and weed killer to prevent further growth and to kill any grass seeds left.

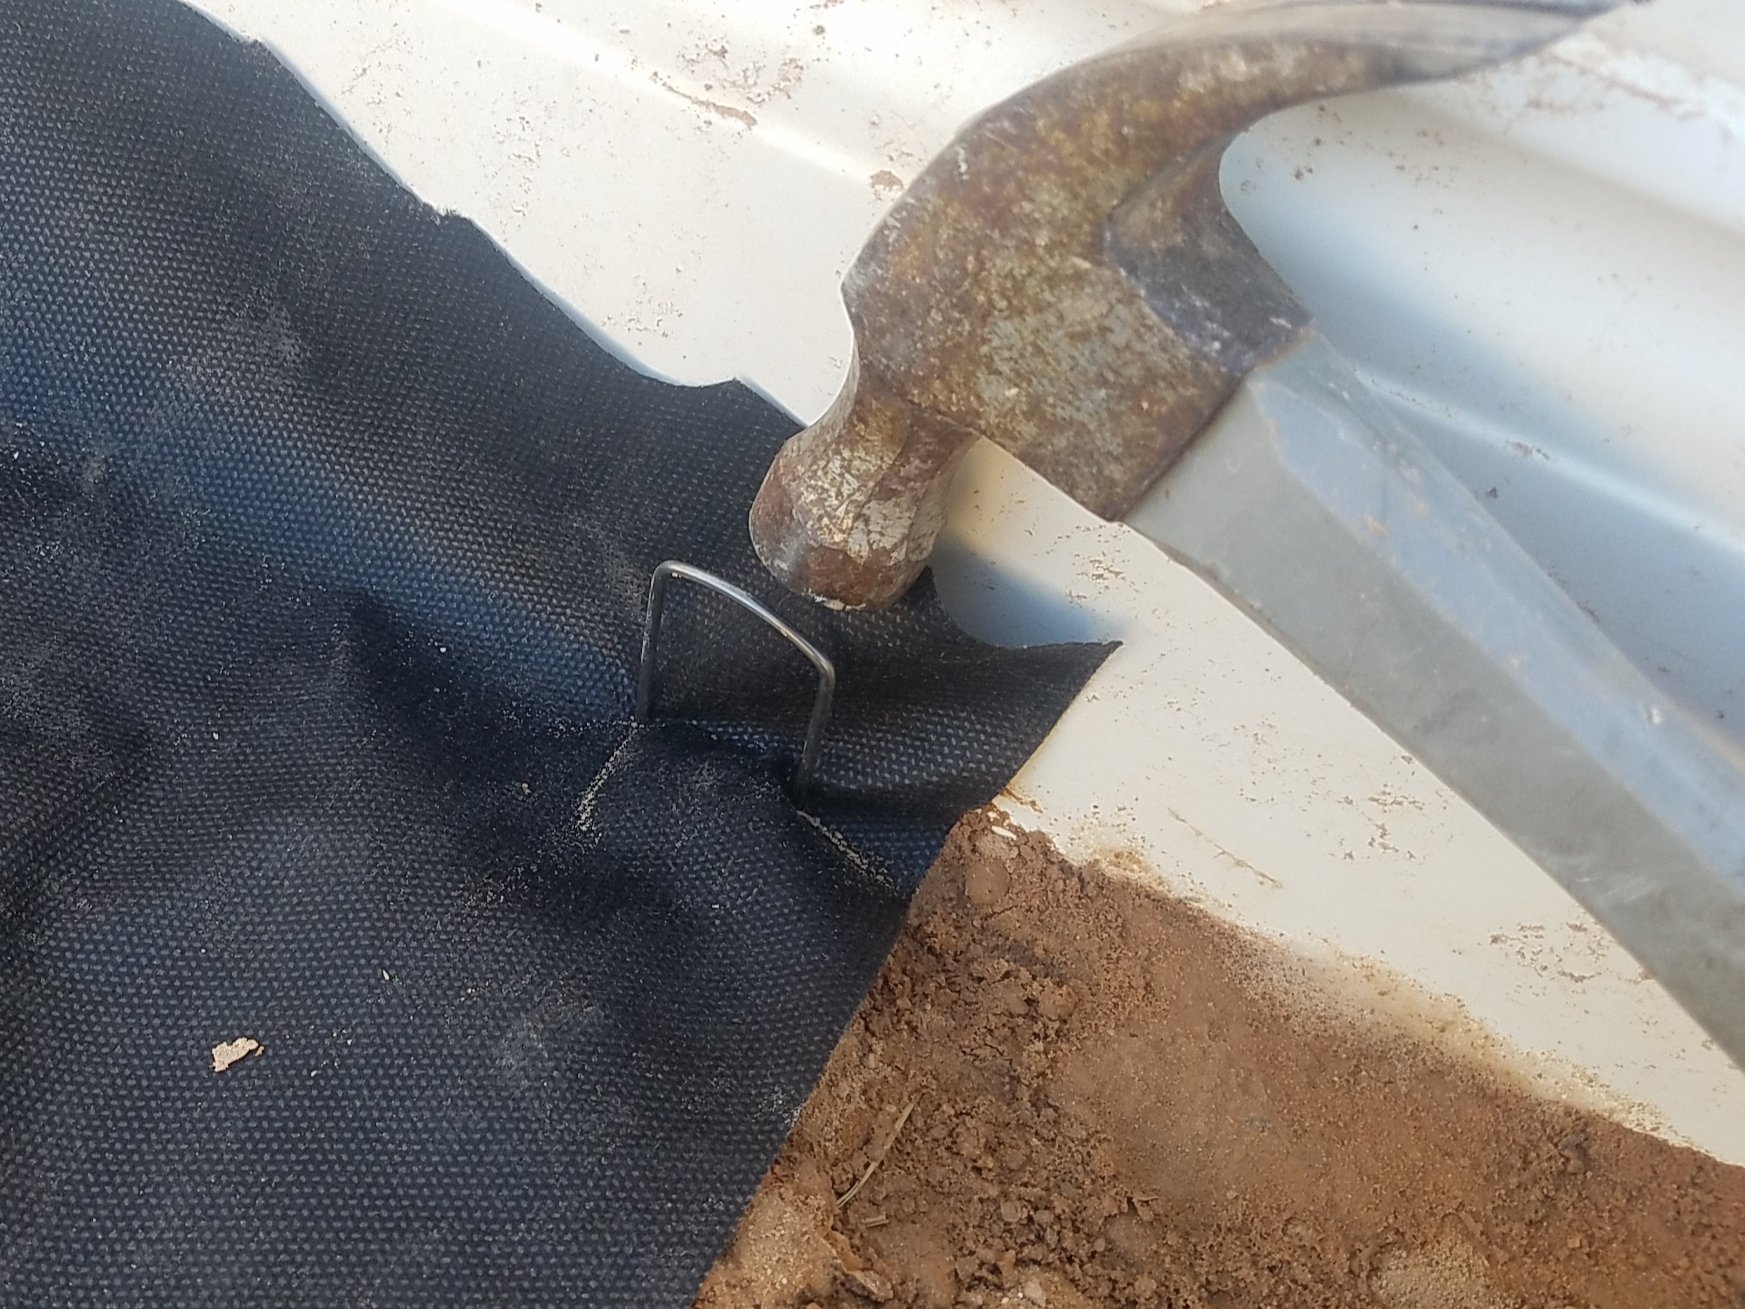
We also built the soil up an inch or two and put down landscape material. I’m serious about avoiding annoying upkeep down the road. I love yard work, but there is only so much weeding a person can love.
Use landscape staples right up next to the edge of the fence. I also have the landscape material coming up an inch or two to discourage unwanted weed and grass growth. Use the metal head hammer for this otherwise the staple pounding eats up the rubber mallet.
Some people use string and a level to make sure the pavers are straight. We had already done alot of work to level the ground with raking, rolling etc. so I didn’t use a string – in fact I eyed it. If it looked straight I left it, if I noticed a bulge in the line of pavers I hammered it into place with the mallet, very easy.
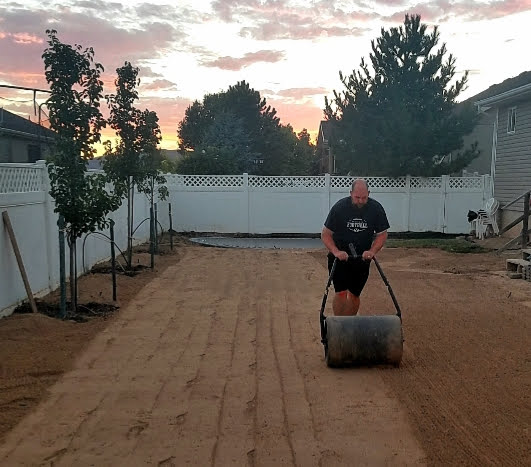
To give your pavers a nice foundation to sit on and reduce pavers shifting through the years, lay about an inch of play sand (play sand because it’s cheaper, we’ll use the nice stuff at the end). Sand will also help the paver not tilt when it’s walked on.
Set the paver where you want it to go and hammer it into the ground slightly. The sand holds it in place, the soft dirt gives way and surrounds the paver, setting a nice sturdy line for a professional look. My pavers were about the same thickness as our sod, so I hammered until the paver was even with the height of the grass.
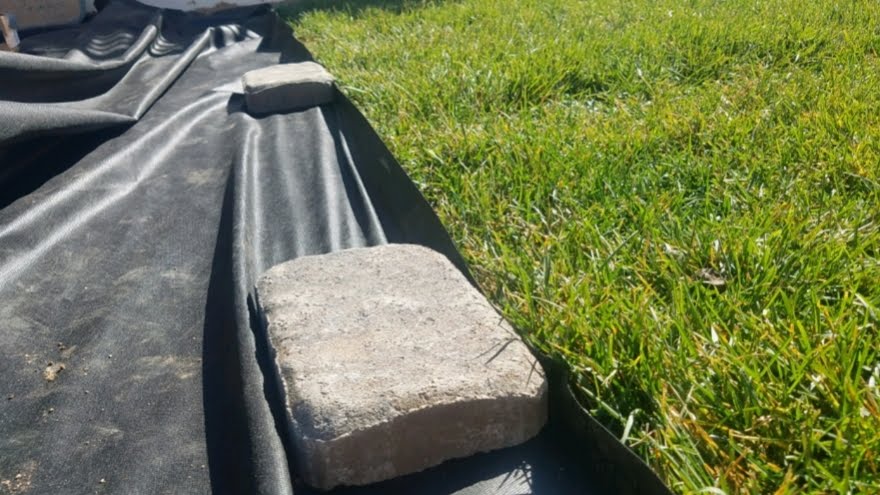
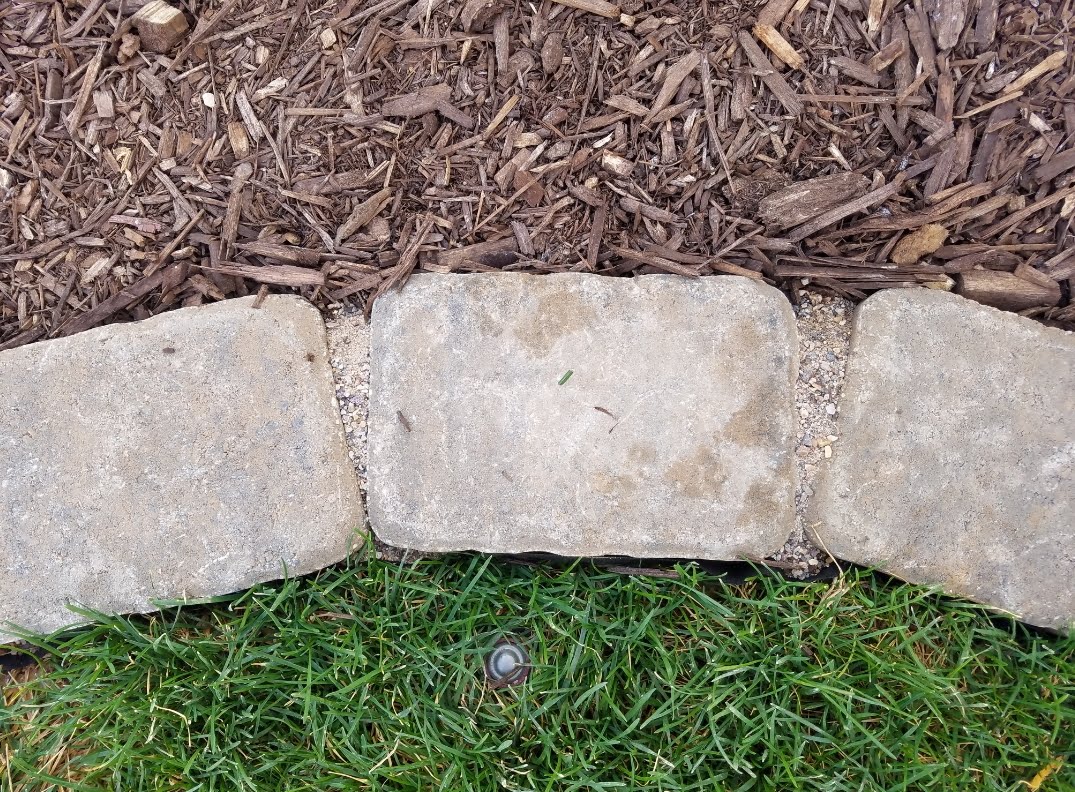 For easy upkeep and mowing we curved the grass at the corners. The pavers just fanned out around the curved corners creating triangle wedges that I then filled in with sand.
To further seal in the pavers, spread paver sand on top. It is very fine sand and will fill in all the little crevices making it harder for weeds and grass to move in and cementing in your well pounded design with very little wiggle room.
To finish off the look and hold down the rest of the weed barrier fabric we put down a few inches of chocolate mulch. If we ever want plants in any of these areas we will can cut a hole in the fabric, but for now, the weeds are held at bay.
I am so happy with the way this paver edge turned out. The pounding was actually fun and we are going to have a much easier yard to care for. Our dog literally wanted to be in every photo, so she gets to wrap it up.
Are you planning a lawn edge soon? What edging are you considering. Feel free to leave your comments below and best wishes with your next project.


Recent Comments