
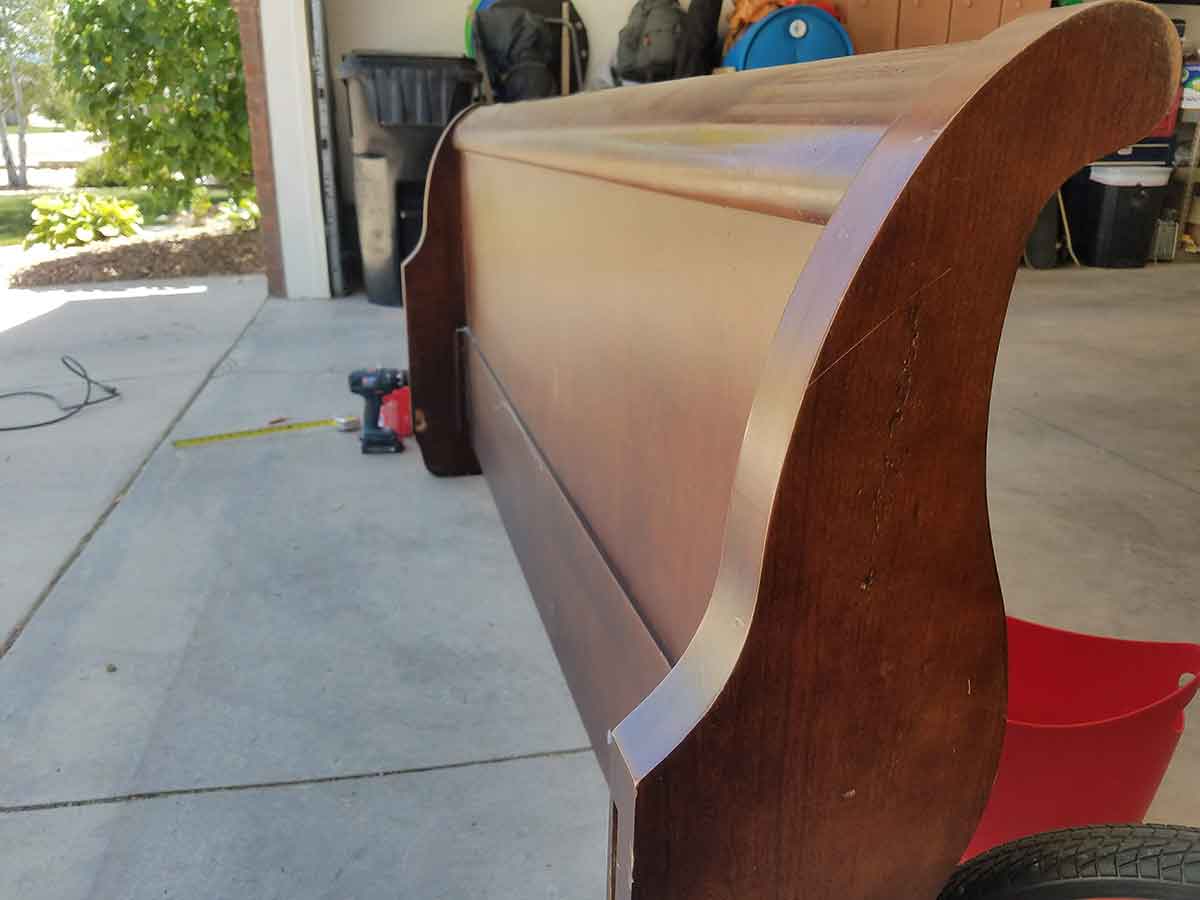
These bench ideas are all over Pinterest and I love them, because they inspired this in a moment of desperation. Someone was giving away a free king size “headboard” and because I haven’t had the time to make my desired headboard I thought this could fill in until I get there. Well… I show up to take a look and immediately realize it is a foot-board. My initial thought was to say, “no thank you.” But, the foot-board-giver had these pleading eyes like, “please take this thing away.” He also looked like he had just had the worst day of the year. So… I took it. The whole way home I’m thinking, “I’m going to need to explain this, this large thing that isn’t going to be a headboard.” By the time I arrived I had planned out the whole bench and was ready to start. It also helped that the same week someone else gave away real walnut wood planks, left over from a kitchen cabinet job and the house being built down the street donated a few pieces of hardwood (really, I did not just take them :). Before I knew it, I had everything needed for my spare parts bench.
Tools Used
Nail Gun
Pencil
Materials Used
Head/foot board
2″ x 6″ Hardwood the length of your foot board plus a few feet for front legs
2 1/2″ Screws
Drywall Mud
Stain
Wood Putty
Polyurethane
Primer
Paint
Upfront disclaimer, the reason this bench was able to cost just $15 is because a bulk of the wood was free and I already had most of the paints, stains etc. It’s leftover, spare parts–but that is the beauty of it. With a little imagination, you can bring leftovers together and get a nice piece of furniture .
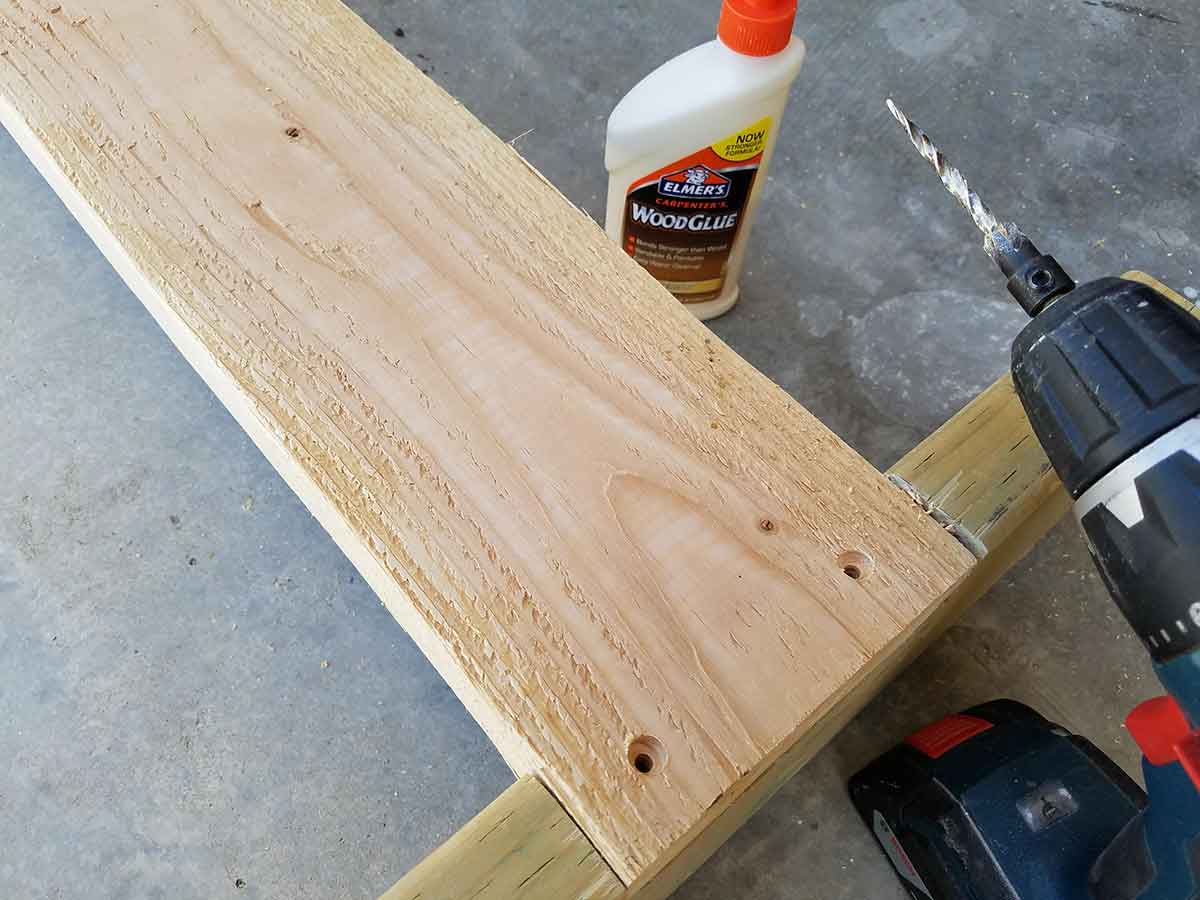
First I built the front legs and support piece of the bench. I took one long piece of 2×6 for the support, which I actually had to buy because no one is going to give away good lumber like that. As you can see it is rough wood which makes it cost less. It also take forever to sand smooth, I will show you in this article how to deal with that and get a smooth look. You will also need to notch out the wood of the vertical leg piece. Then you will need to pre-drill with one of these handy drill bits specifically for that purpose. It also has a large drill at the end that will drill out a hole to fit the screw head so you can caulk over it. If you don’t pre-dill you will more often than not split your wood.
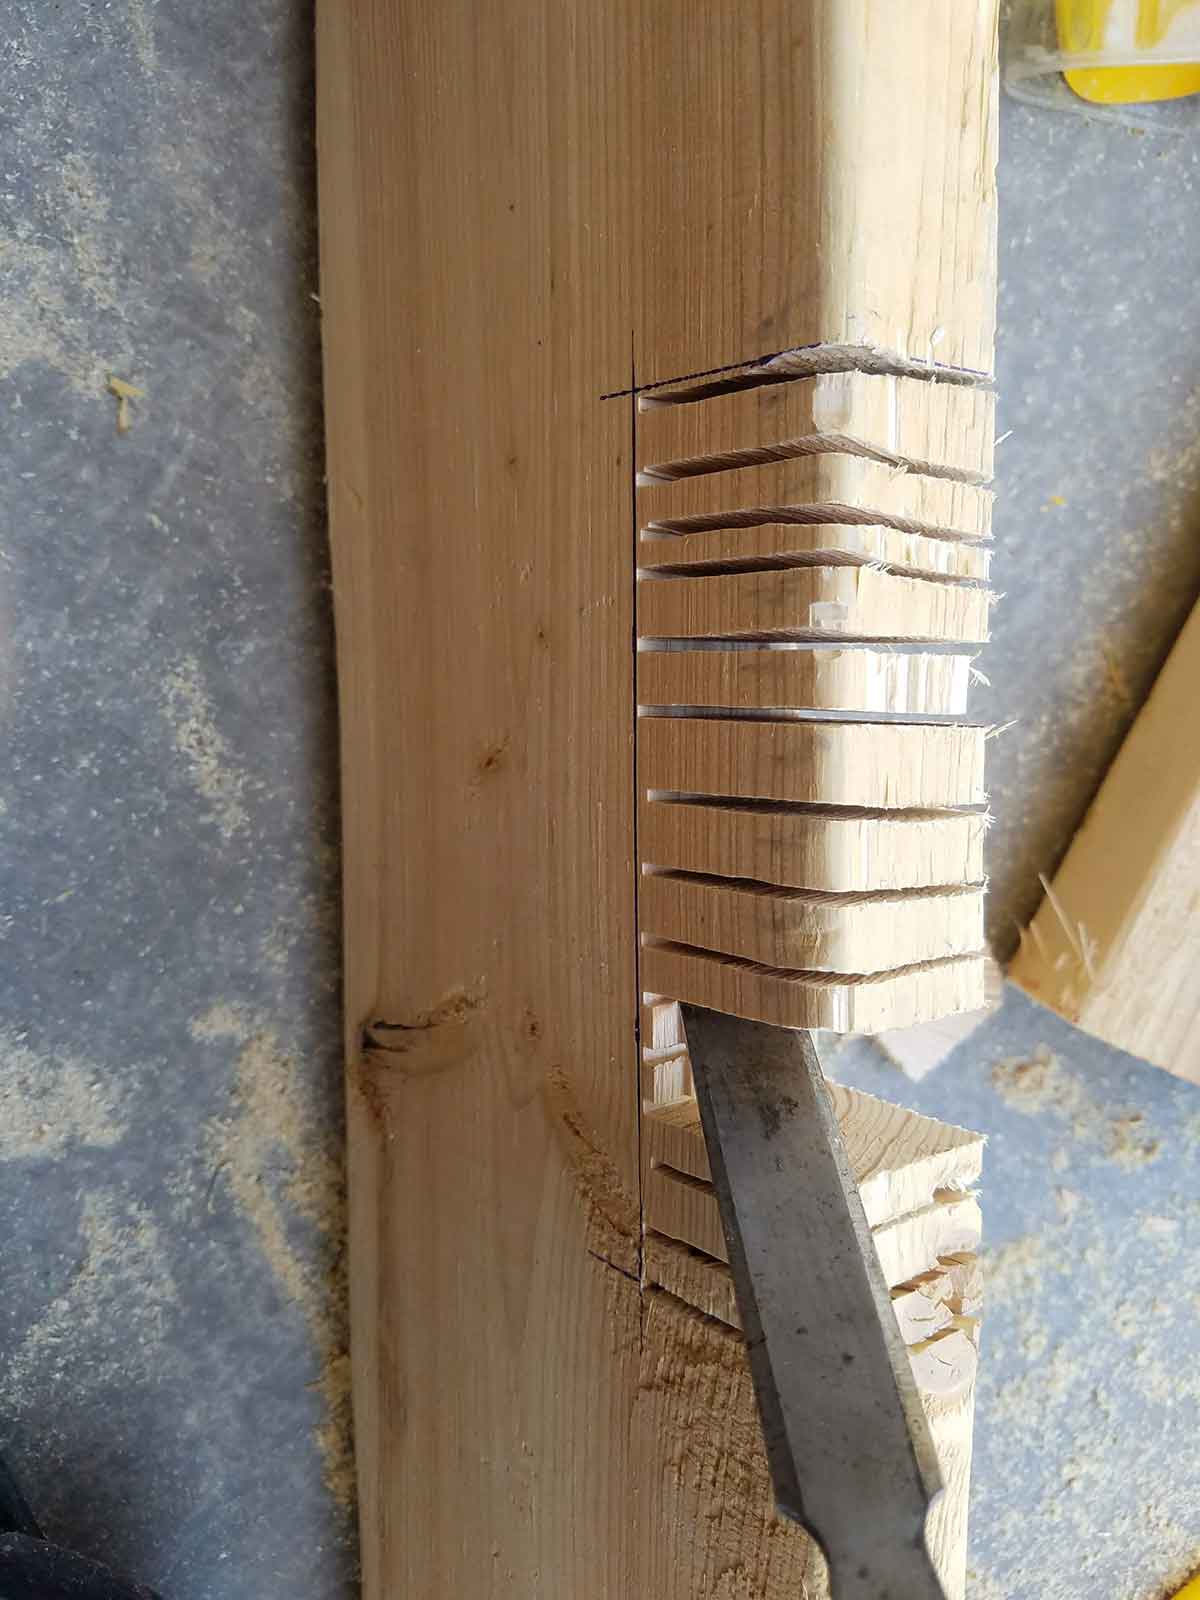
On the vertical leg piece cut notches about 1/4″ apart with a circular saw. Adjust your saw so that is cuts the depth of 2×6 board. Then use a chisel or screwdriver to break off each piece.
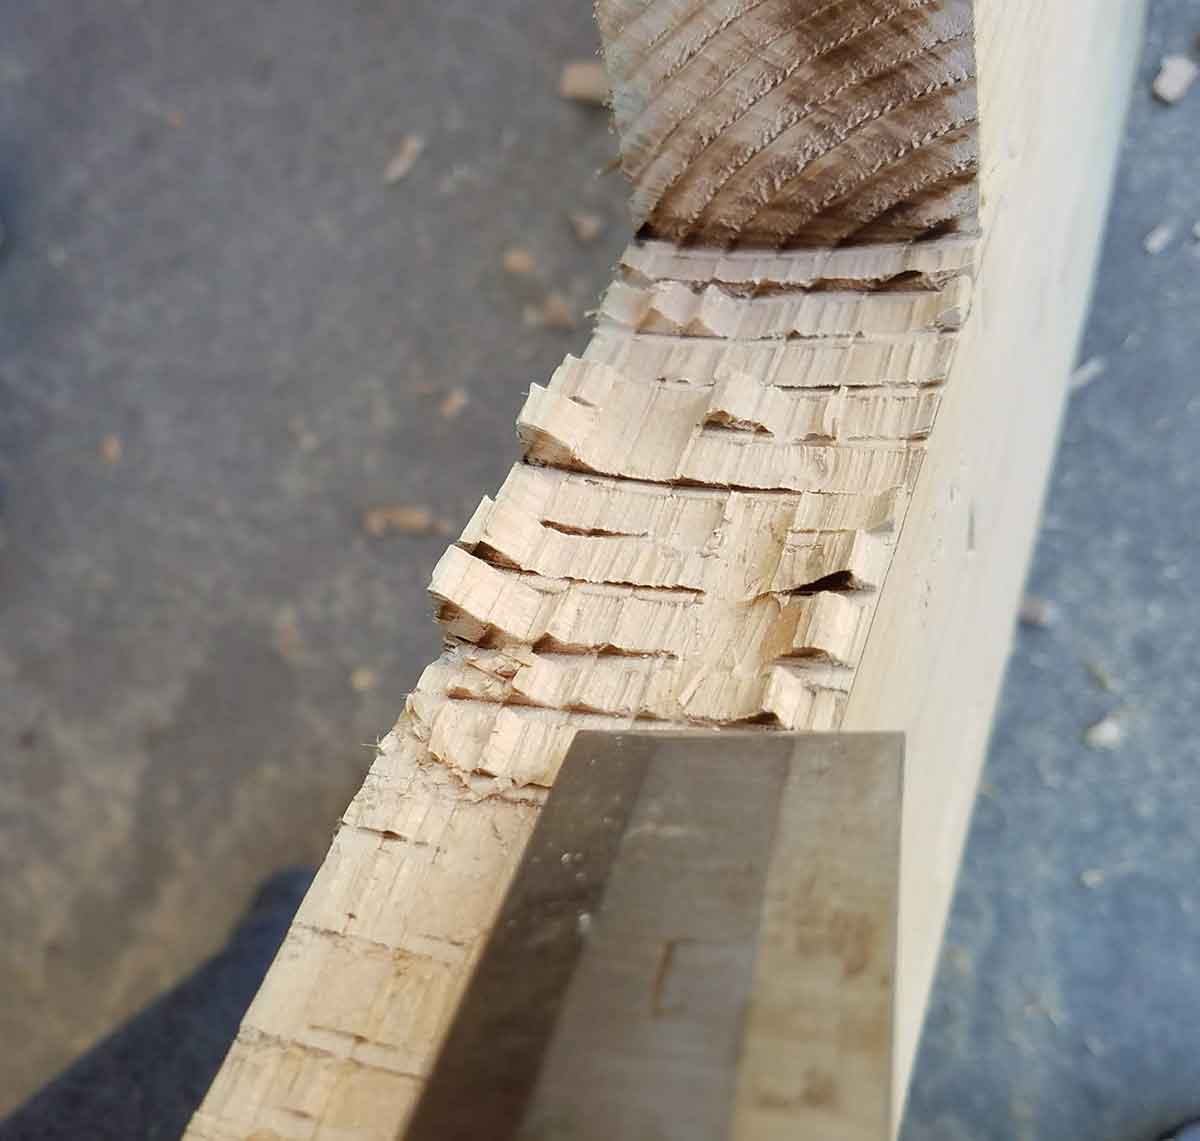
Clean it up with a chisel and rubber mallet like this. If you don’t clean it up the 2×6 board will not lay flat. No need to sand it, but get off the jagged wood so it is smooth. In this picture you can see the portion behind the chisel is smooth enough for the board to lay flat.
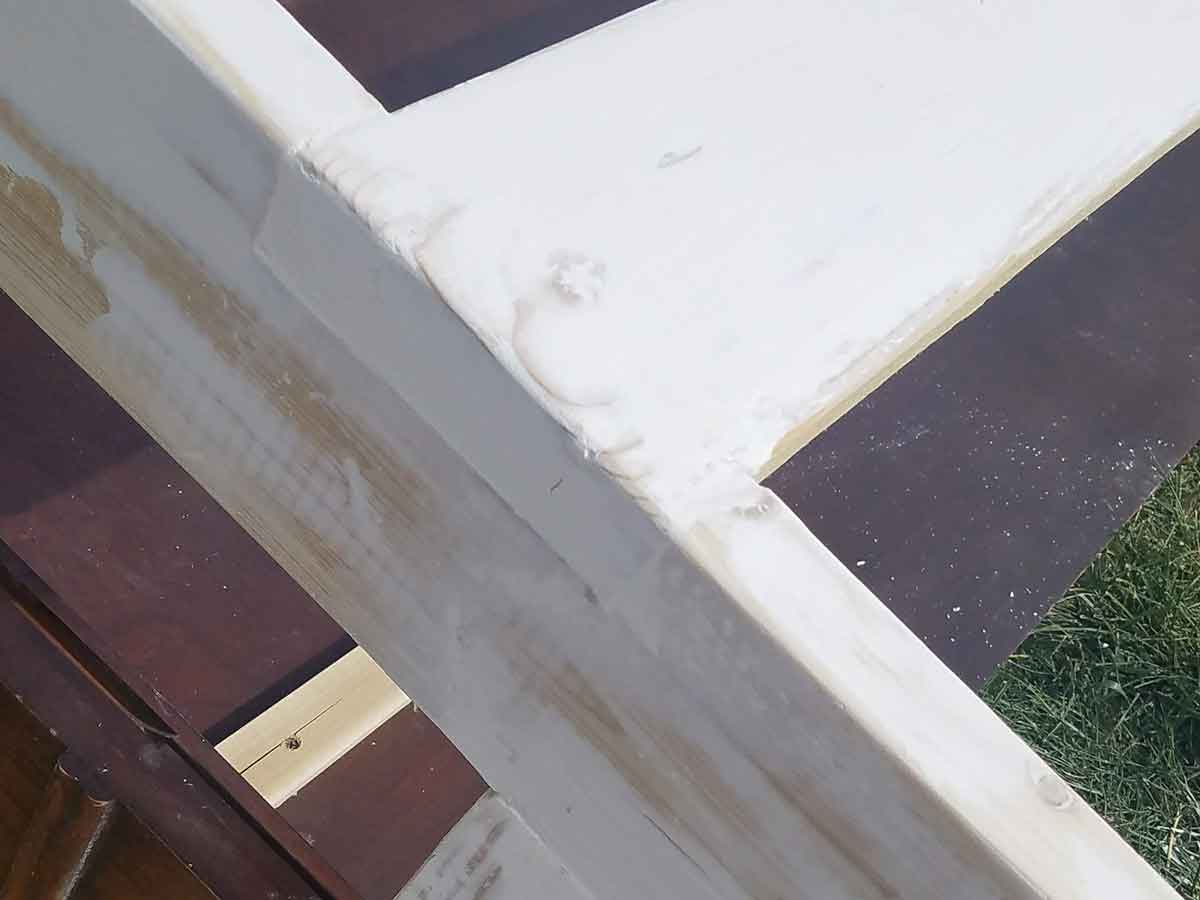
Now to get rid of rough wood, sand it a bit just to get the real jagged parts off, fill in gaps with caulk and let it dry. After it is dry take drywall mud and spread a smooth layer over all the parts you want smooth. Drywall mud fills in gaps nicely and blends this joint together almost seamlessly.
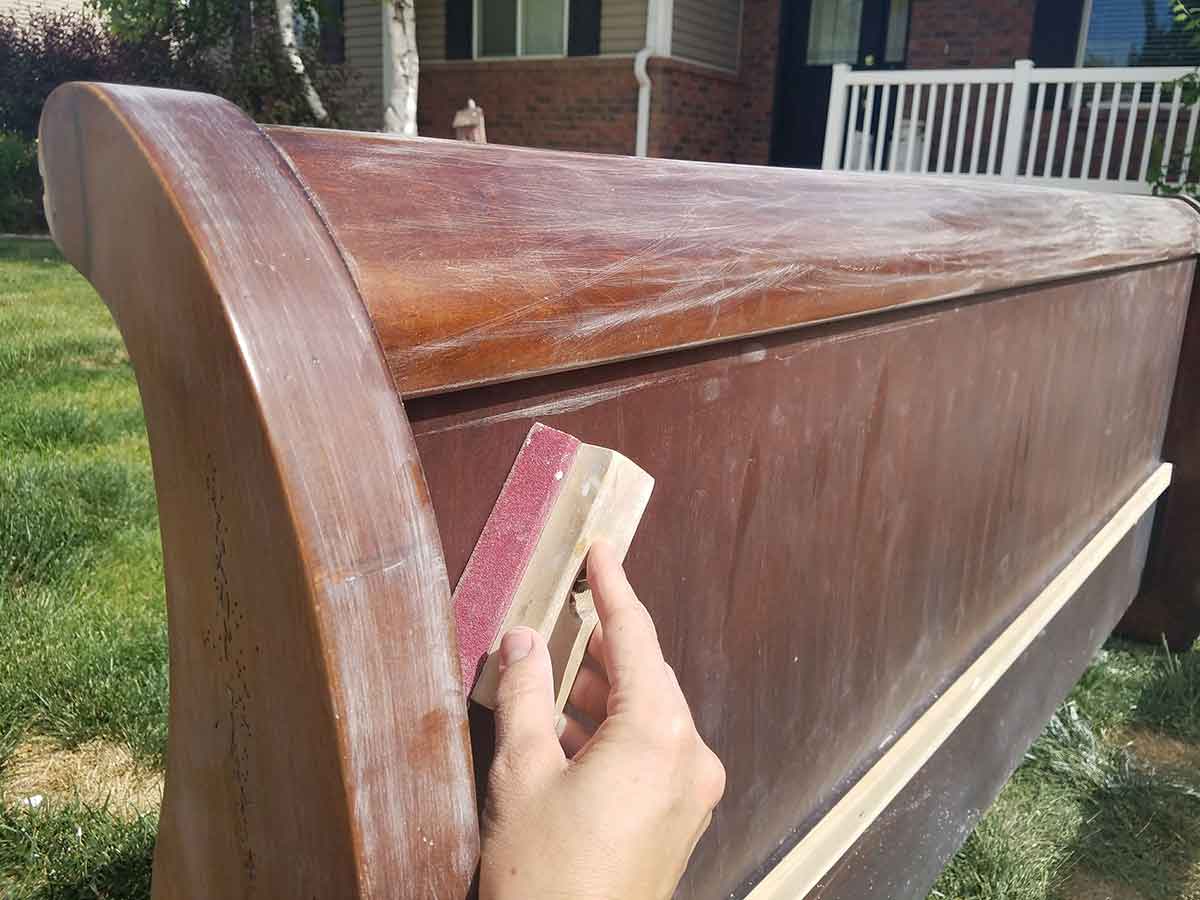
Now the bench is ready to prep for paint. When I am planning on painting a piece that is varnished this is my quick trick that works really well. I sand the entire area that is varnished with a sanding block. See all the scratched up wood? That is going to allow the primer to really stick well to the wood. In order for it to stick you will need to also wipe down the piece with a damp cloth and get rid of all the dust.
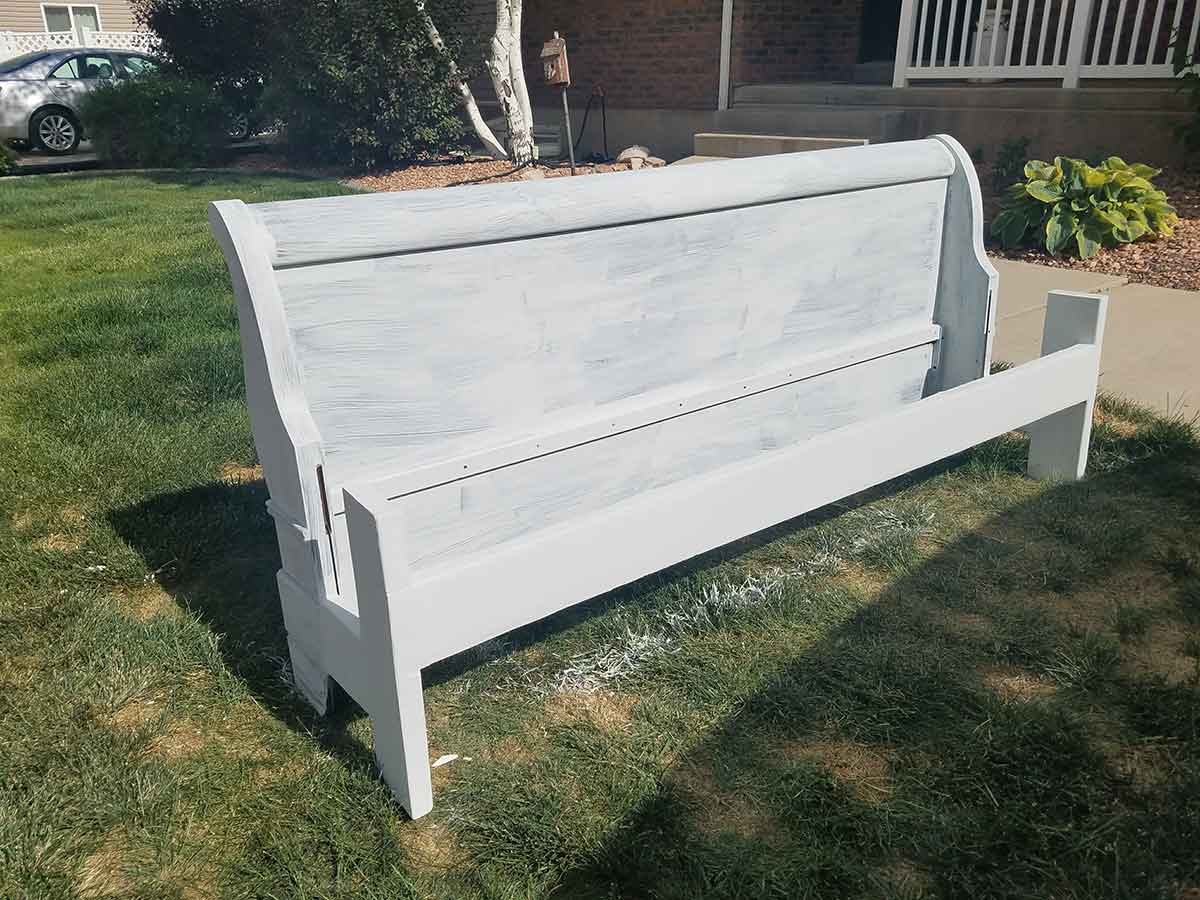
Next prime the whole piece with good primer. Cheap primer will not stick as well. Remember to give nice even strokes and watch for drips, they are much easier to take care of while they are wet than when they are dry.
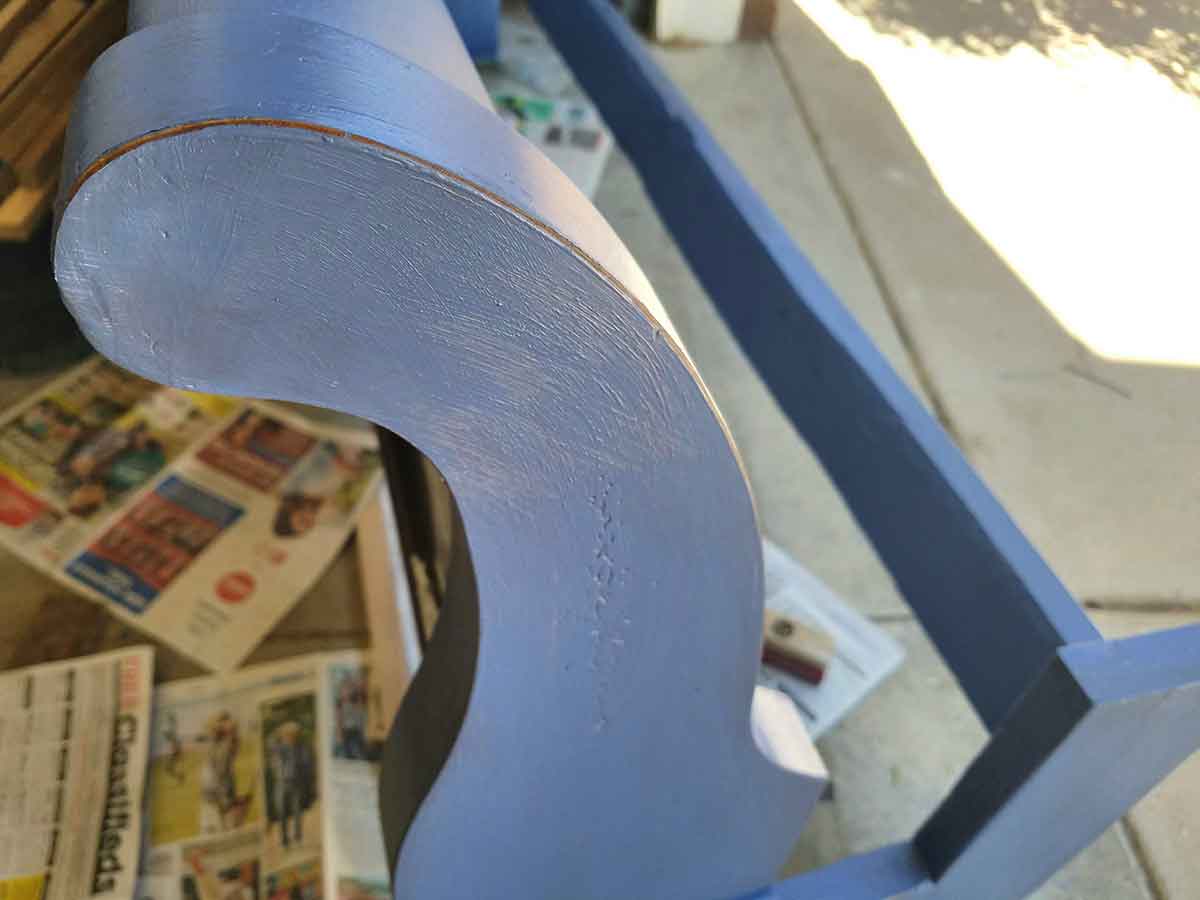
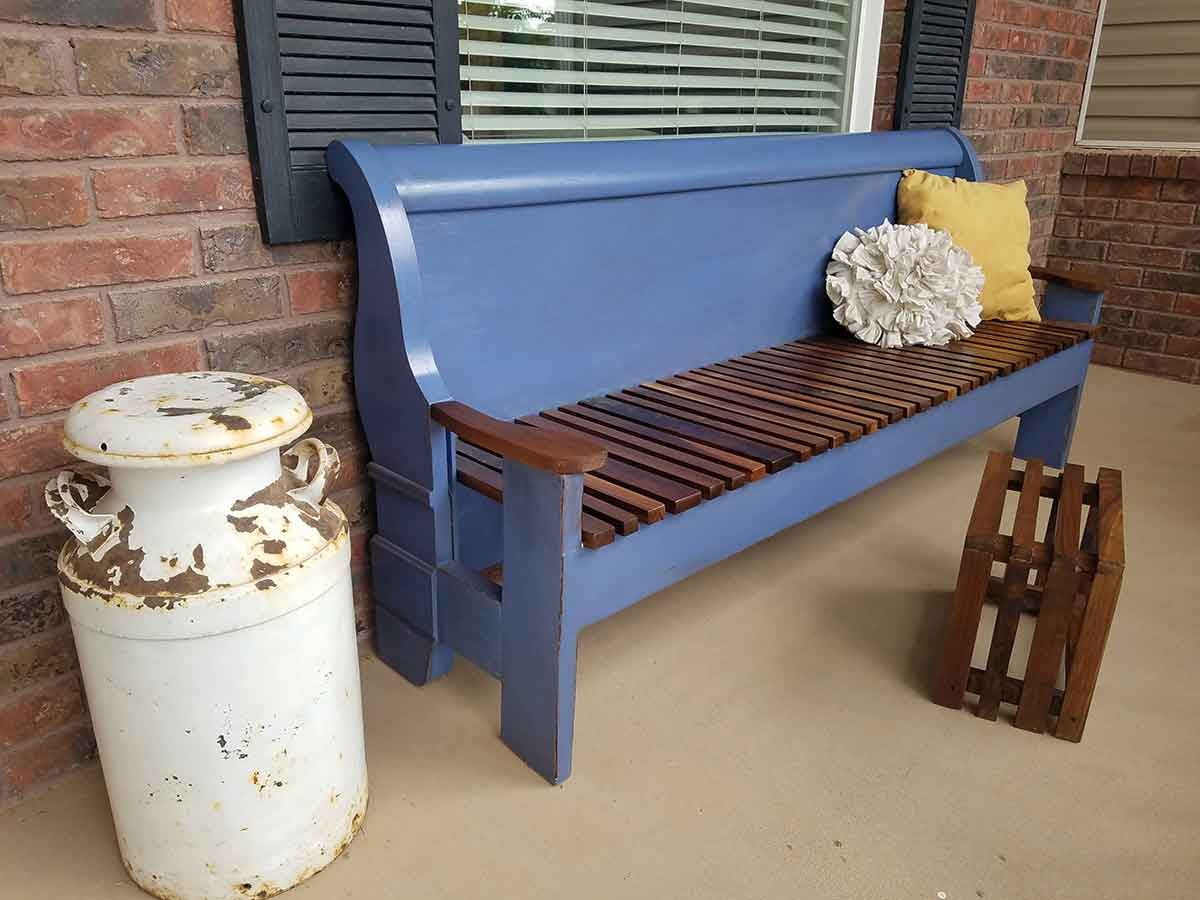
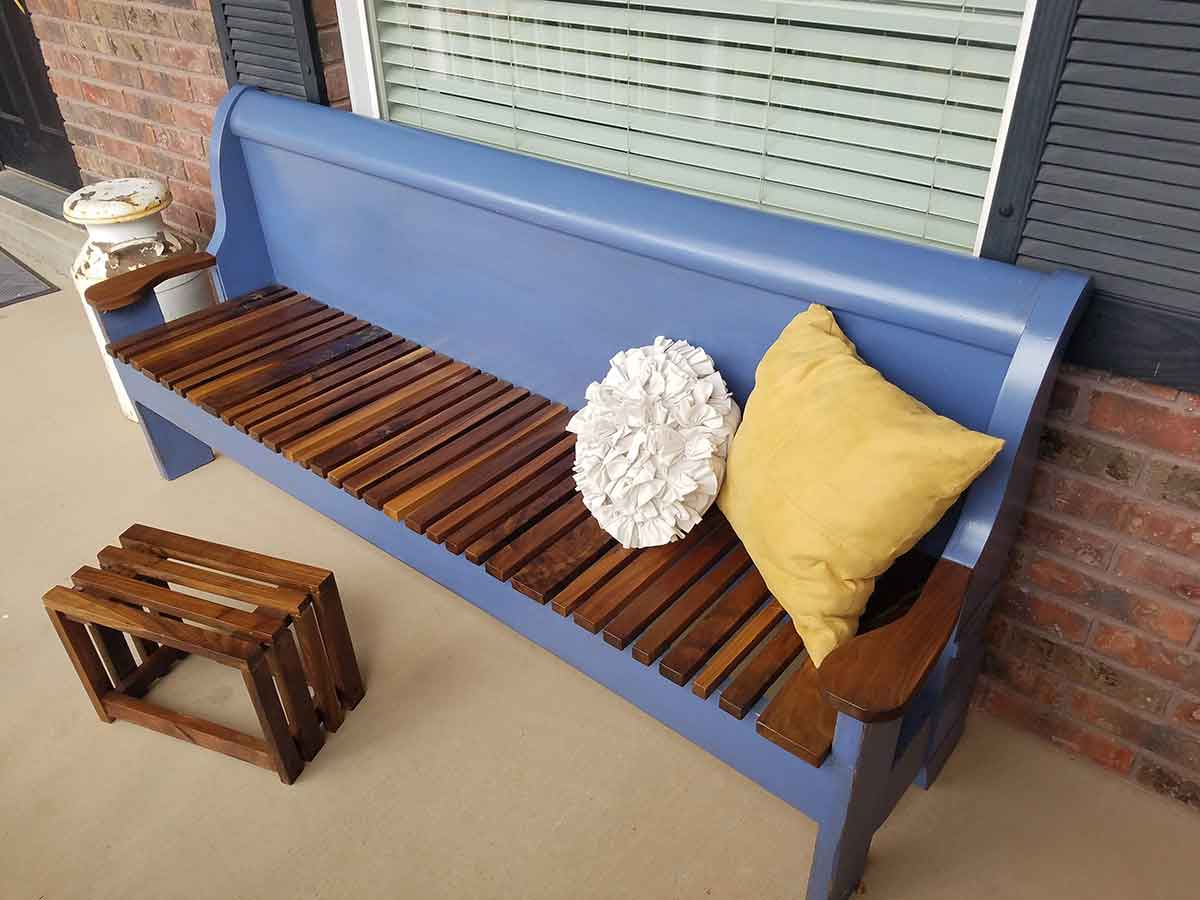
Select your desired bench color. I have seen plenty of cute white benches or black benches, but I already have those colors incorporated on my front porch. I finally went with this color because it is a nice country blue and can pop a bit with the white railing and red brick.
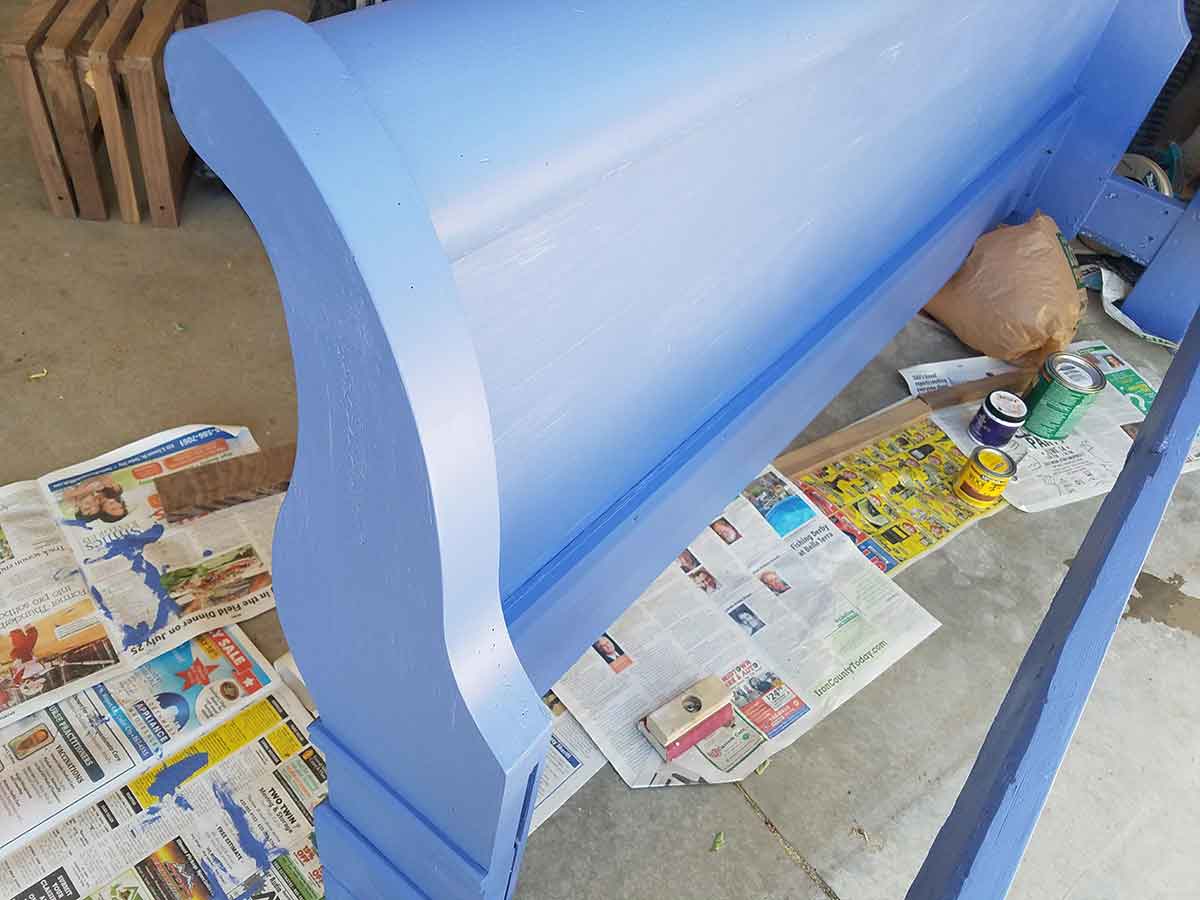
I wanted to add a little texture and personality to the color so I sanded the edges with my sanding block and stained it with a walnut brown stain to give it a warm well loved look.
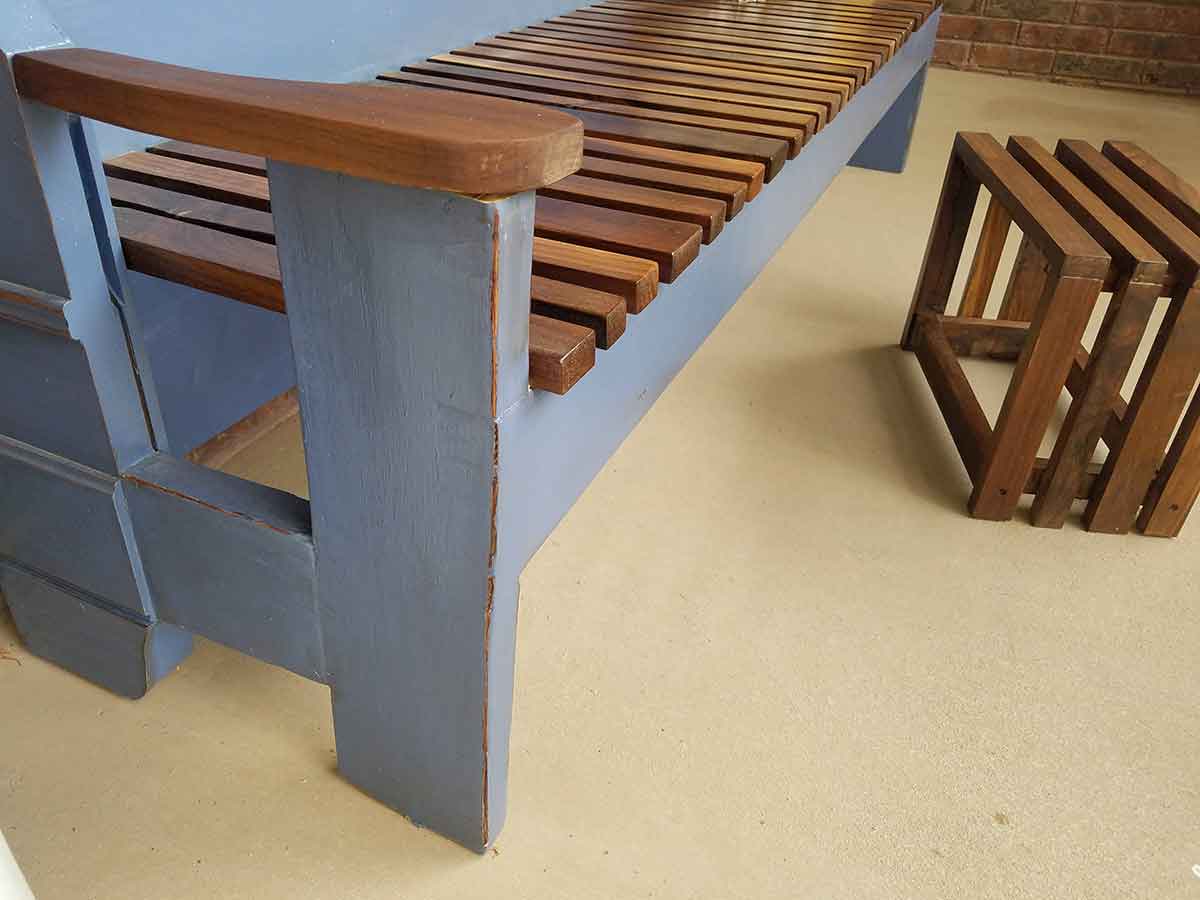
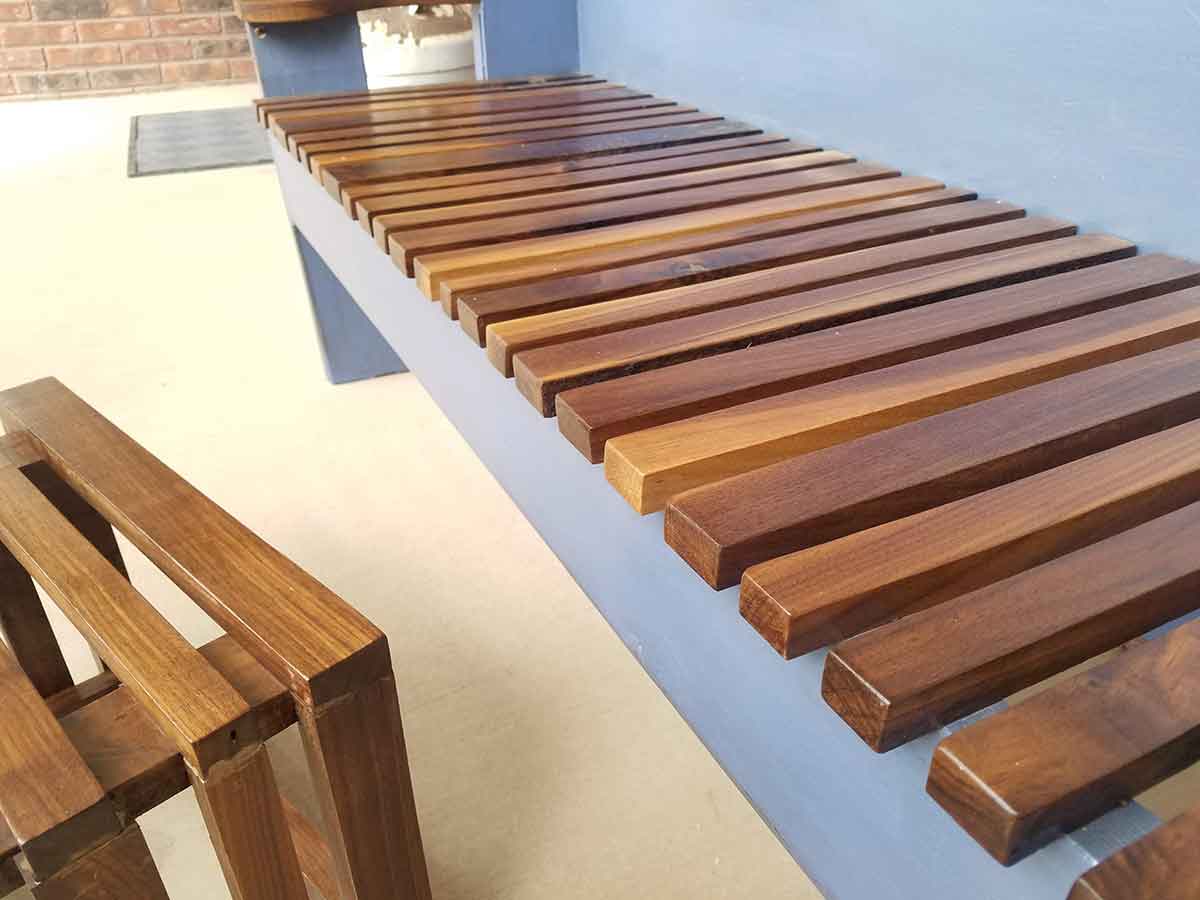
Then it was time to make the seating. Since I had come across such beautiful walnut wood. I decided to make slat seating. Like this. Testing out the waters to see if I liked the spacing ect. The arm rests were just placements until I could get a jigsaw to round them out a bit and tie it in with the nice curve of the back of the bench.
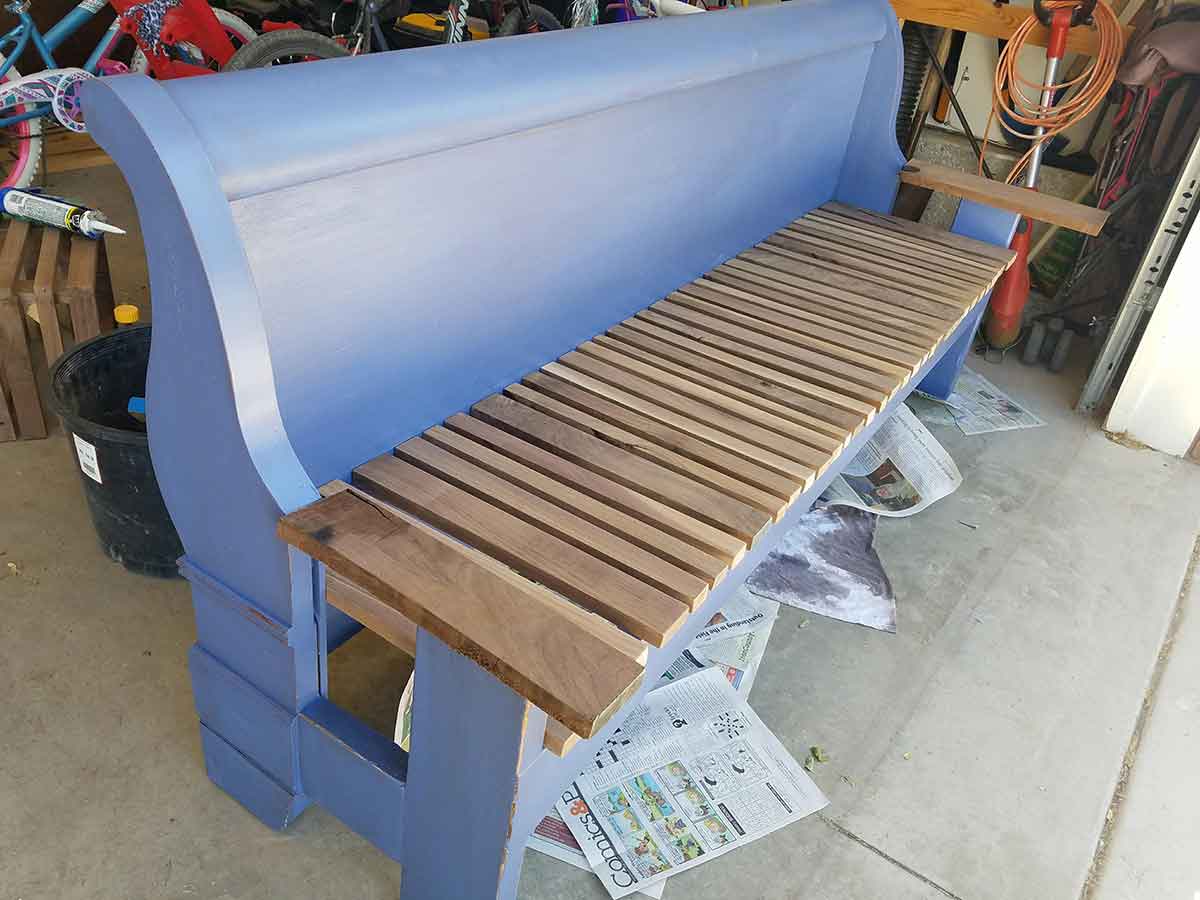
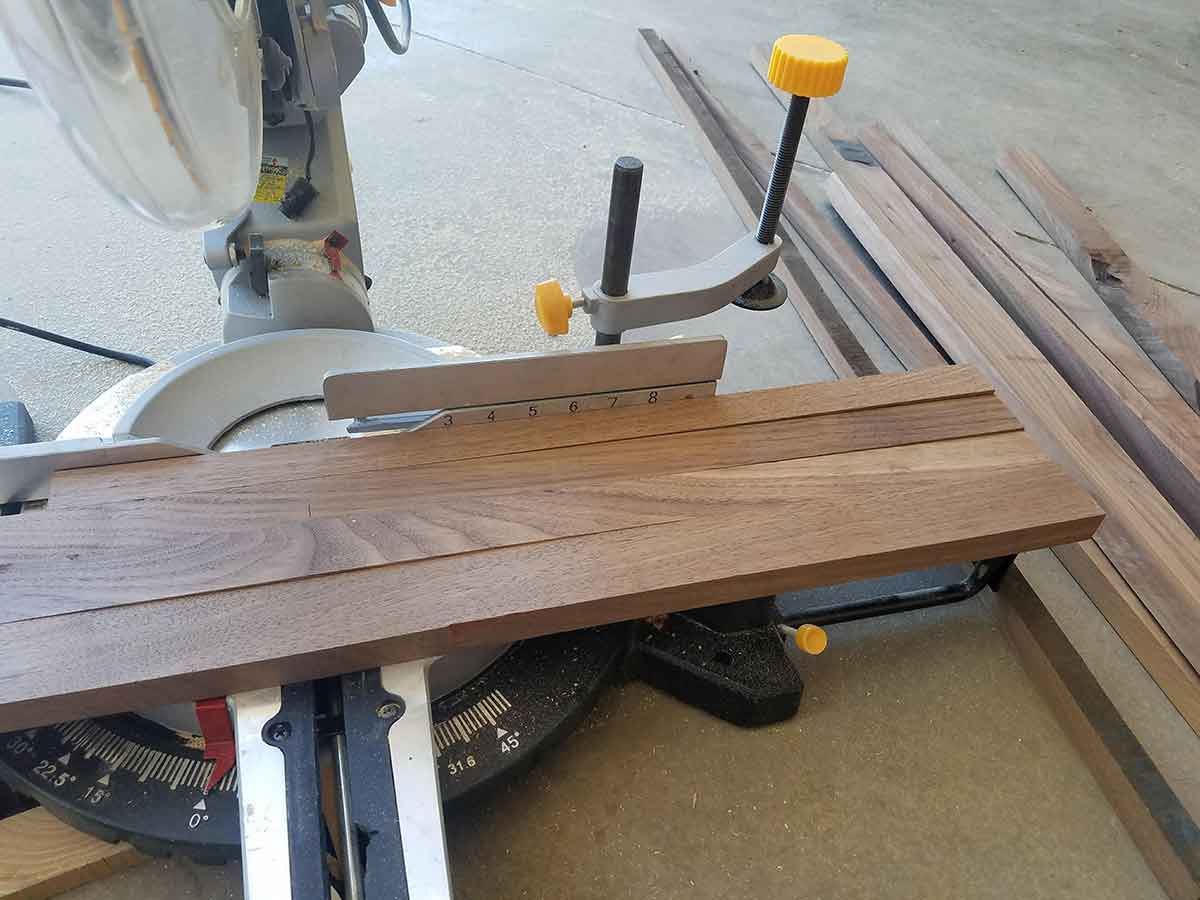
To cut the slats to size I used my miter saw, cutting four pieces at a time. I then sanded each piece lightly softening the corners and edges.
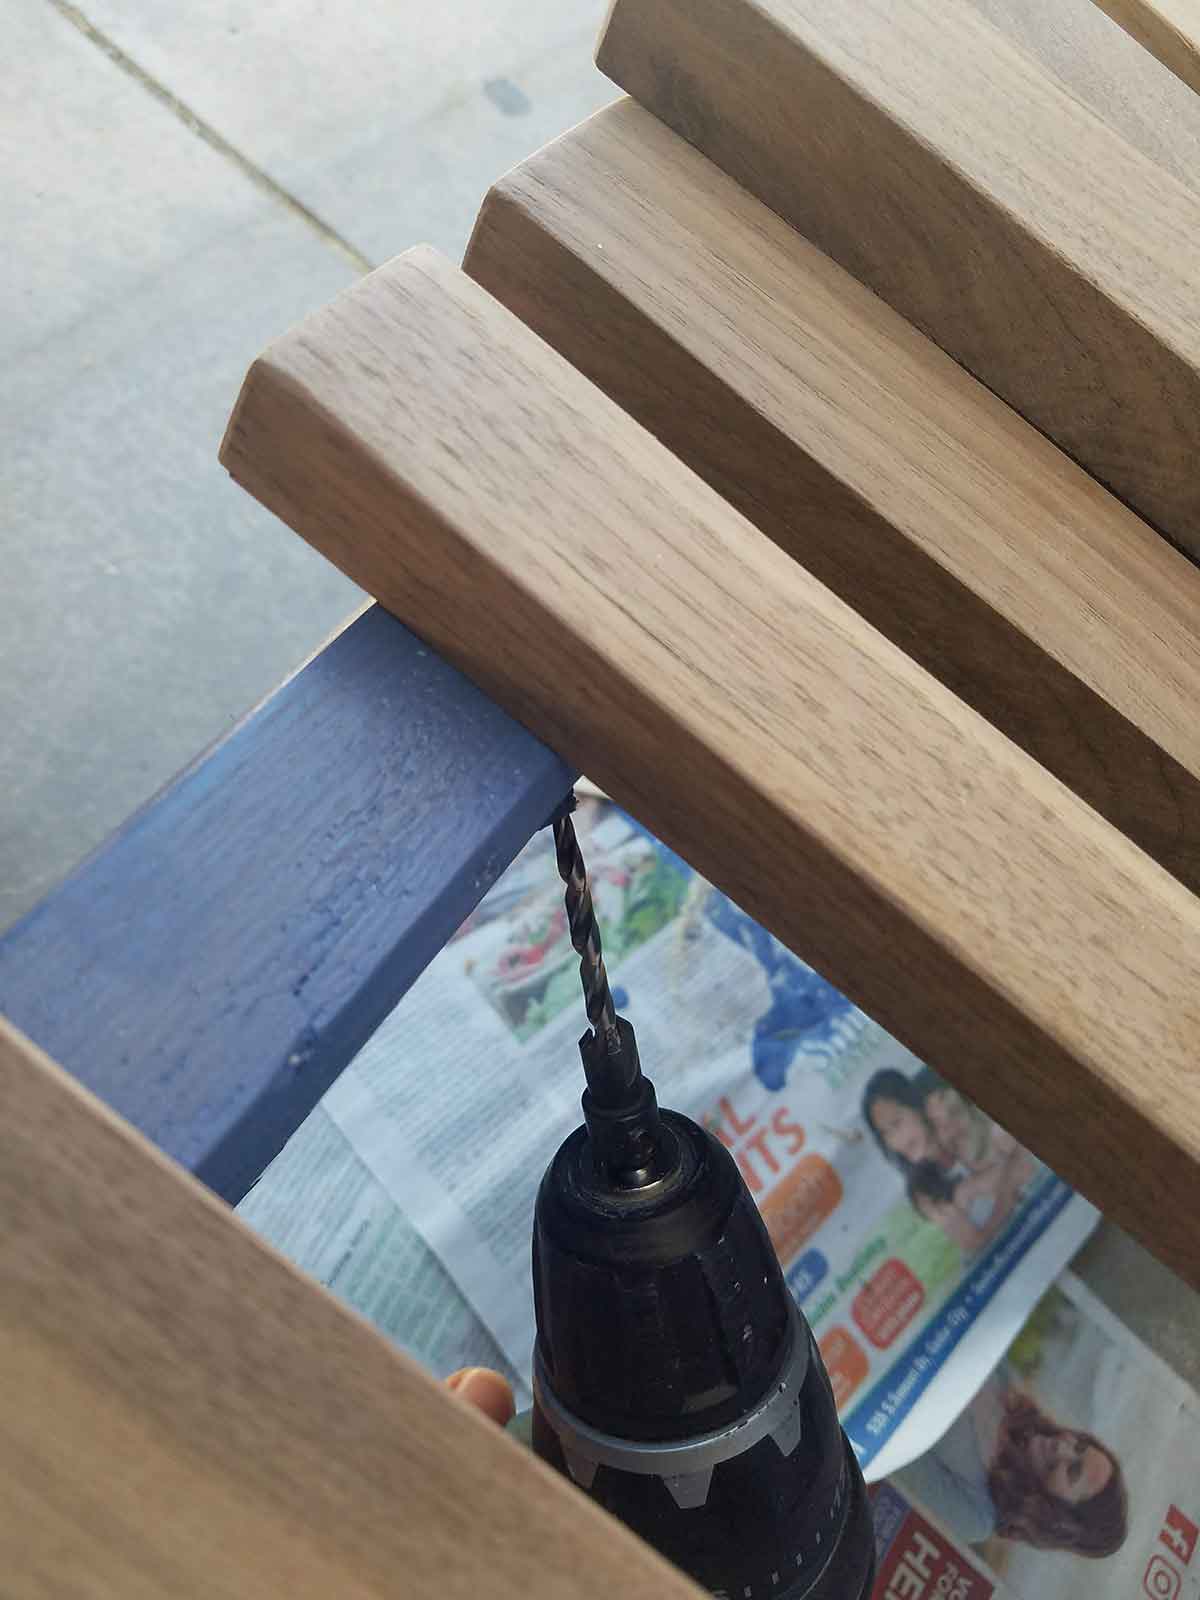
Each slat needed to be secured to the back and front of the bench. I secured the front by pre-drilling each slat like this and then screwing it into place. You will notice I am drilling in at an angle and had to be careful that my screw would go through the slat and the 2×6, but not show. I was successful on all of them, but one. I simply filled the hole in with colored wood putty.
To secure the slat on the back I used a nail gun. Each slat had to be measured so I could know where to nail in the back. I also used a hand weight to hold each slat down so that is was in the exact spot I wanted it to be when I nailed it.
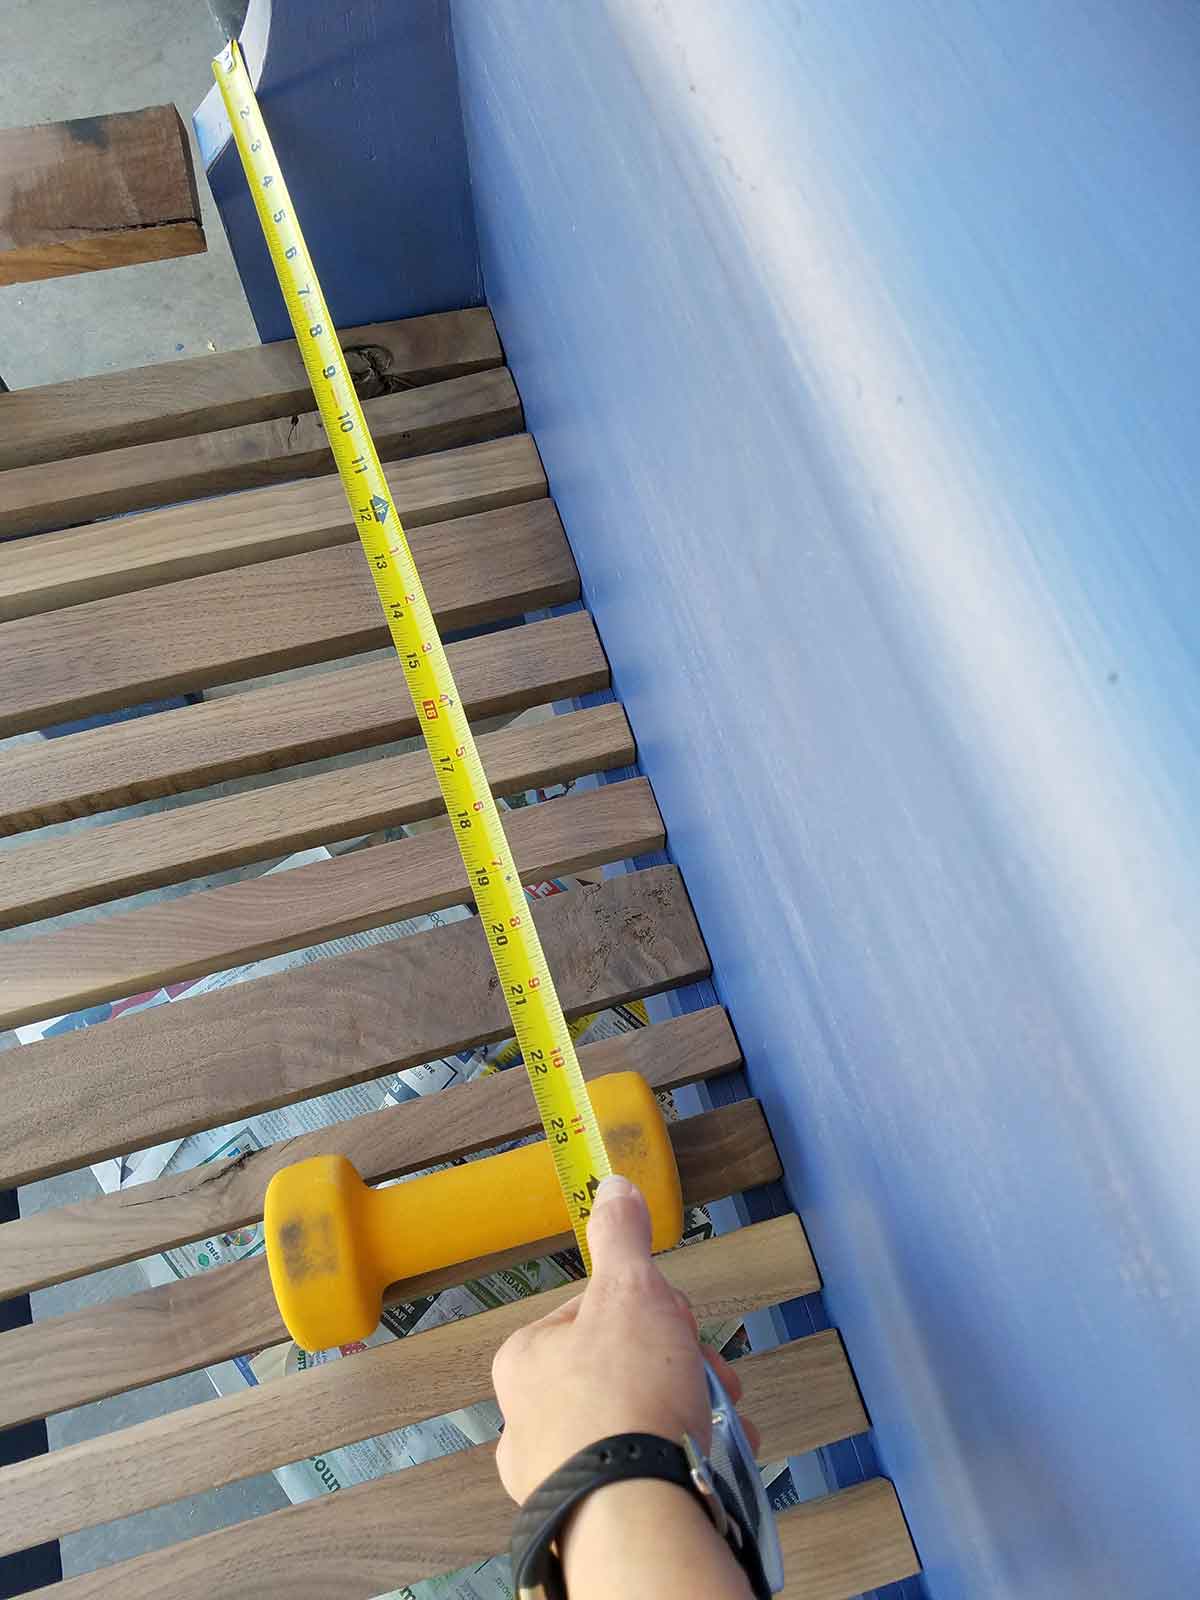
Here you can see where I am measuring to get the placement of the next slat and where the holes are for the other slats. This was my first time using a nail gun and I was a bit intimidated, wear ear plugs and make sure no one is in front of you just be be safe. I did have one nail hit to the side and ended up having to pull it out and try again, but amazingly all the other nails went where I wanted them Yay!
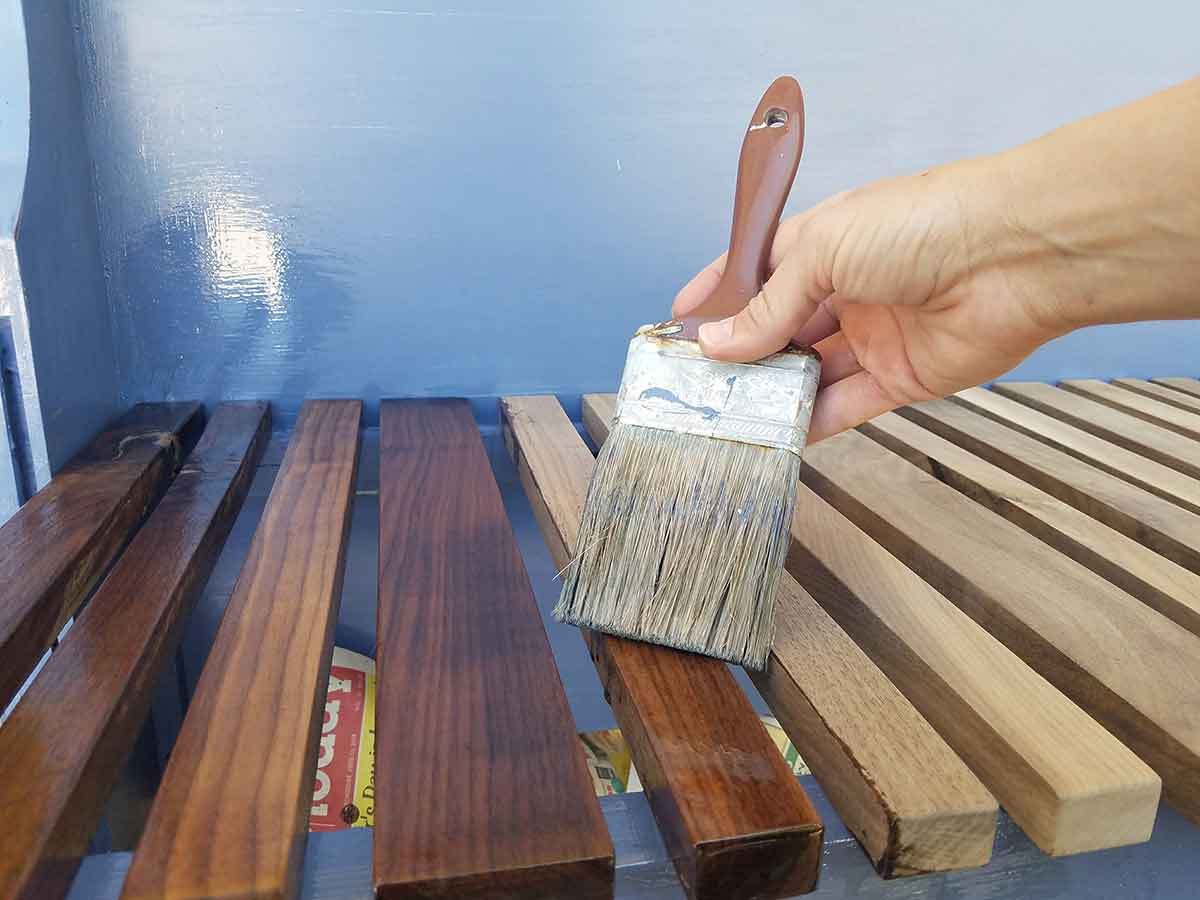
Now it’s varnish time, the pinnacle of refurbishing and building. I love how it brings out the shine and beauty of the wood. No stain here, it’s all natural wood color. I made one mistake here and used my good brush and even though I cleaned it “thoroughly” or so I thought, with paint thinner, it still dried hard with varnish residue. I was reminded again why I love cheap paint brushes so much and finished the rest of the bench with these bad boys. They are so inexpensive you can toss them instead of spending for ever trying to clean them out and it not work anyway. They also work better–at least I think so.
Once you have it varnished you need to let it dry for a few hours, lightly sand it wipe it with a damp cloth and do another layer of varnish. You should varnish at least three times on bare wood that has never been varnished before. When you have all the layers on let it dry for a good 24 hours or so before using it. I used oil based varnish for indoor outdoor use since it would be sitting on our porch.
I loved making this bench


This is incredible! Your are awesome Natalie! I was telling McKay we should really be neighbors then I can watch you so I can learn! Way to go!
You can at least watch my work virtually😁. Let me know if there is something you want to learn about and I’ll do an article.
Beautiful work as usual!